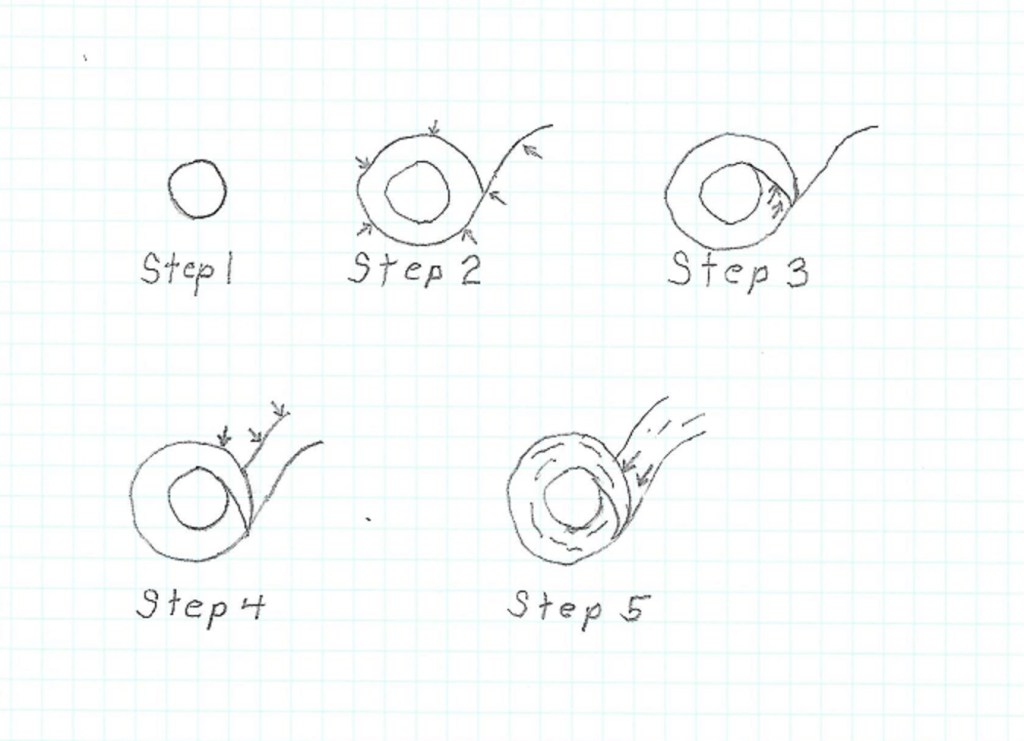
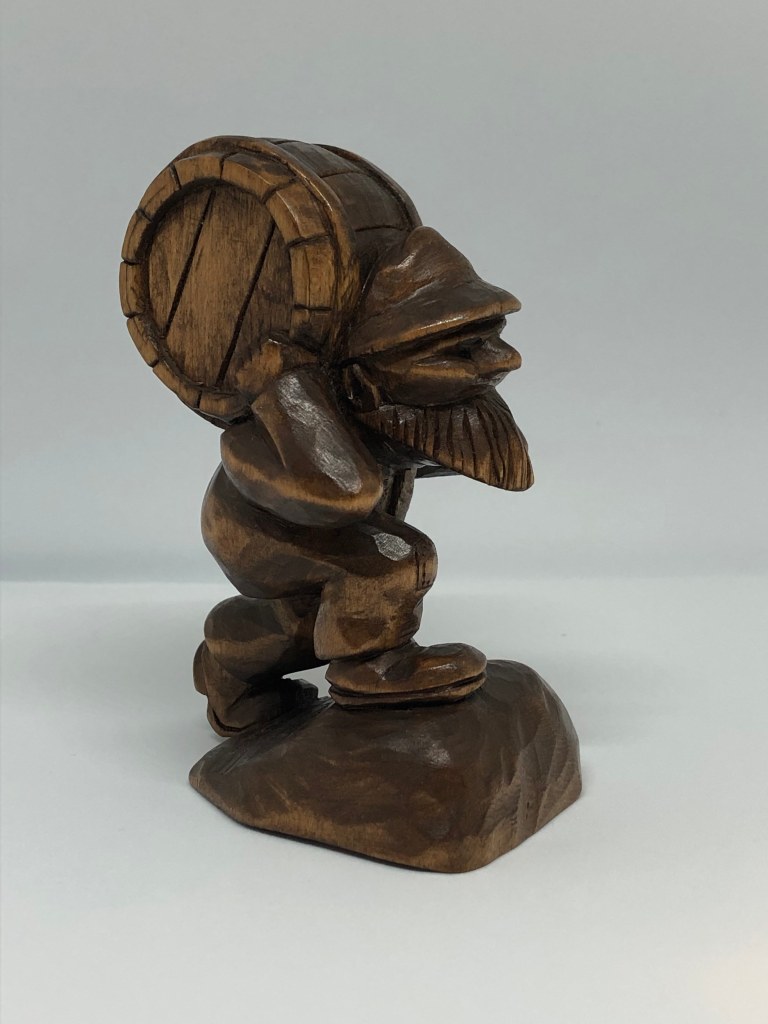
The Comfort Bird
I‘m sure most of you have heard of Comfort Birds and many of you have probably carved a few of them. Comfort Birds are often given to those in need such as the ill, blind, homeless, elderly or people in disaster areas such as hurricane flood zones, as a token of support and an act of kindness. When gently rubbed, the birds can bring comfort to those struggling with both physical and emotional pain. For many, these small birds serve as tangible reminders that someone loves and cares about them.
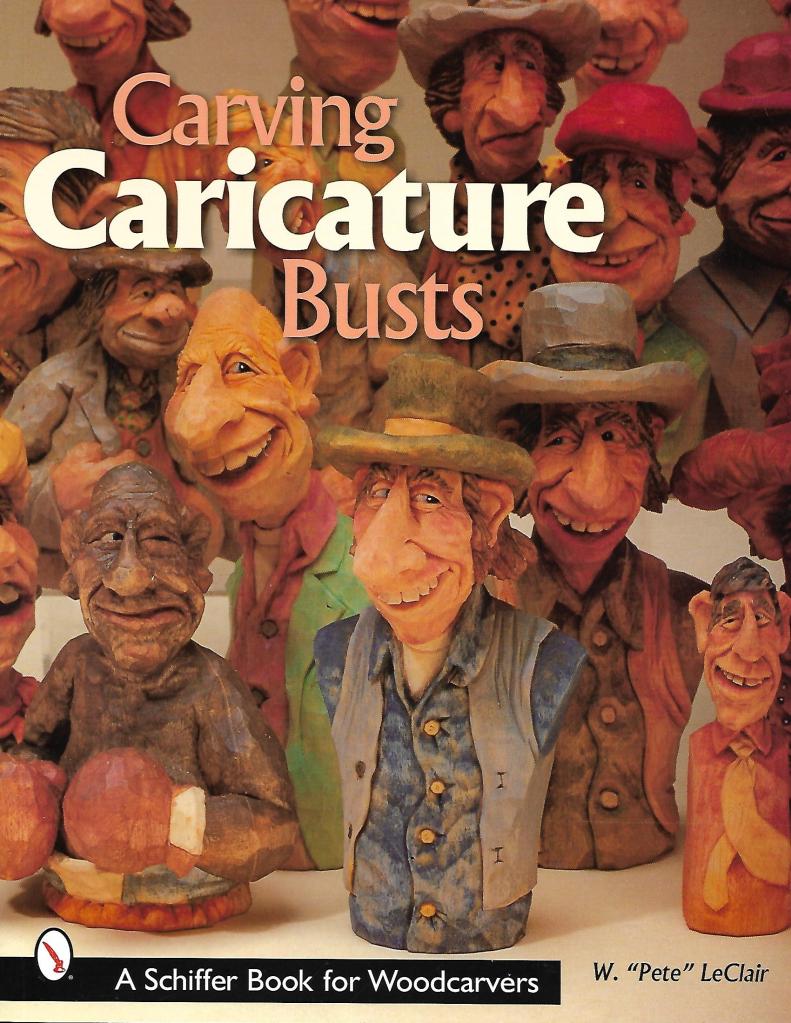
From an article by Frank Foust

Comfort Birds are easy to carve and require only a knife to complete. They can be carved from literally any type of wood you choose. Popular wood choices are black walnut, butternut, poplar, cherry and maple.

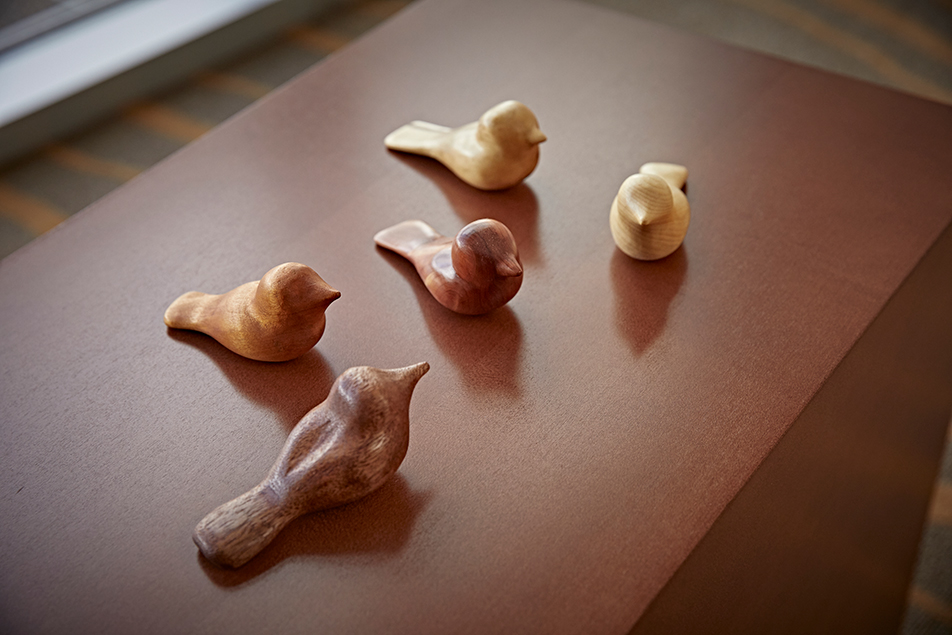
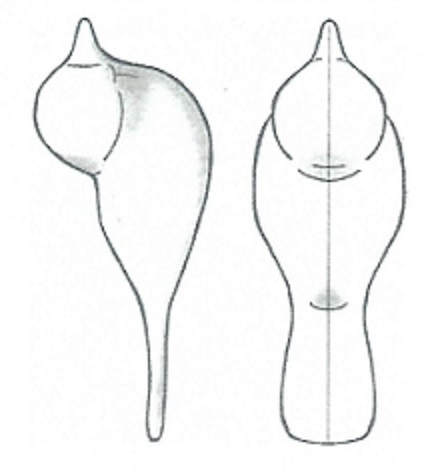
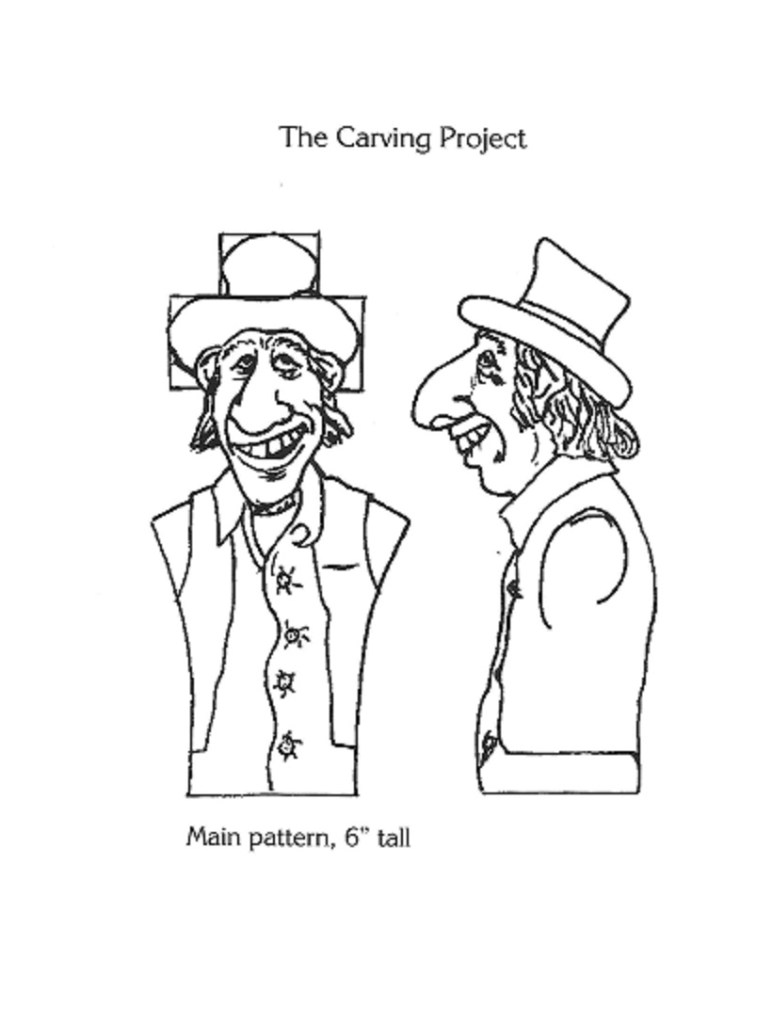
Start by transferring both patterns onto the block of wood and cutting them both out on a band saw or scroll saw. At that point a lot of your work is already done. Round the carving to shape then sand the heck out of it until it’s smooth as you know what. Give your bird two coats of polyurethane, lacquer or varnish (your choice), and you’re done!

If you don’t have a band saw or scroll saw, I have seen that BeaverCraft sells a Comfort Bird Carving Kit, although I was not able to find it on their website. BeaverCraft is a Ukrainian company which I know nothing about so I can’t speak for the quality of their products or services.

Discussion Time
I would like to get some discussions going here on Wood Chip Chatter for the purpose of sharing thoughts, ideas, methods, tips and tricks which our readers use in woodcarving. So to start off the first discussion here are some questions: How do you strop your knife? What kind of strop do you use? What kind of honing compound do you use? How often do you strop your knife? Explain why.
Certainly we can all learn a few new ideas from a discussion like this.
I‘ll start off the discussion with how I strop my knives:
I actually use two different types of strops. One is the John Dunkle pig skin strop, and the other is a Pinewood Forge cow hide leather strop. On the John Dunkle strop I use the John Dunkle ‘Blue Velvet’ (which is actually aluminum oxide) compound which comes in a blue powder form. You just sprinkle some onto the strop and rub it into the leather. The ‘Blue Velvet’ has some hard lumps of powder in it which I just mash down with my finger and rub them in.
I use a powder form of aluminum oxide on my (Pinewood Forge) leather strop. This stop has a very smooth piece of leather on it and the grey aluminum oxide powder (very powdery) easily rubs into the leather.

My observation has been that the Blue Velvet on the Dunkle pig skin strop cuts more aggressively than the powder aluminum oxide on the cow hide leather strop. So I will usually use both…first the Dunkle, then the leather. The aluminum oxide on the leather strop gives a nice polished shine to the blade.
Generally, I strop about every 15 minutes or whenever I feel my knife is getting dull.
I have tried all of the different waxy stick/cake types of compounds but found that they all go on streaky and unevenly. Additionally, the wax in the compound tends to cause my blade to ‘drag’ as I draw it over the strop. The way I see it, all of the waxy stick compounds use aluminum oxide as the cutting agent ( with the exception of the green compound which uses chromium oxide ). So why add all that wax to your strop when all you need is the aluminum oxide anyway.
EMAILS

The following is an email exchange I had with Jakob Santiago from the Canary Islands. The conversation pertains to treating and stabilizing wood before carving.
I thought I had posted Jakob’s earlier comments in a past blog but I can’t find them so I apologize if some of this is a repeat of what you may have already read. His final email has not been posted before and I find it very interesting. The conversation goes as follows:
Jacob: Hello everyone.
I hope you are having some long and profitable wood carving sessions
I’ve been reading and watching some videos on how to bake wood in the home oven to dry and harden it.
They also comment that its physical properties stabilize, its fibers compact and it tends less to deform. moreover, wood insects no longer attack it.
I understand it is not suitable for carving characters, but for spoons and the like, it can be interesting. What do you think about Bob?
Bob: Hi Jakob,
I don’t know too much about baking wood in the oven although I’ve heard of it. The basswood I use here is already kiln dried and stable so I don’t run into any of the problems you describe. I understand that many spoon carvers carve their spoons from live (wet) wood so I can see where the baking process might come into play there. I’m sure the process works.
If you don’t mind I will post your email (comments & question) in the next blog and we’ll see if we can get some input from some of our readers on the subject.
Best regards,
Bob
Jakob: Thank you very much, Master Bob.
Please, feel free to use all the stuff I send you. It is truly a pleasure and an honor for me to have your advice and expertise.
And so, you’re right. I’ve been watching again the videos and they talks about wet wood (my english is not as good as it should be, so I lost parts of the speeching)
As a curiosity, here where I live (Canary Islands) the traditional method of curing wood was to immerse it in the sea for a few months and then dry it under the sun on the beach also for a long time.
Best wishes for you and your family
Jk
Bob: That’s a very interesting way of treating wood and it sounds like a very long process. About how many months is it immersed in the sea and how long is it left out to dry on the beach? Are they logs that are immersed or pieces of cut wood, and what type of wood is it?
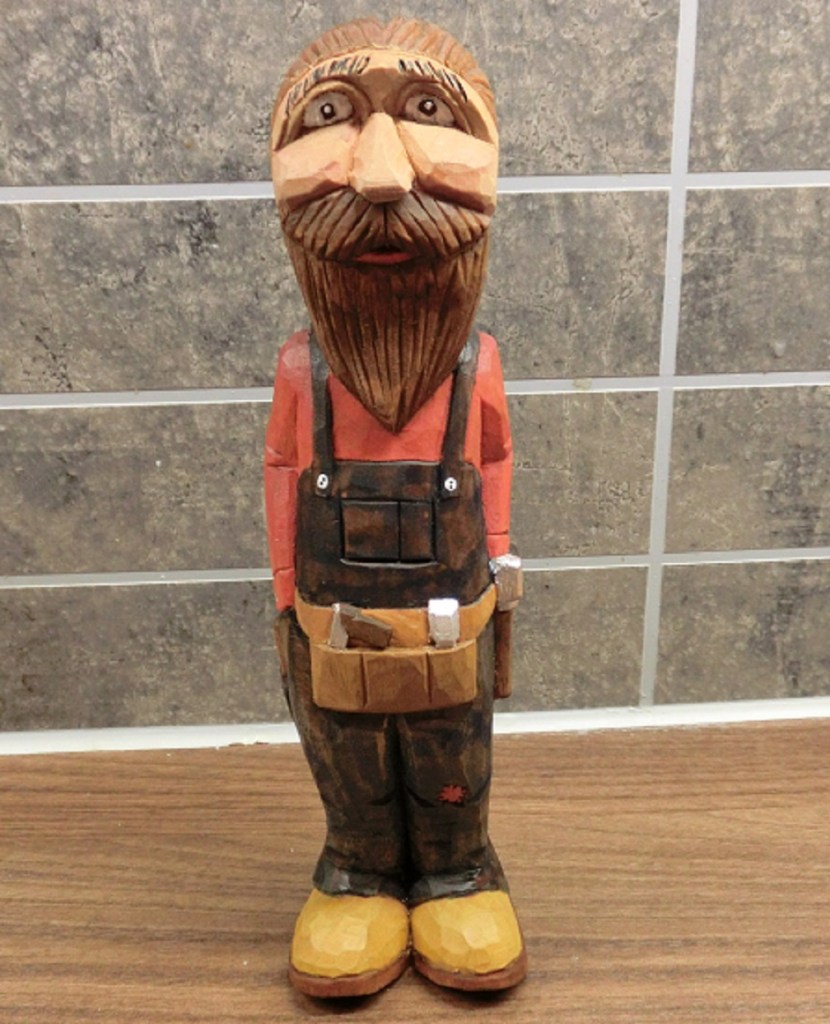
We received one email this time from Roar Martinsen responding to my question about the photos he sent in of his carpenter. I had asked Roar how tall his carpenter carving was. Roar wrote:
“Hi Bob. Picture of my carpenter is 4.inch tal. Painted with acrylic paint.”
Thank you, Roar for clarifying that.
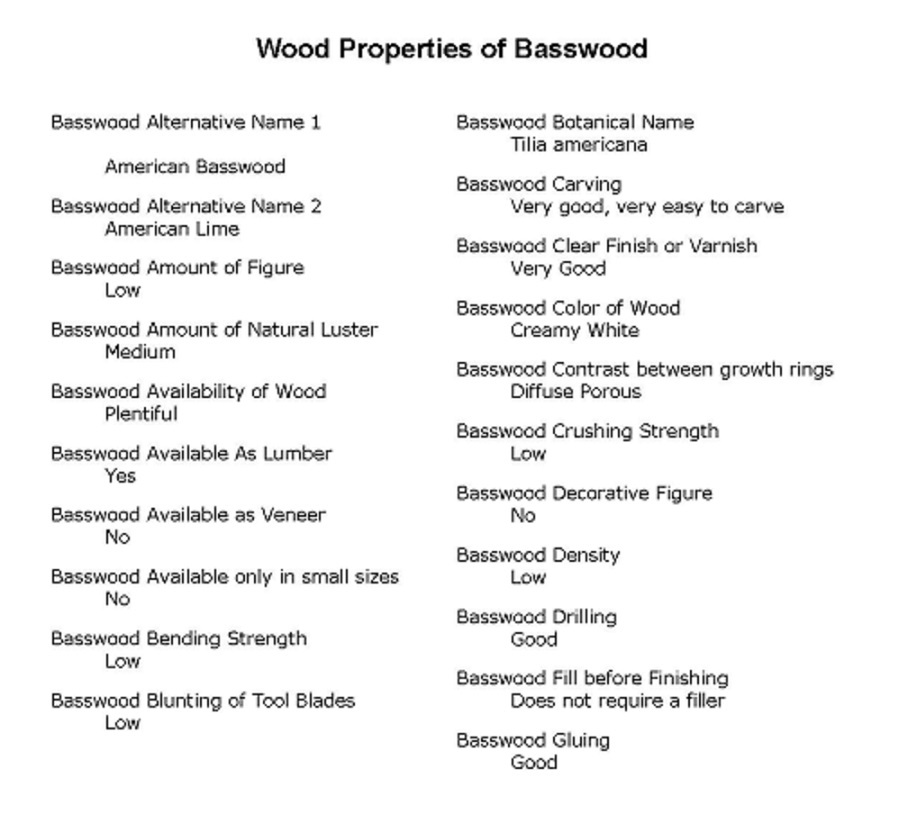
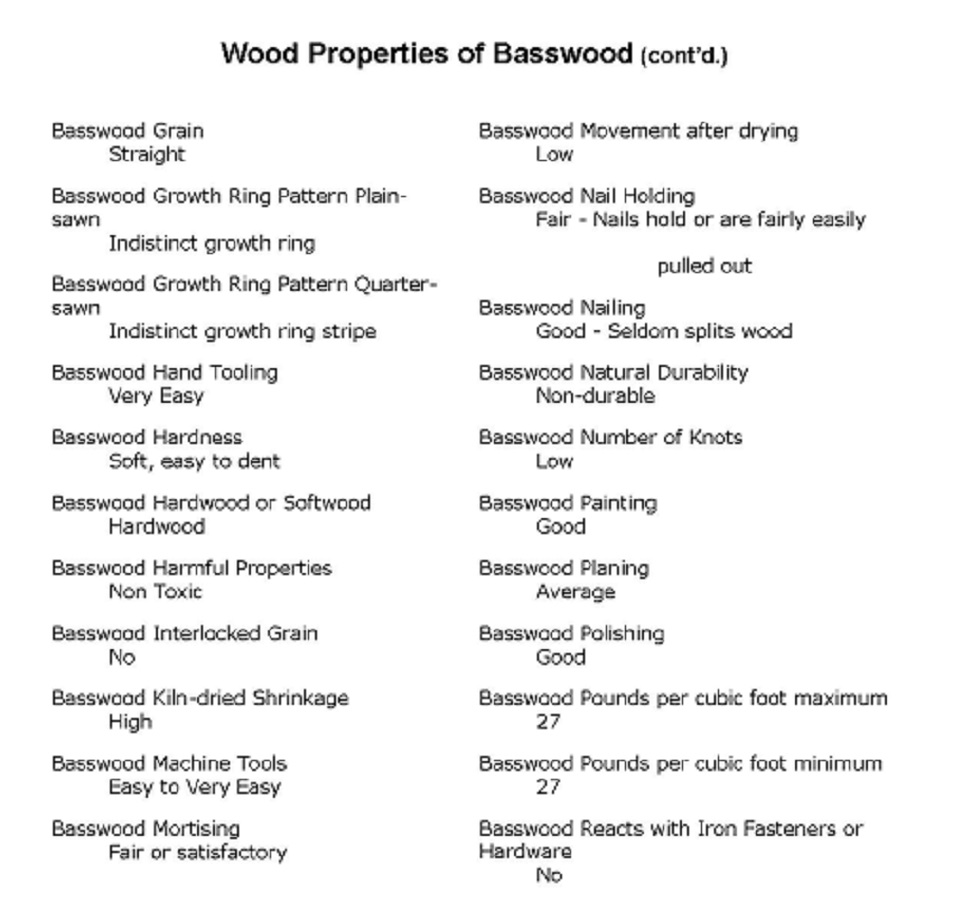
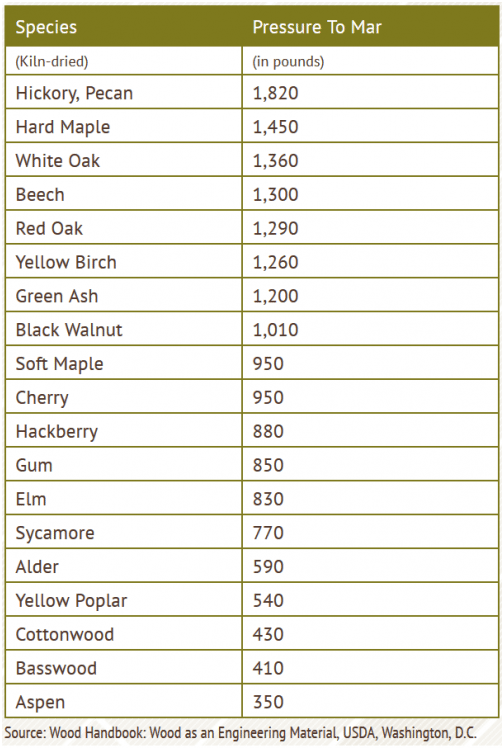
We’re rather short on emails this time as we have no questions or comments from anyone. I need your input. What do you think about the book reviews? Do you want to see more of them? What about the Wood Properties of Basswood list in my last blog? Do you want to see more lists like that for other species of wood such as butternut, walnut, cottonwood, mahogany, etc.? Send me the name of a species you are interested in. Your feedback helps me keep Wood Chip Chatter informative and fun.
Let the chips fly! Tell your wood carving friends and spread the word about Wood Chip Chatter, and don’t forget to send in your questions and comments so we can keep Wood Chip Chatter active and keep the conversations going!

And remember, we need your photos! I’m sure you all have some terrific carvings to share and photos of your carvings will help to liven up the blog’s appearance and make it more interesting. Perhaps we can start a carvers photo section! Email your photos to carverbobk@woodchipchatter.com (let me know if you have any trouble attaching your photos).
Keep a sharp edge and keep on carvin’!