Lumber Production
Lumber is the product of the sawmill and ordinarily is not manufactured further than by sawing. It is produced in varying sizes, the usual approximate dimensions being about 3/4″-4″
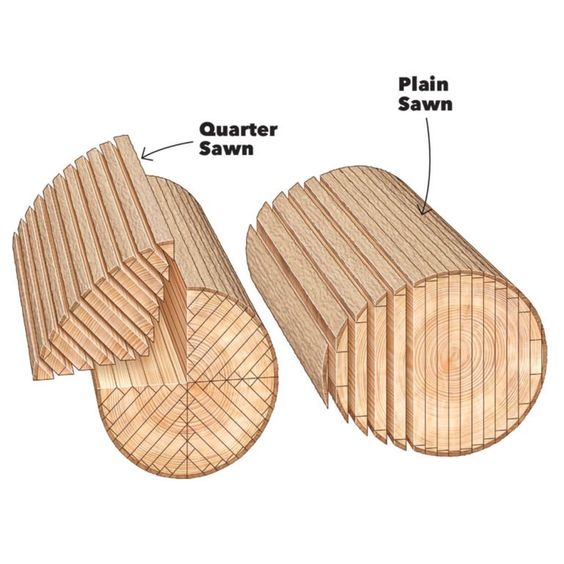
(2–10 cm) in thickness, about 3″ (8 cm) and greater in width, and about 6′-20′ (2–6 meters) in length. The conversion of logs to lumber involves breaking them down into boards of various thicknesses by resawing, ripping (edging), and crosscutting.
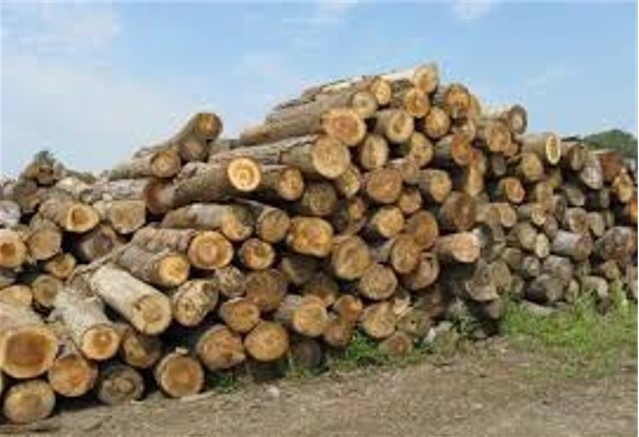
The organization of production varies in its detail in different manufacturing plants but can be described in general terms. After transport from the forest, logs are stored in water, usually a pond or river, or in a ground storage yard. Each log enters the mill on a conveyor; in large operations it is mechanically debarked, and in some it is crosscut to length. Supported on a carriage, it is brought to a headsaw (the first saw), which is one of three types: band saw, frame (gang) saw, or circular saw.
A band saw consists of an endless band of steel, equipped with teeth usually on one edge only, that moves around two wheels—one powered and the other free-running.
Frame saws commonly consist of a reciprocating frame in which a number of saw blades are mounted parallel to each other at predetermined lateral distances.
A circular saw consists of a circular blade having teeth on its periphery and mounted on a shaft.
Band and frame saws have relatively thin blades and are therefore less wasteful than circular saws. Band and circular saws permit changing board thickness and turning the log after each cut; therefore, breakdown is more advantageous in terms of yield and grade. Frame saws require that logs be sorted according to diameter, because the position of the blades (and thus the thickness of the lumber) is determined accordingly. Frame saws are being largely replaced by band saws. Machines for other operations can be sited behind the headsaw in the production flow; they include resaws (band or circular saws), edgers (band or circular saws, or chippers equipped with knives), and trimmers (circular saws for transverse cutting).
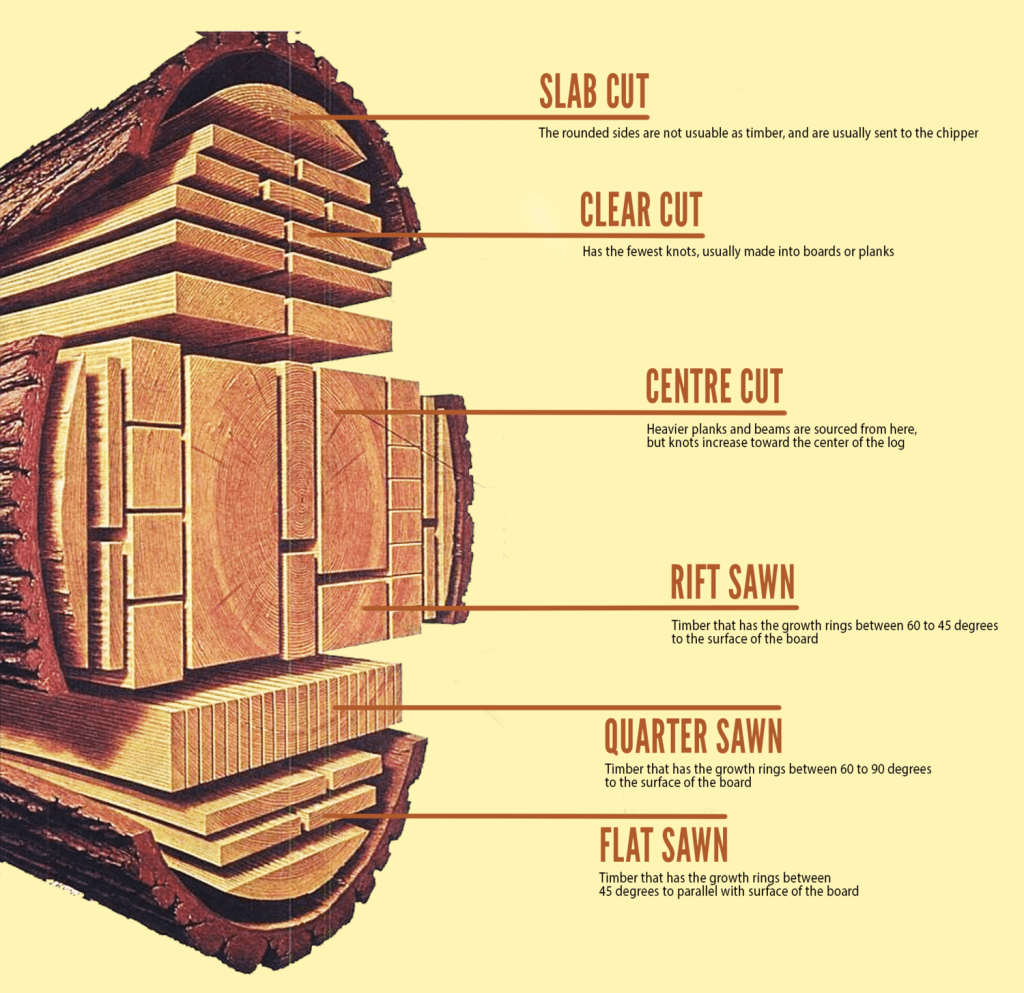
Breakdown is accomplished in one or more operations. For example, a combination of circular and frame saws, or two frame saws in series, may be used. The first saw removes slabs (the outside pieces cut from a log) and, in certain cases, some boards. The piece produced is then turned 90° and introduced into the second saw, which converts it into boards (cant sawing). The second operation may be considered resawing; in general, resawing consists of either dividing thick boards into thinner ones or producing boards from slabs.
Ripping, or edging, is the removal of wane (edge areas with bark or some missing wood) from the sides of boards, frequently done by passing the board through a machine that has two small circular saw blades mounted on a shaft; one blade is stationary and the other can be moved sideways to set board width. Edging can also be done by chipping in a simultaneous sawing and chipping operation, with the chips directed to pulp, fiberboard, or particleboard manufacture. (Some valuable furniture woods are not edged in the sawmill.) Finally, certain boards are crosscut with trimmers to square their ends and remove defects.
Other examples of combinations of machines used for breakdown include two band saws (used as headsaw and resaw), followed by edger and trimmer, or a series of double band saws with chipping edgers. In some sawmills (and other wood-using industries) computers are employed to regulate positioning of logs and other operations.
Questions & Answers

My very good friend, Jim Babcock, from Columbus, Indiana wrote in with a very interesting question regarding walnut oil finishes. Here is what he had to say:
“Bob:
Hope things are all well with you, I have a question on walnut oil and would like
your thoughts.
I was at a carving show in Ohio recently and got into a discussion on finishes with
another carver. He said that he had gotten away from using walnut oil because he
had concerns about someone handling a carving if they had any nut allergies. I guess that I’ve never thought of it. He had switched to mineral oils; your thoughts?
Thanks Bob.
Jim Babcock
Columbus, Indiana”
That’s an excellent and important question, Jim. Here’s how it works:
Raw or unrefined walnut oil can still contain trace walnut proteins – the part that triggers allergic reactions. When it’s wet or freshly applied, those proteins could pose a risk to someone with a walnut allergy if they touch or inhale it.
Once walnut oil fully dries and polymerizes (a process that happens over several days as it hardens, like in an oil finish on wood or art materials), the proteins are typically bound within the hardened film. At that point, it’s much less likely to cause an allergic reaction through casual touch. Once fully cured/dried, it’s generally considered safe to touch, as the allergic proteins are no longer bioavailable.
However, sensitivity varies. For someone with a severe anaphylactic walnut allergy, even trace exposure before the oil is fully cured could be dangerous.
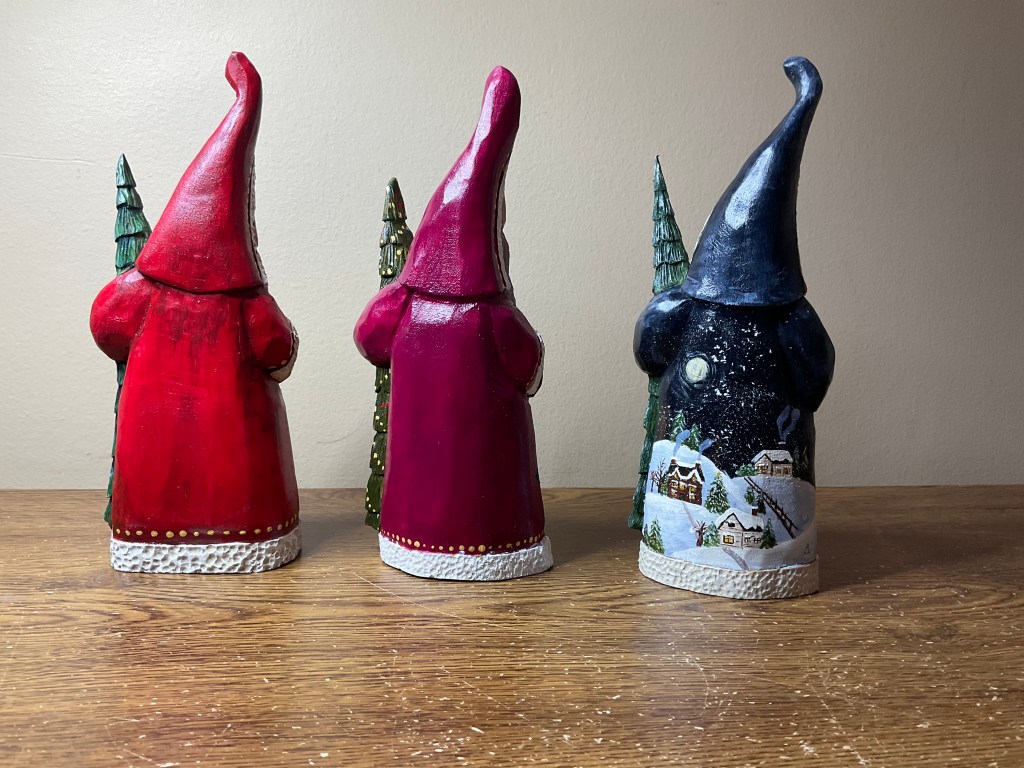
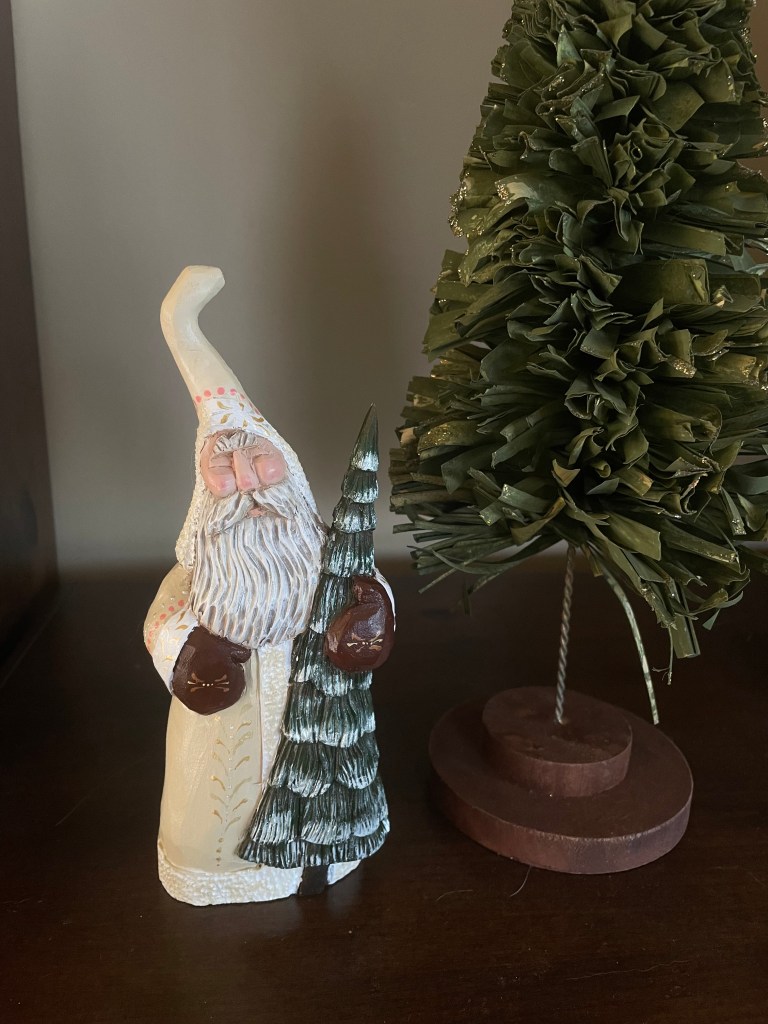
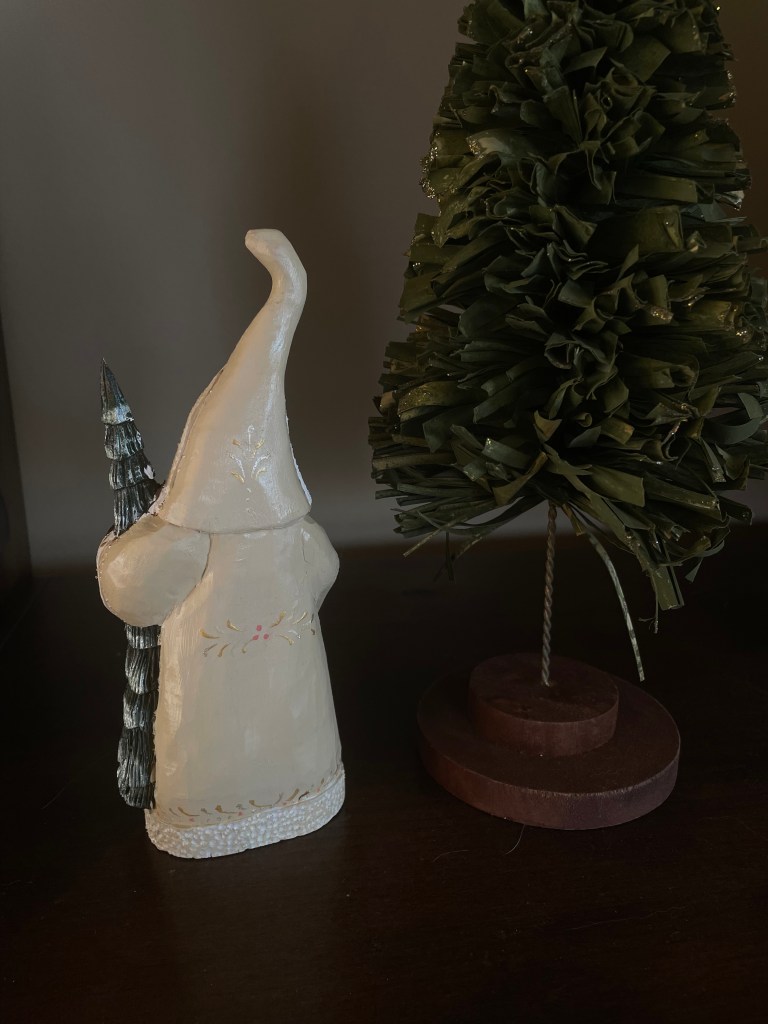
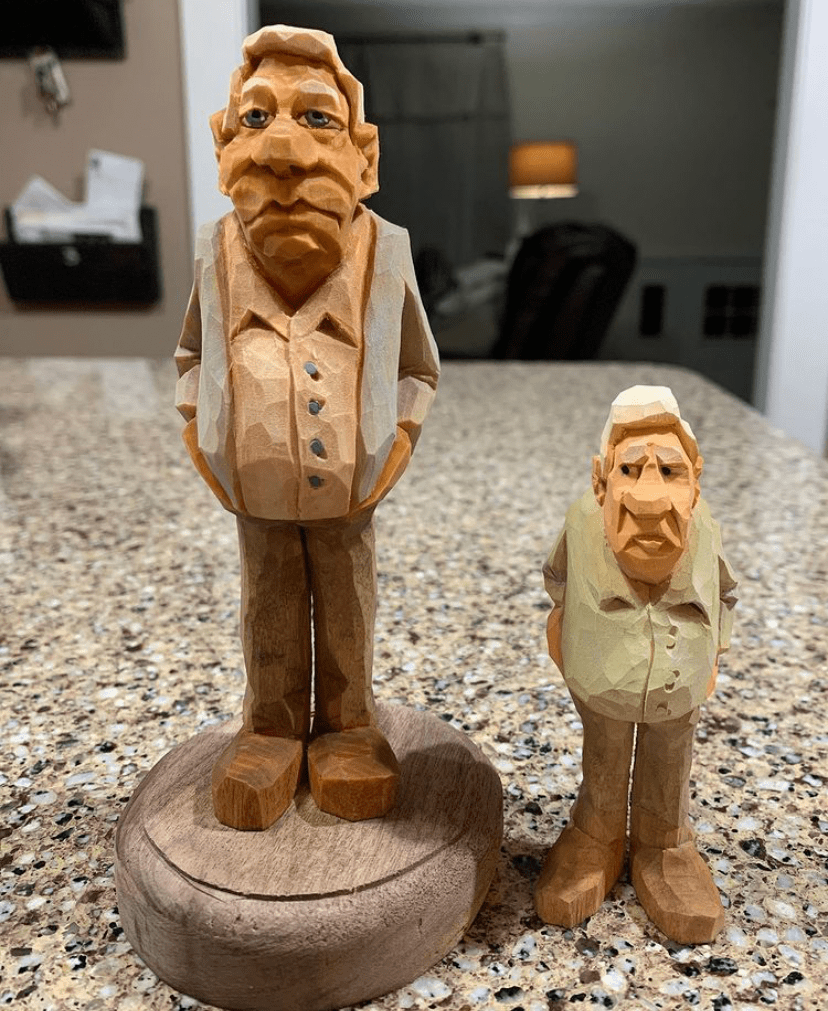
Photo Shop

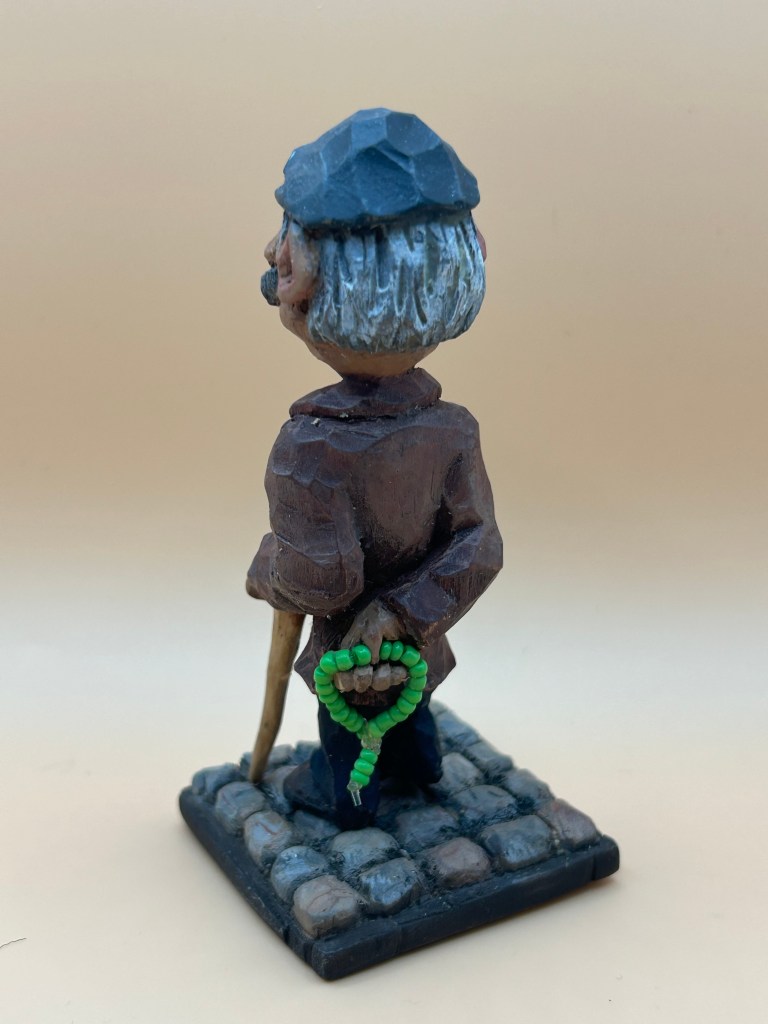
“Photo Shop” is the section of Wood Chip Chatter where carvers can send in photos of their wood carvings for display. It’s your chance to show off your work…sort of a show and tell. The photos will only be displayed and no comments or critiques will be made. For critiques on your carvings send them in to the “Carver’s Corner.” Send your photos to: carverbobk@woodchipchatter.com
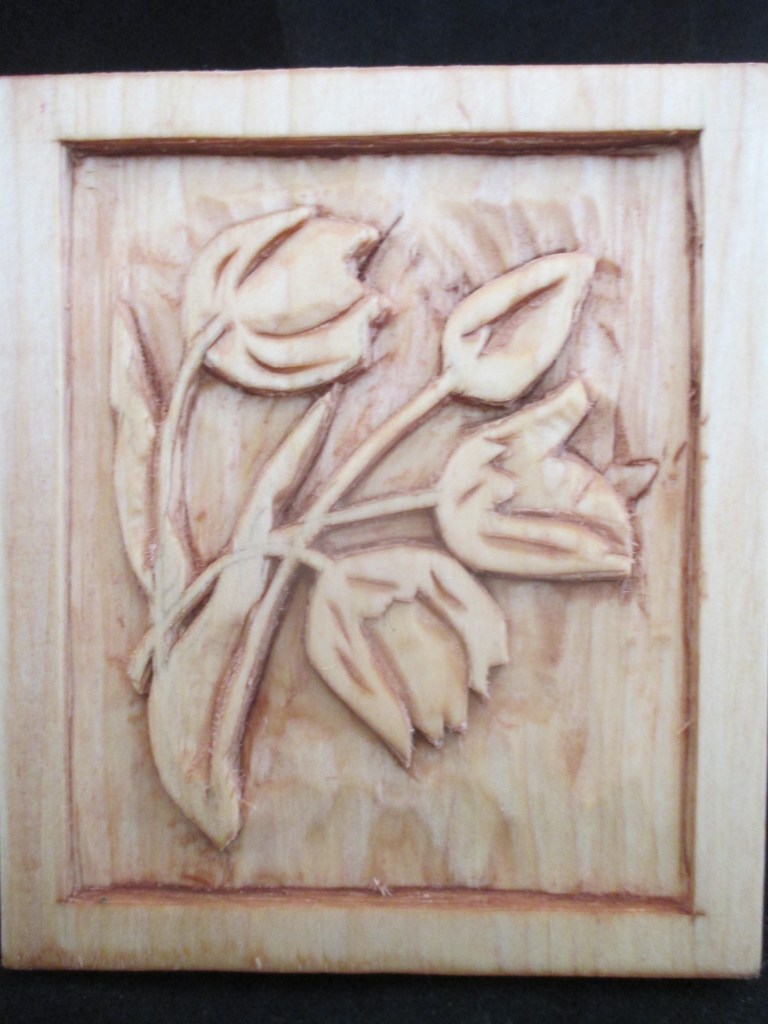
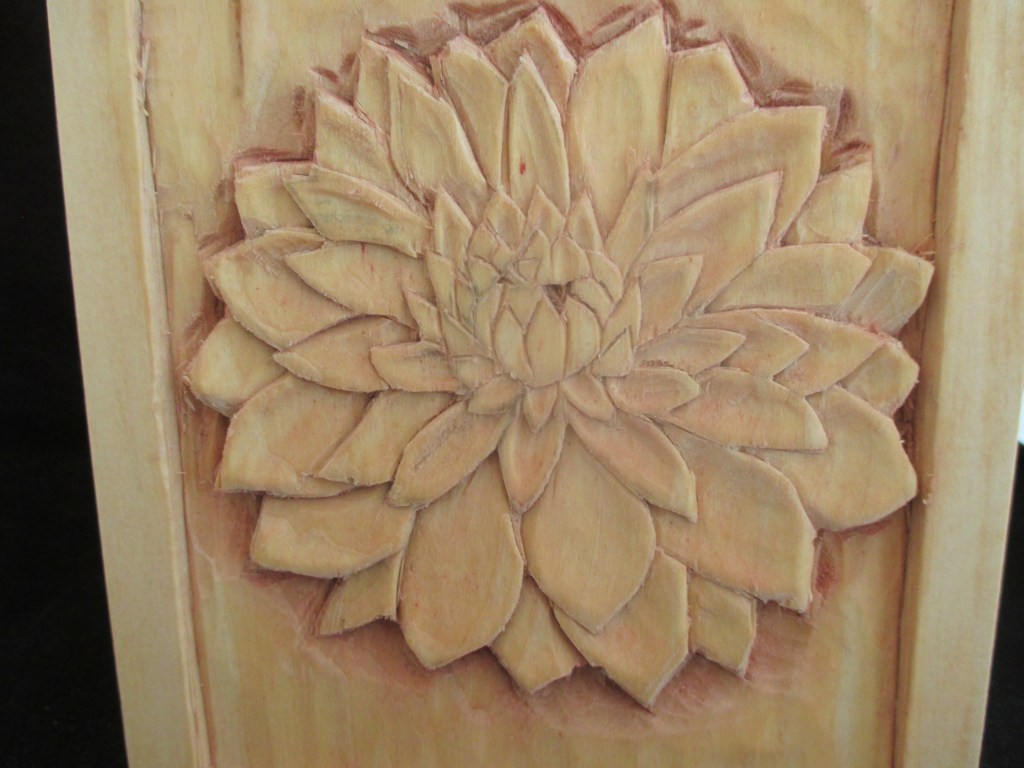
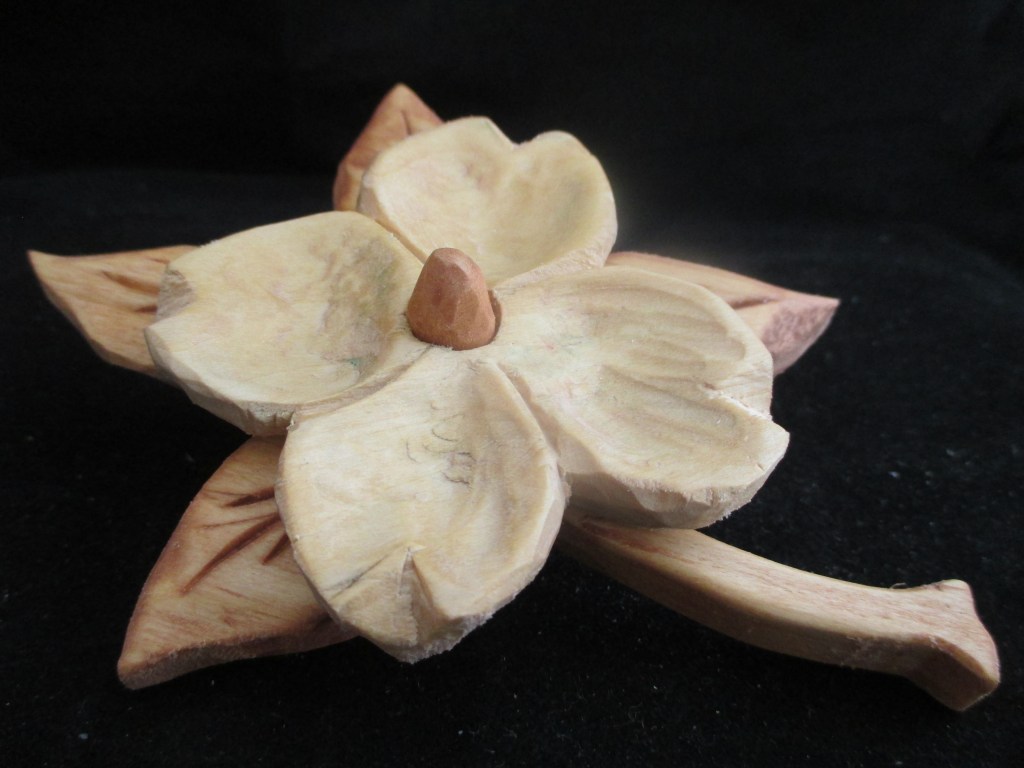
My very good friend, Jim Babcock, from Columbus, Indiana sent in a photo of a relief carved lotus flower he recently finished.
“Bob:
Just received the newest Wood Chip Chatter. Always enjoy the features and carving
tips and suggestions. Halloween seems to be a season for woodcarvers; spooky or
fun.
Here is a recent relief carving of a lotus flower. Northern basswood, finished with
walnut oil.
Jim Babcock
Columbus, Indiana”

Thank you for your kind comments, Jim! I like your lotus flower. Nice depth and detail using deep cuts.
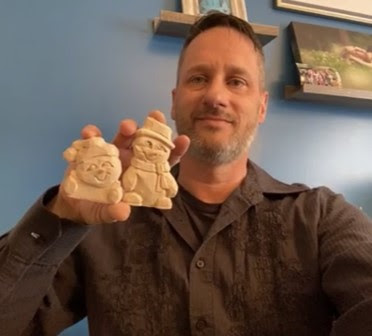
My good friend, Shannon Coker sent in a photo of a hummingbird ornament he carved for his wife:
“A hummer I carved this summer for my wife.”
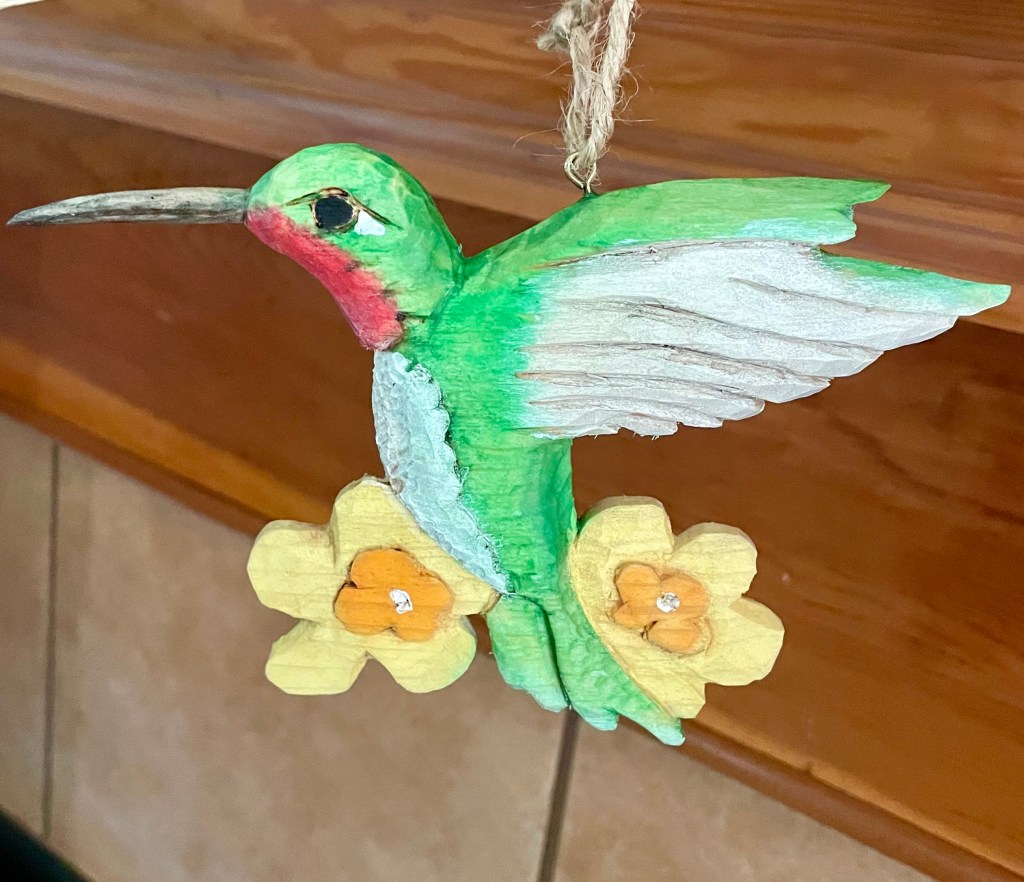
Thank you, as always, for the photo, Shannon! Very nice job! I like how you incorporated flowers into the design.
Woodcarving Tip
How do I create dynamic facial expressions that communicate anger, joy, or surprise?
Use eyebrows, the eyes, and the mouth to convey emotion. For anger, try lowering the eyebrows and pulling them closer together. Tense the mouth (corners pointing down). For joy, try raising the cheeks a bit and curving the mouth up into a wide smile.
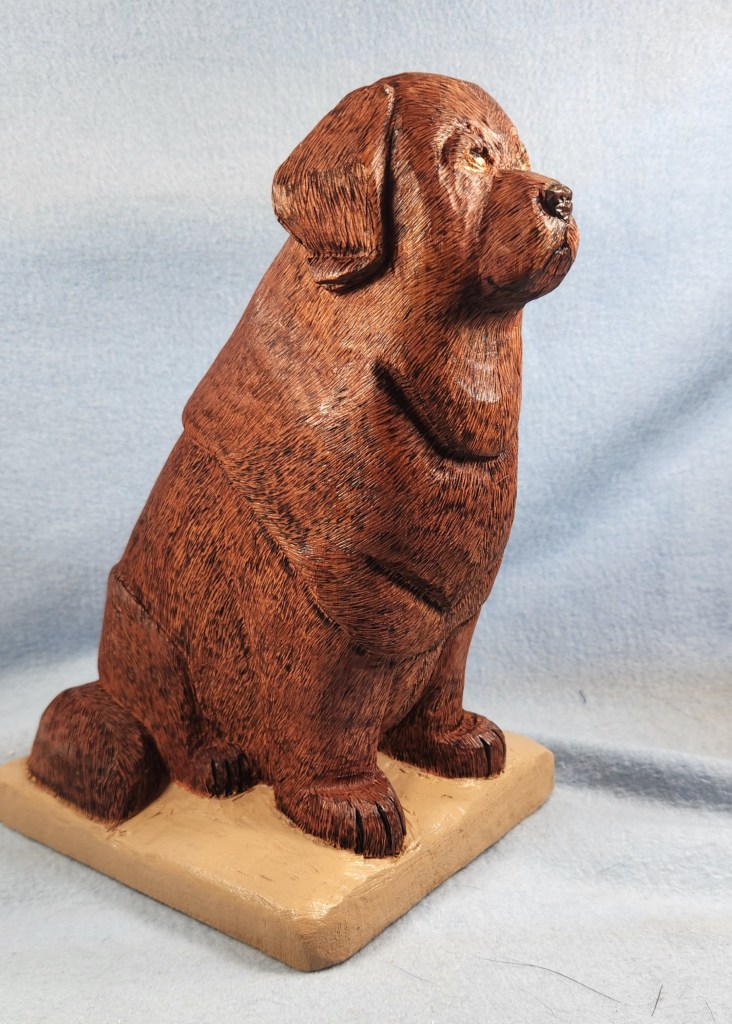
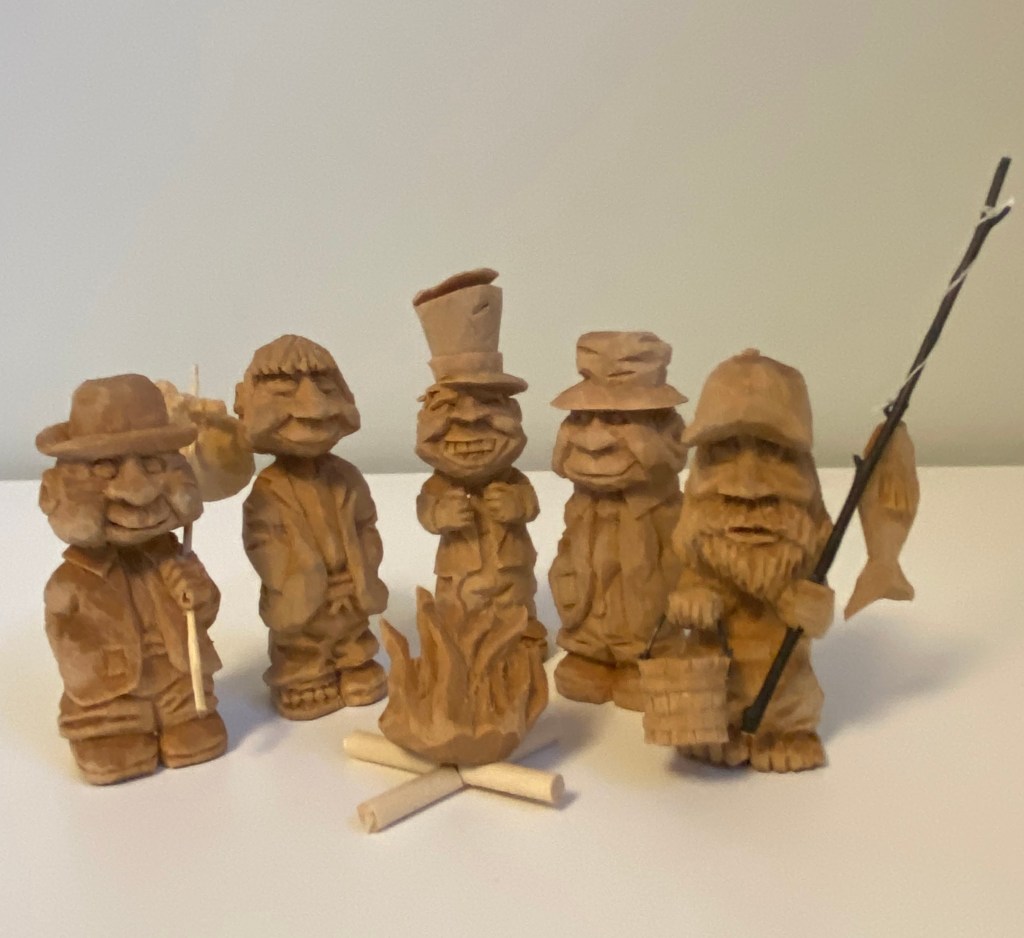
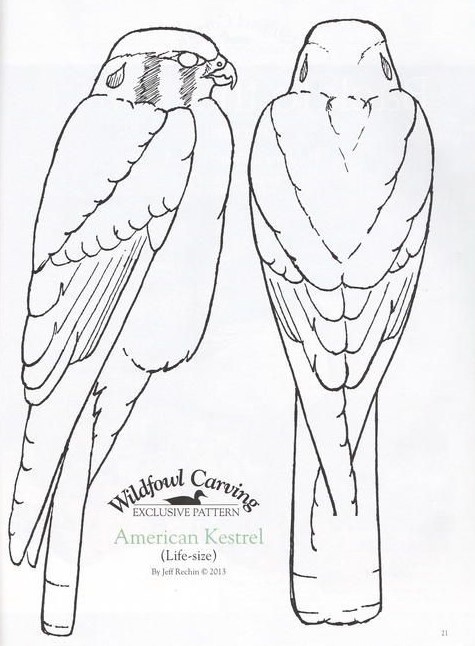
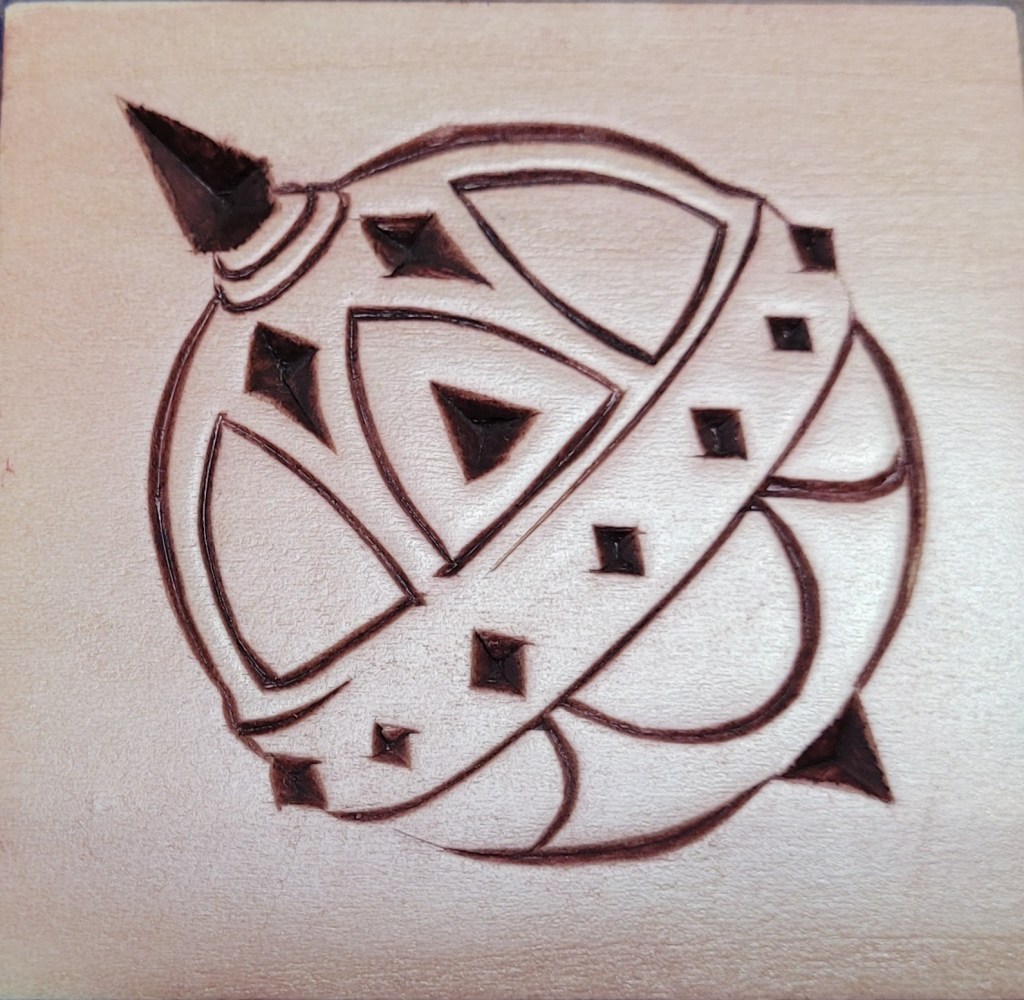
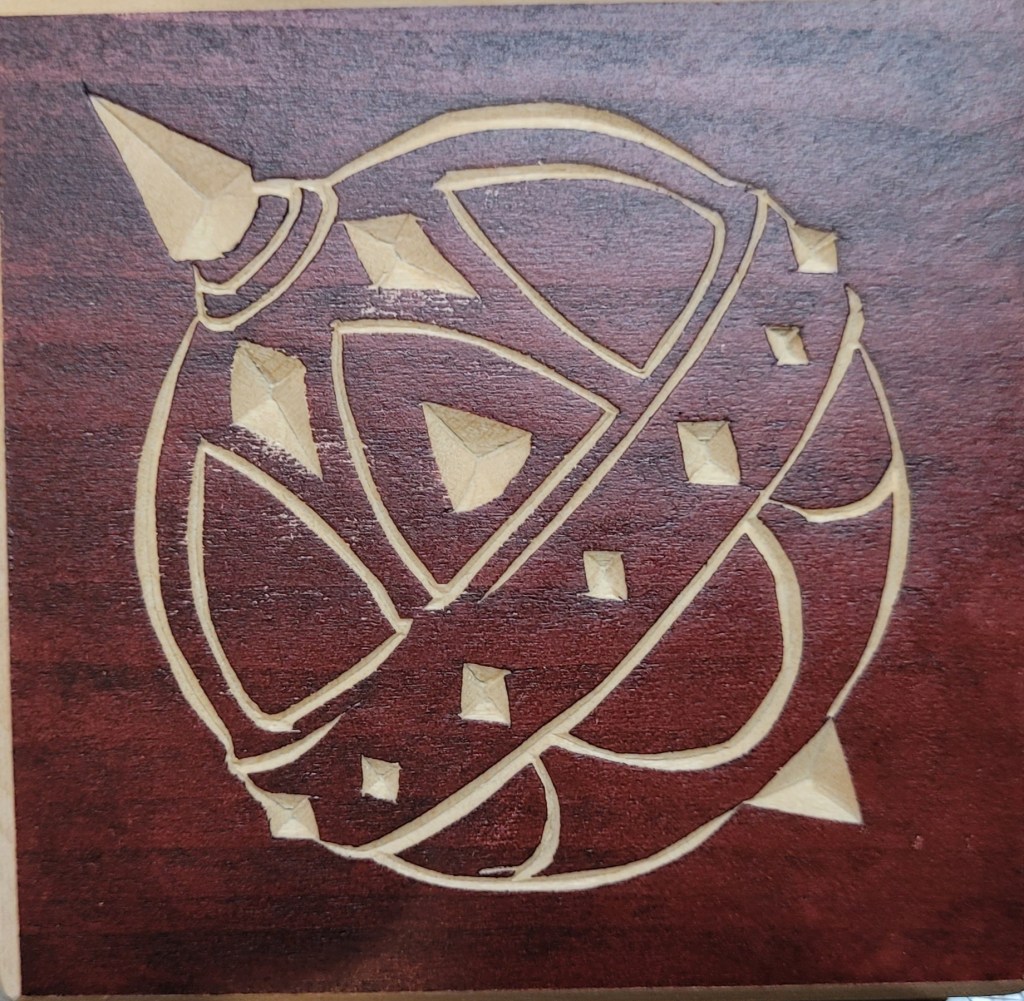
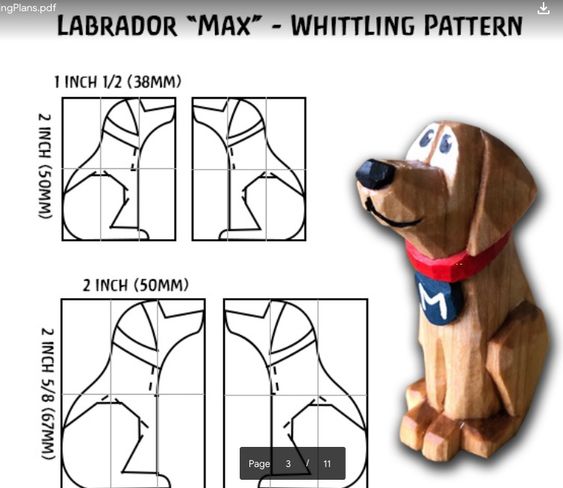
Pattern of the Month
Labrador “Max”
Coming Workshops
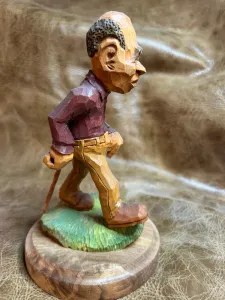
Walker named “Rufus”
Teacher: Dwayne Gosnell
Dec 9,20 – 6PM Eastern
Twiitling Tuesday – 4 hours ( 2 sessions – 2 hours each day)
Location: Online (Via Zoom)
For details and to sign up click on Dwayn’s website https://www.dgosnellwoodcarving.com/
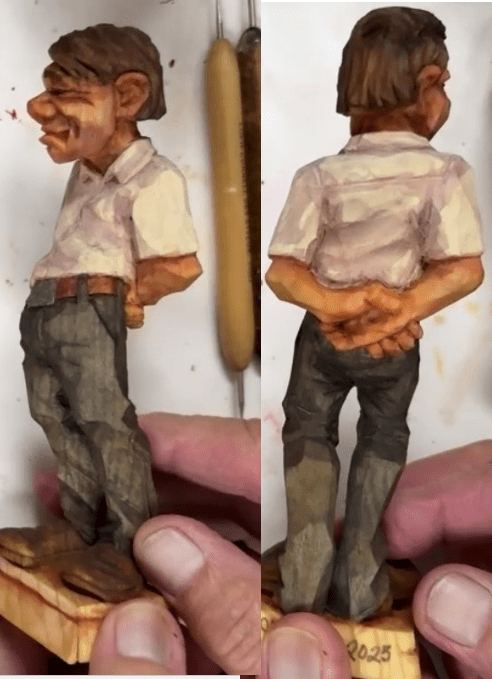
Human Figure with Dynamic Movement
Teacher: Dave Stetson
Dates: December 6,7, 13,14,20
Saturday & Sunday both weekends 9:30 am-11:30 Pacific / 10:30 am – 12:30 pm Mountain /
11:30 am- 1:30 pm Central / 12:30 pm – 2:30 pm Eastern
10 hours ( 5 sessions – 2 hours each day)
Location: Online (Via Zoom)
For Details and to sign up contact Dave via his email address: lcnmichele@aol.com
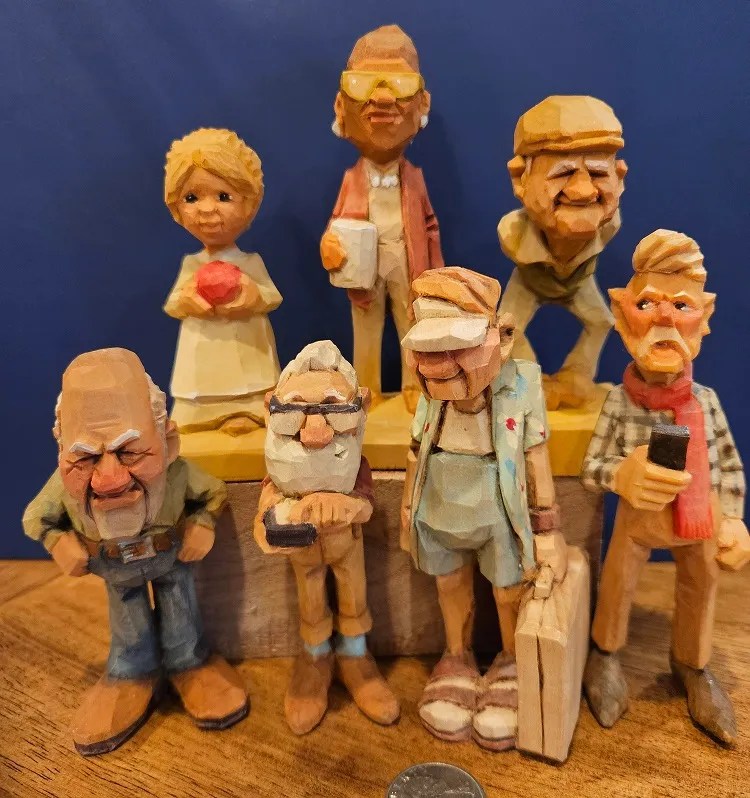
Creativity Through Miniatures
Students will explore design, creation, and painting of miniatures from cutouts. We will explore the value of experimenting with smaller carvings before committing to larger works.
Teacher: Ryan Olsen
Dates: January 3,4,10,11 2026
Saturday & Sunday both weekends 1:30 pm-3:30 pm Pacific / 2:30 pm – 4:30 pm Mountain /
3:30 pm- 5:30 pm Central / 4:30 pm – 6:30 pm Eastern
8 hours
Location: Online (Via Zoom)
For details and to sign up contact Ryan ryanscaricatures@gmail.com

Online Classes With Chris Hammack
Teacher: Chris Hammack
Chris Hammack is offering a new series of online classes to help students learn and sharpen their woodcarving skills. Individual and Group Classes are available through his website, chrishammackart.com/groupclass

Twhitling Tuesdays
Teacher: Dwayne Gosnell
Dates: Two – 2 hour classes each month on Tuesdays
Location: Online (Via Zoom)
To sign up, contact Dwayne Gosnell via email at dagwood_76@gmail.com

Woodcarving Academy
Established in 2020, the Woodcarving Academy offers dozens of videos and seminars created by some of the country’s top level instructors. More videos are added regularly as they are created by the instructors.
With a paid subscription to the Woodcarving Academy you can view any videos you like for as many times as you like.
Subscription rates: Monthly = $19.95 Quarterly = $49.95 Annual = $139.95
There is even a Free level which allows you to tour the website and watch the sample videos and content, and receive email updates as new content becomes available.
Check out the Woodcarving Academy and learn with the masters right in the comfort of your own home! Go to: www.woodcarvingacademy.com or Email: support@woodcarvingacademy.com
News & Announcements


The International Association of Woodcarvers has upcoming Zoom meetings on the following Saturdays at 3PM EST with special guest presenters. Check them out…
Zoom: 310-460-3575
Presentation Schedule:
12/13 – Jonathan Creason
1/3 – Deep Holler Knives
1/10 – Windy Cape Studios
1/17 – Jerry Trzebiatowski
1/31 – Kathryn Overcash
INTERNATIONAL ASSOCIATION OF WOODCARVERS
COME JOIN US!!!
The Jersey Hills Wood Carvers (JHWC) club is a small but growing group of wood carvers sharing their time, knowledge and joy of woodcarving. The JHWC generally meets from 7:00 PM EST to 9:00 PM EST on the 1st, 3rd and 5th Thursday of each month (when school is in session) at the Jefferson Township High School wood shop classroom.
Membership is “FREE” and open to anyone interested in woodcarving regardless of their ability.
JHWC’s Upcoming Meetings and Events
2025
December – 18th
2026
January: 15th, 29th
February: 5th, 19th
March: 5th, 19th
April: 16th, 30th
May: 14th, 28th
June: 6th
For more information contact:
Al Santucci alsantucci4@gmail.com President
Bill Brunner billbrunnerdesign@gmail.com newsletter/website editor
Or visit:
Website: https://www.jerseyhillswoodcarver.com/ Facebook: https://www.facebook.com/groups/736479646821641/
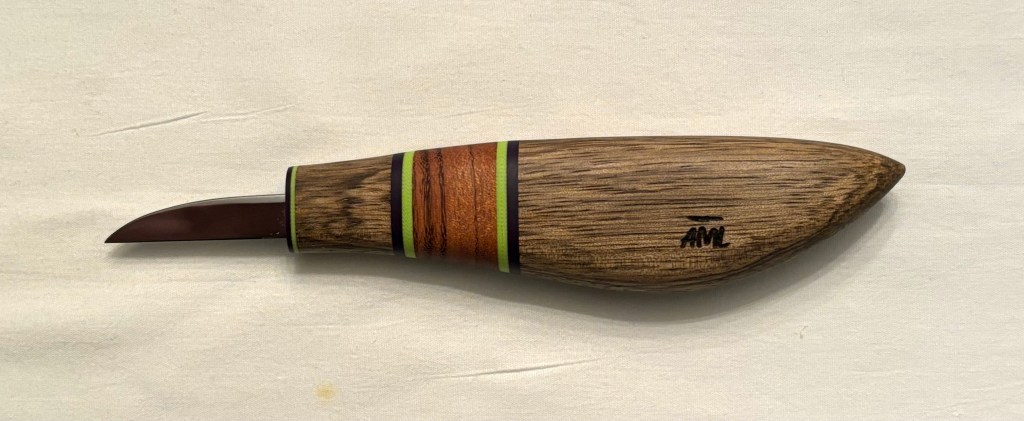
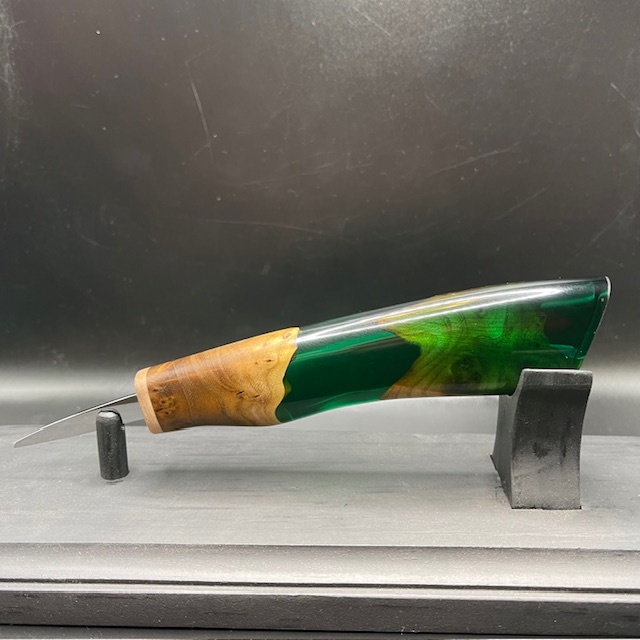
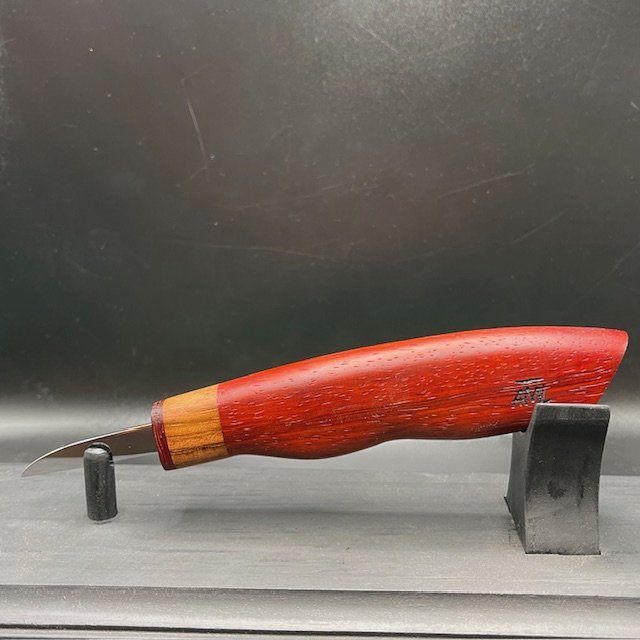
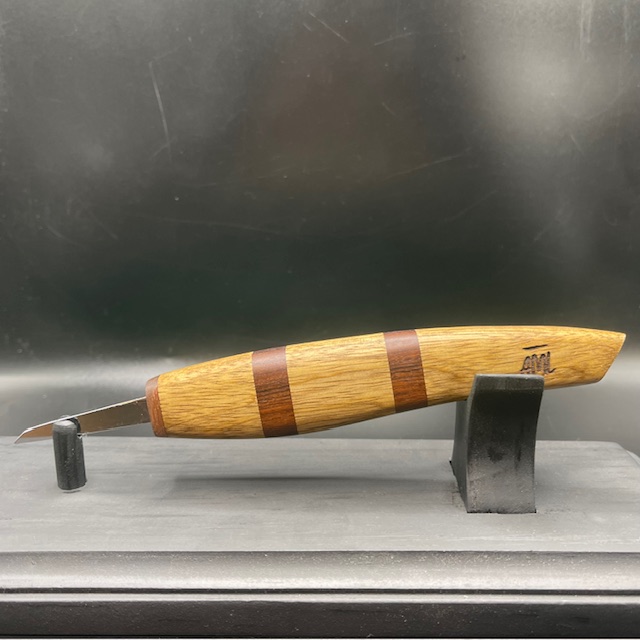
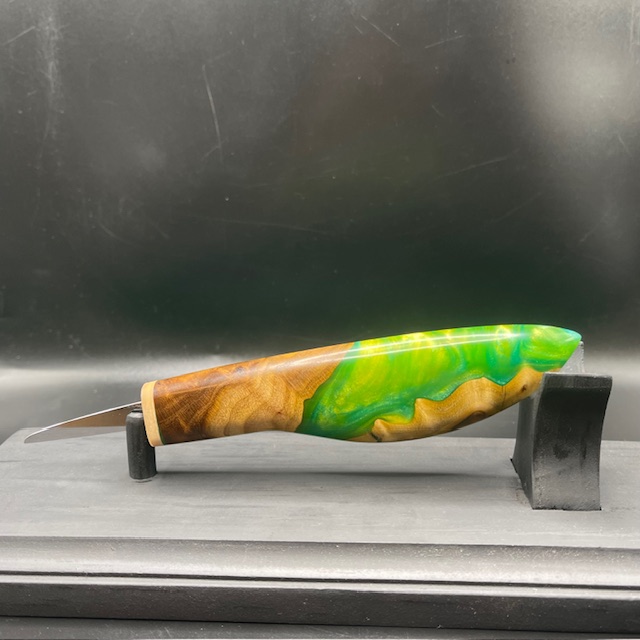
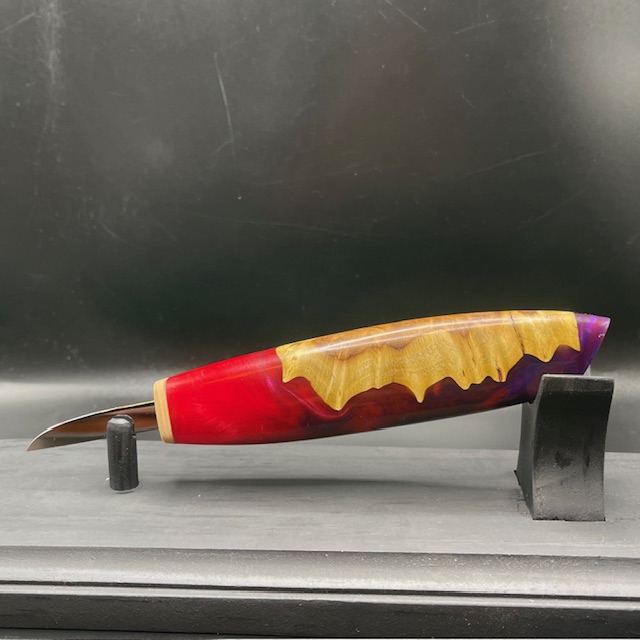
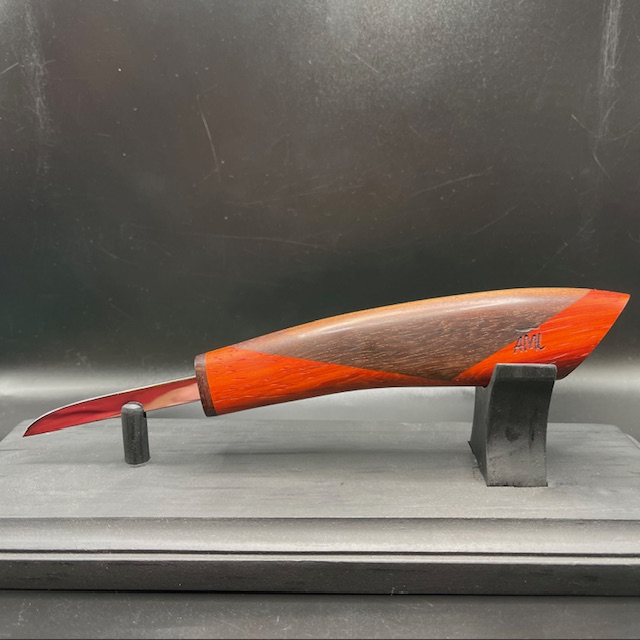
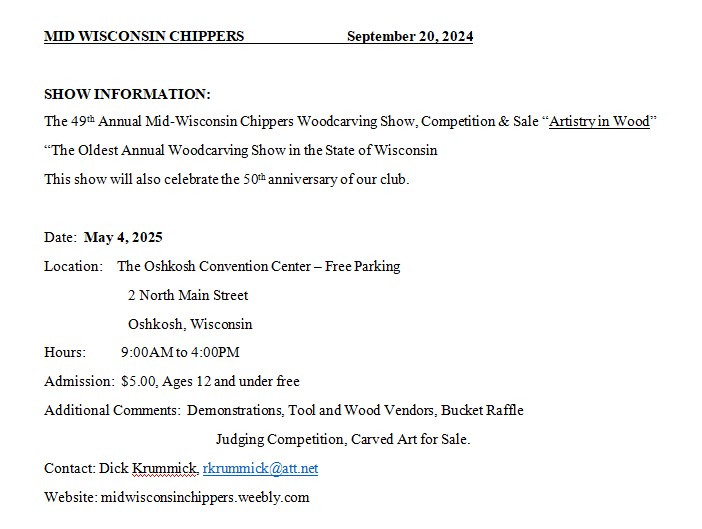
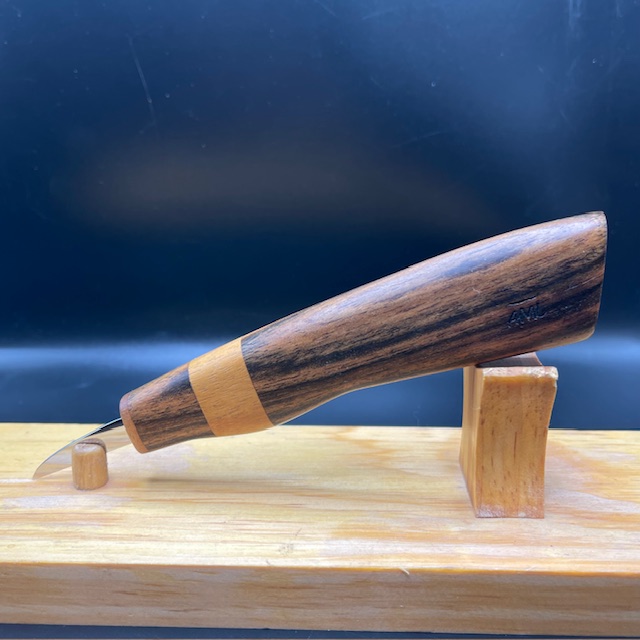
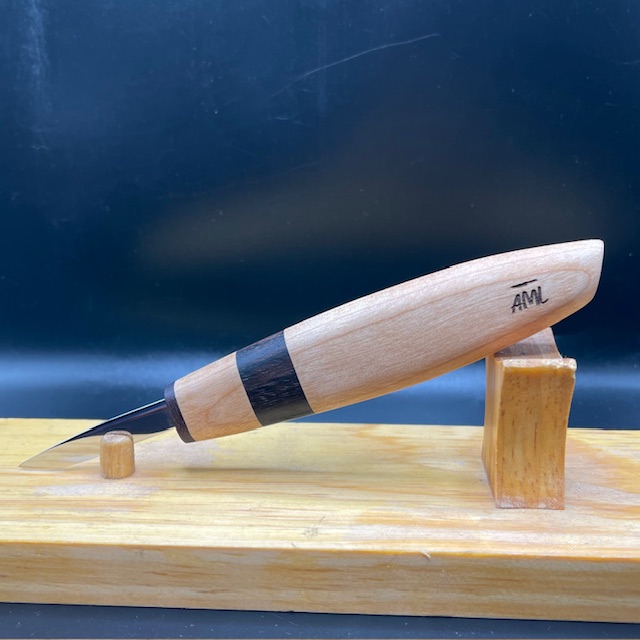
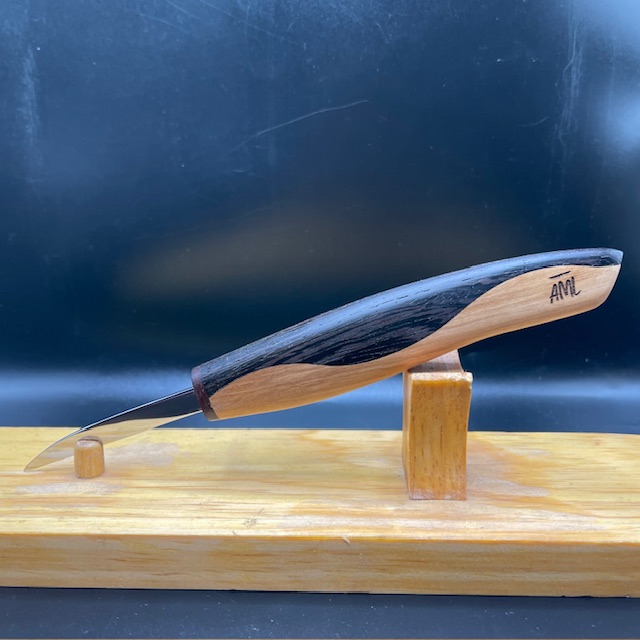
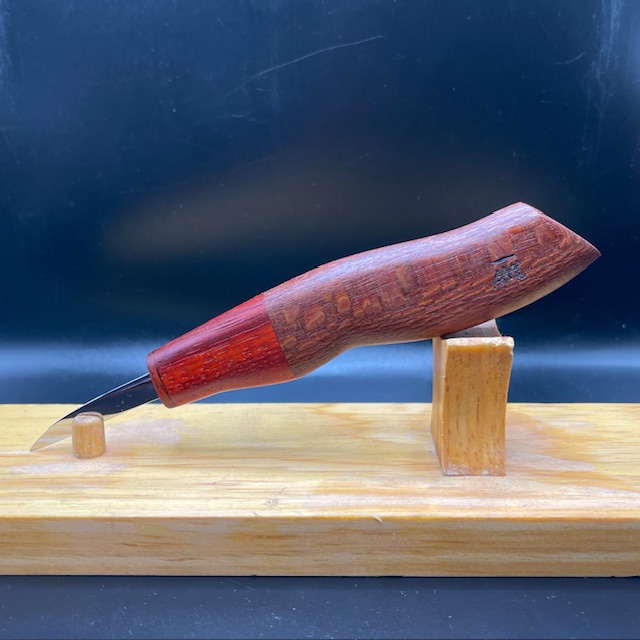
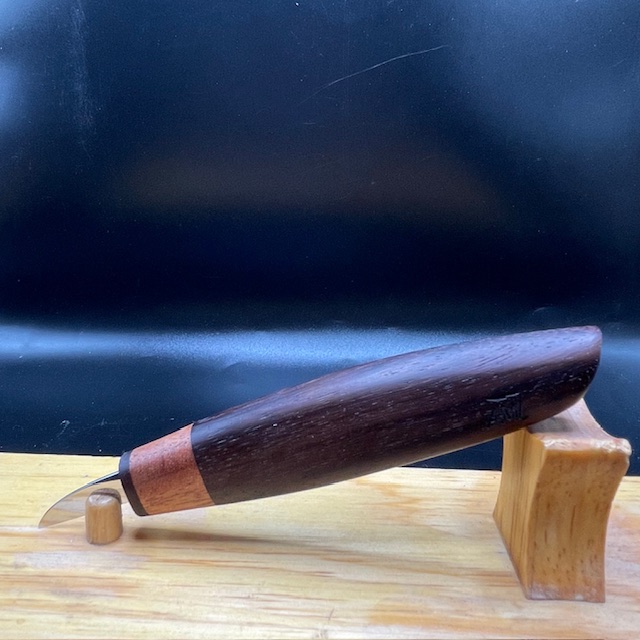
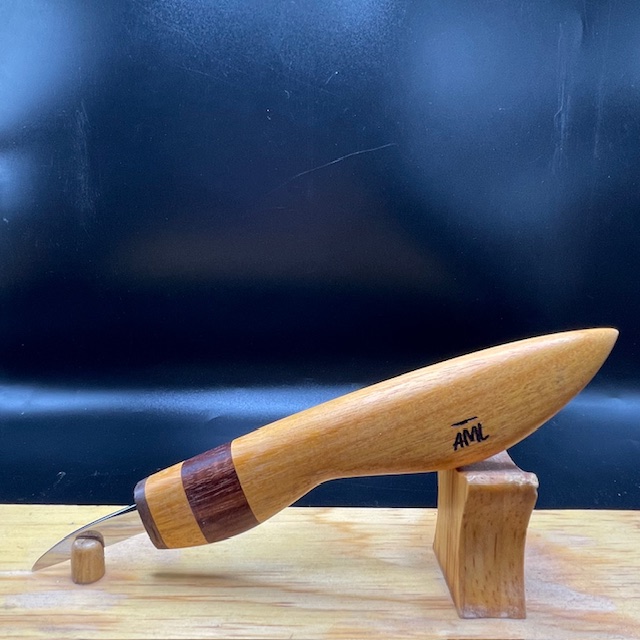
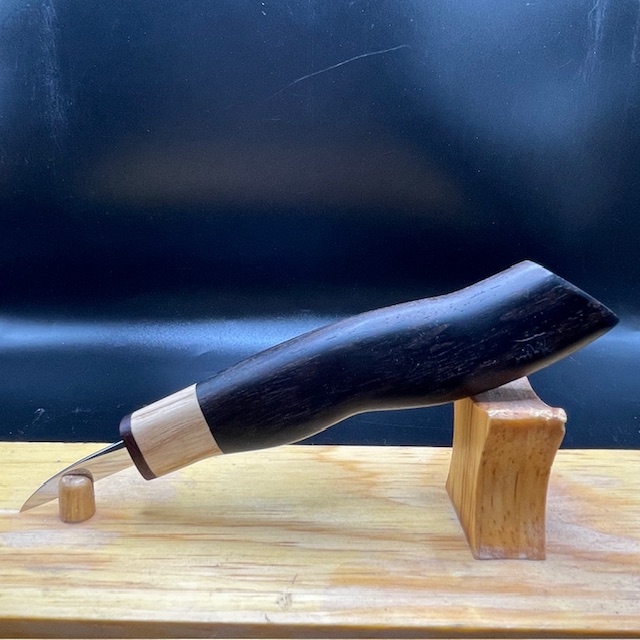
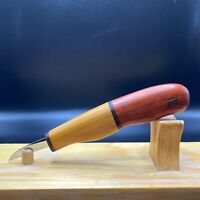
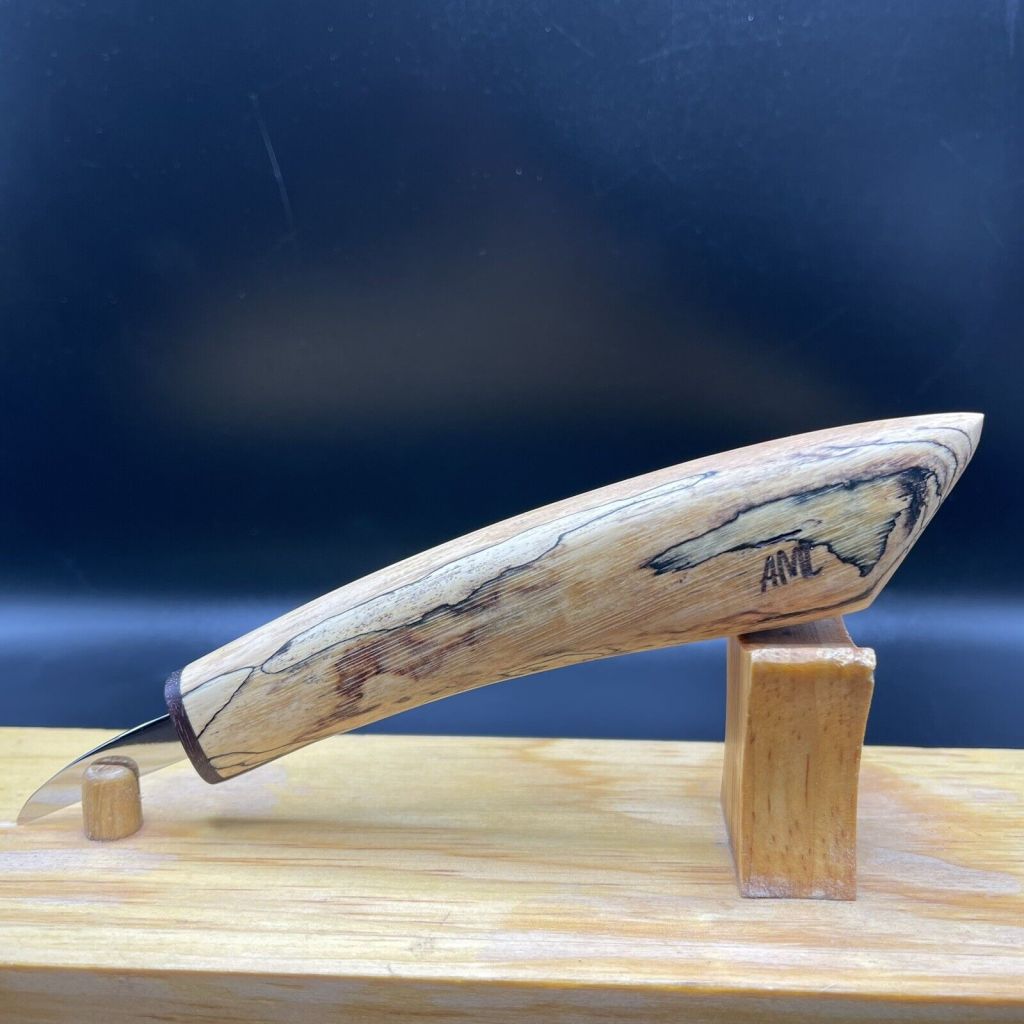
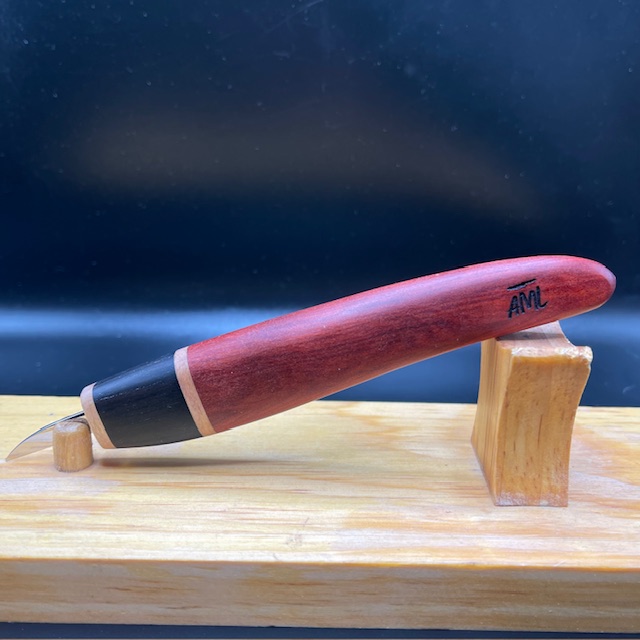
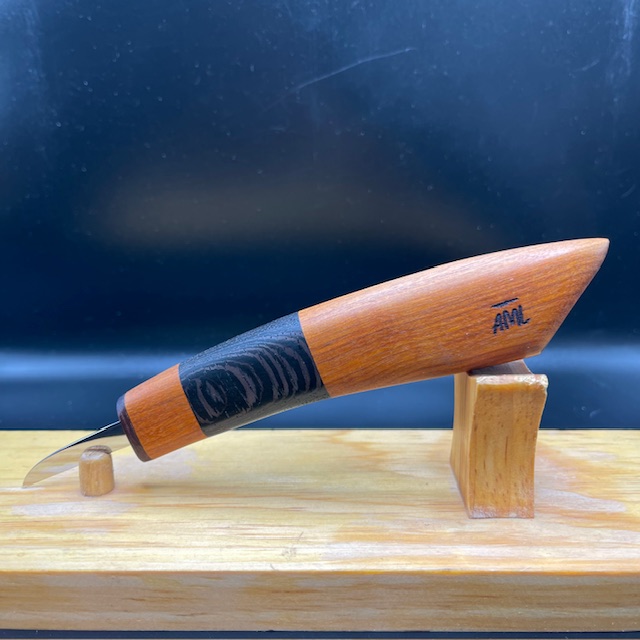
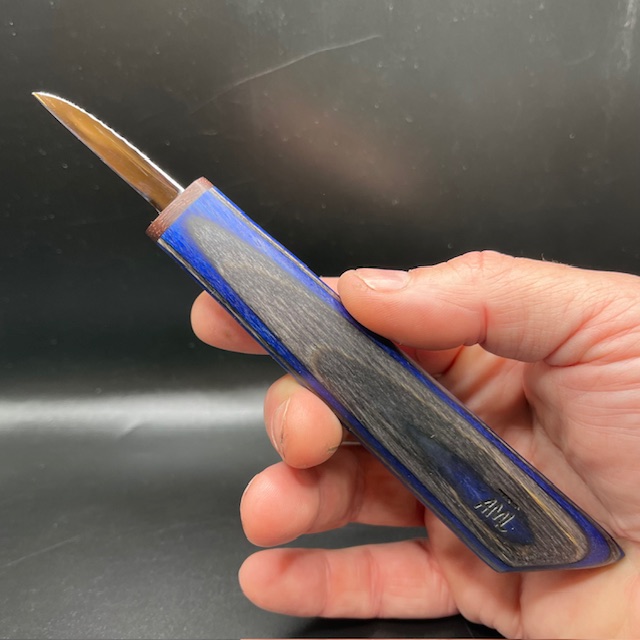
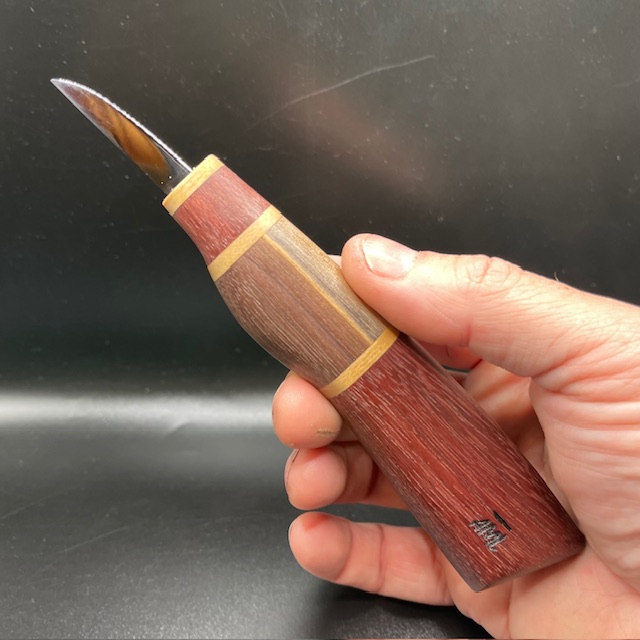
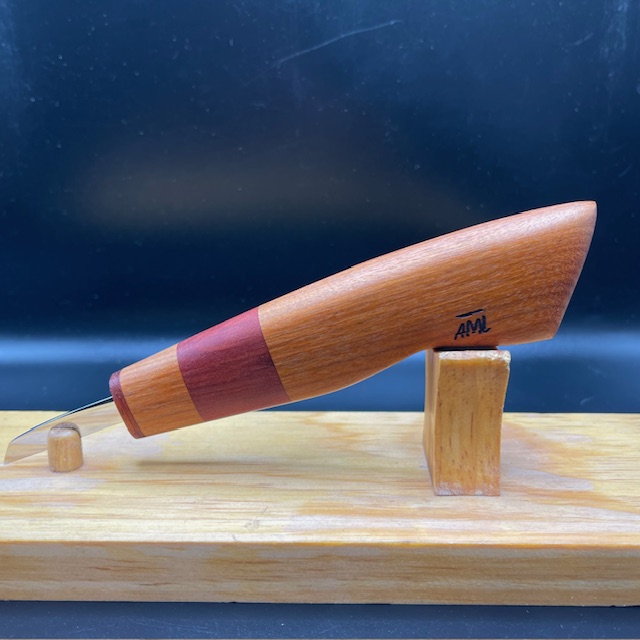
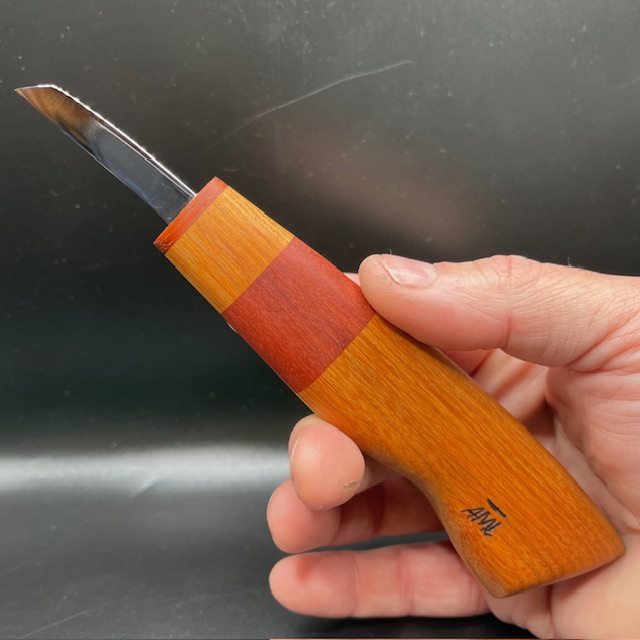
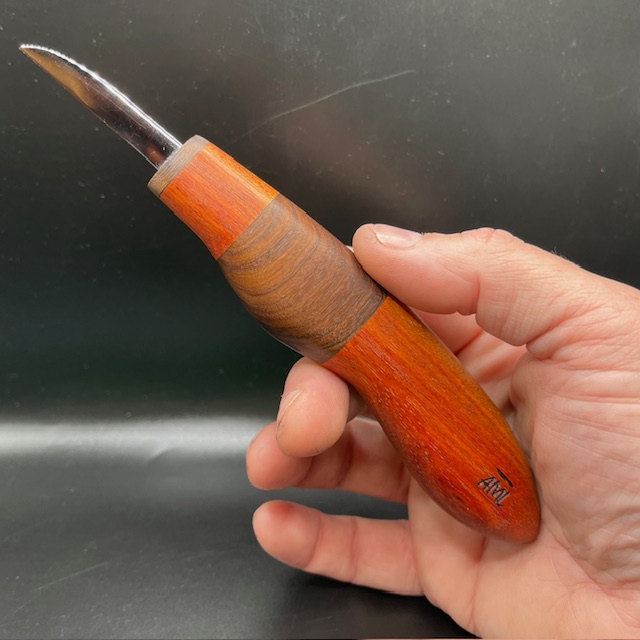
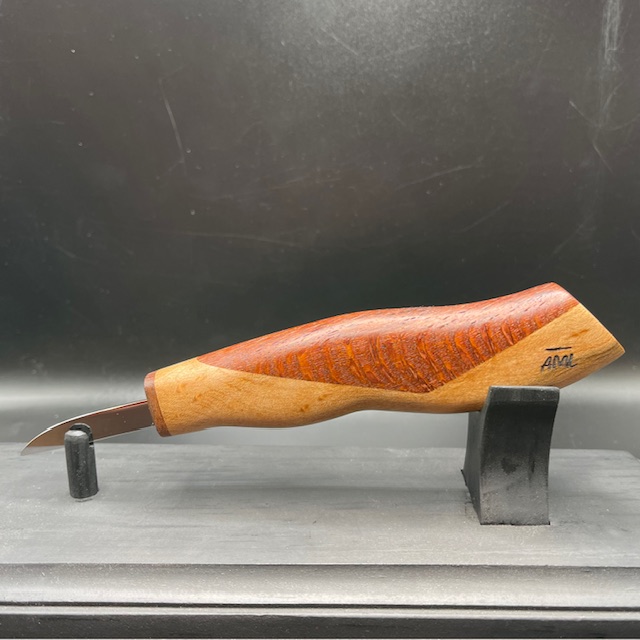
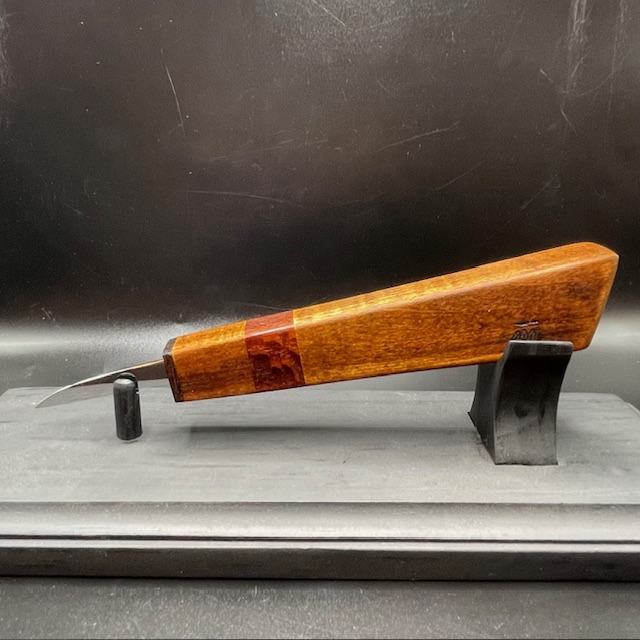
AML Wood Carving Knives

AML Wood Carving Knives are handmade by Andy Loughlin in Monroe, New York.
Each blade is meticulously crafted from 1095 high-carbon steel, ensuring easy sharpening and long-lasting edge retention. The diverse exotic woods used for the handle styles are sourced from around the world, adding a touch of elegance to these knives. You can find these exceptional knives for auction on eBay under ‘AML Knives,’ with bidding usually starting at $22 and most knives selling for between $40 and $100.
Unpack your AML Wood Carving Knife and experience its razor-sharpness right out of the package. Each knife comes with a custom-made magnetic wooden sheath, a thoughtful addition at no extra cost.
I now own three AML Knives and can speak personally about their quality. These are not production knives. Each knife is handmade by Andy himself. The knives are sturdy, well made, and will stack up to any other knife on the market. These knives have quickly become quite popular and sell out fast, so check the site (“AML Carving Knives” on EBAY) often for availability.
Andy has recently begun making knives with handles made from exotic woods and colored epoxy, creating some stunning and unique handle designs. Below are examples of some knives currently available or which have recently sold:


The next issue of Wood Chip Chatter will be posted on February 6, 2026

Keep a sharp eye out for it!
Keep a sharp edge, and keep on carvin’!


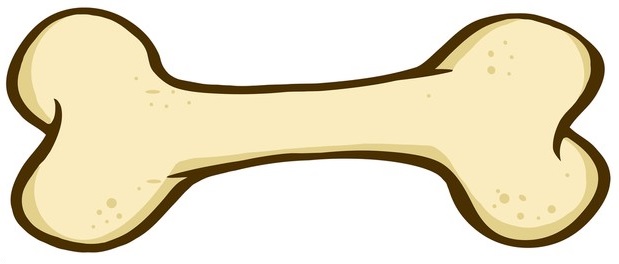
Funny Bone