EGG HEADS & other “Eggcellent” Things

EGG HEADS

& Other “Excellent Things

by Tom Wolfe

A Book Review

Front Cover
Back Cover

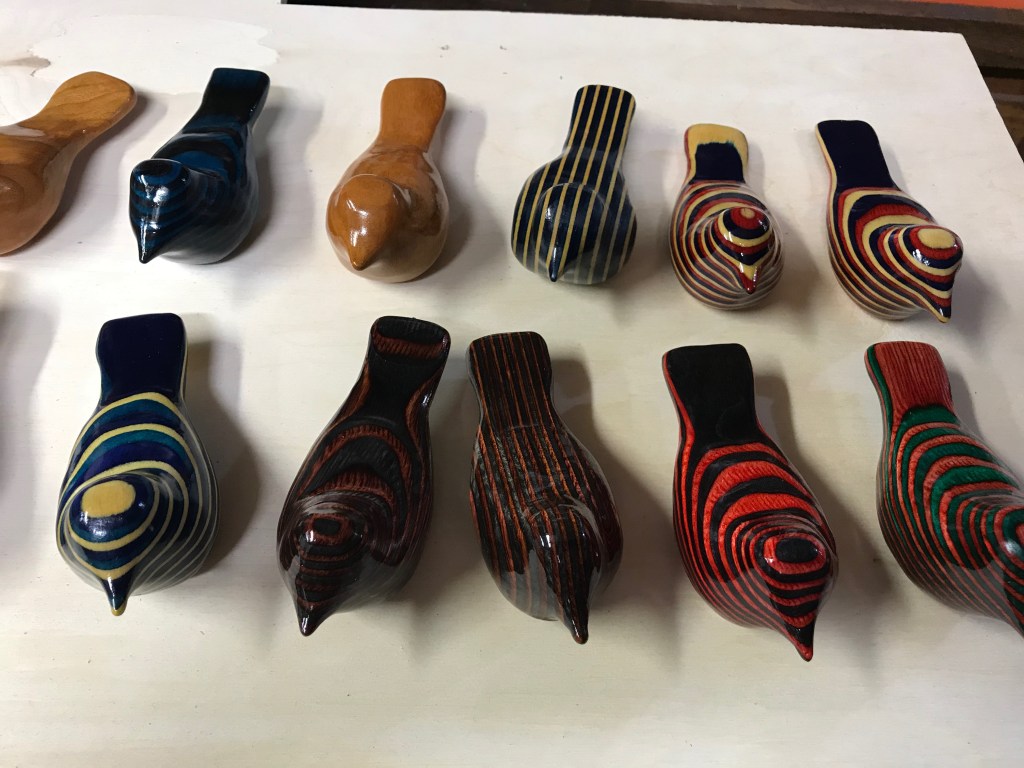
If you like carving eggs you’ll be ‘eggstatic’ over the  book, EGG HEADS & Other “Eggcellent” Things written by the renowned author, wood carver and instructor, Tom Wolfe.   In this book, published in 2008 by Schiffer Publishing Ltd., Tom uses basswood and butternut goose eggs to carve ‘eggtraordinary’ caricature heads and birds. 

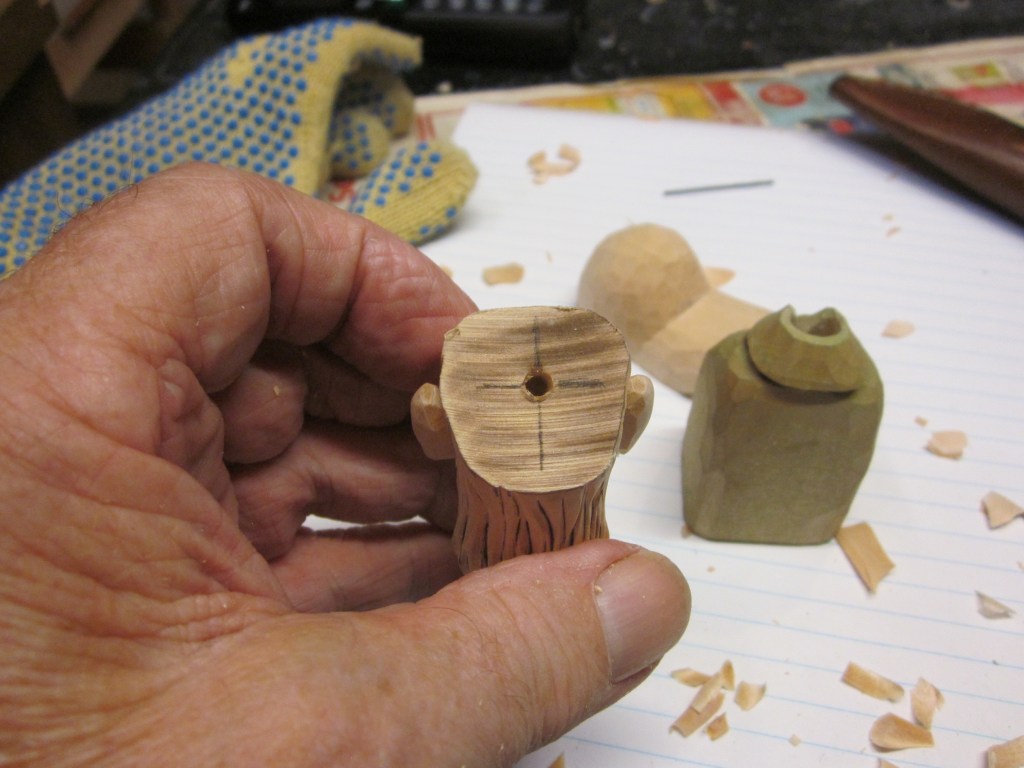
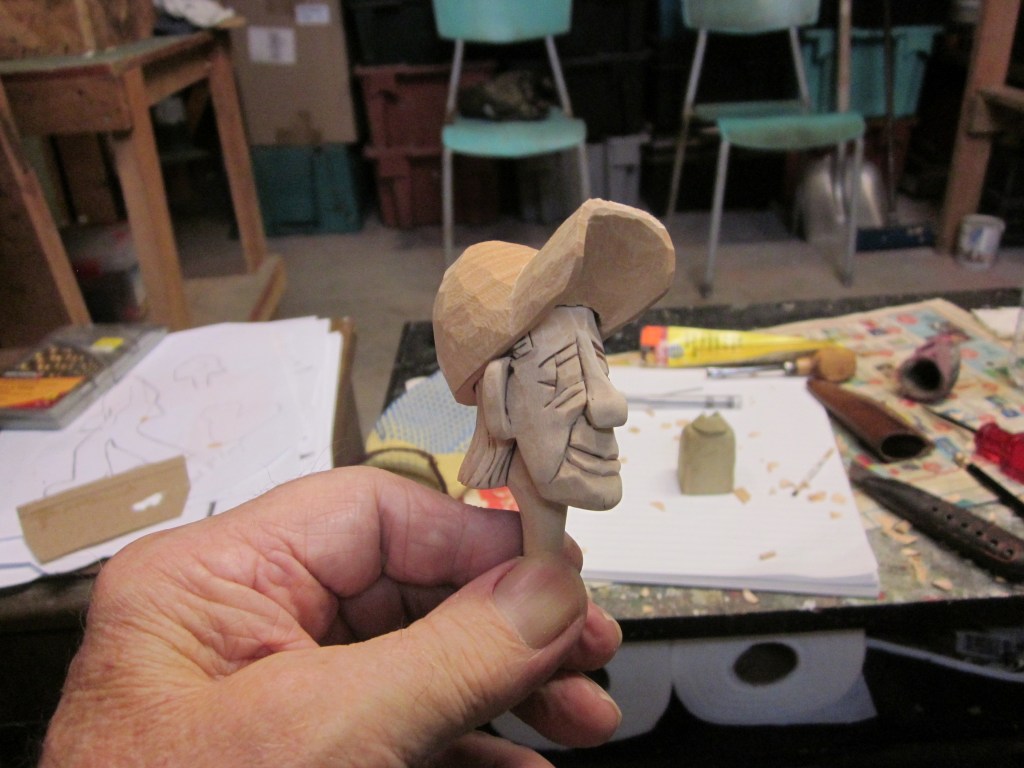
In this 64 page full color book Tom takes the reader from the blank egg, to drawing, carving and finishing through two different projects…a caricature head and a bird.

Sample Instruction Page

The caricature head is carved from a butternut goose egg and is just given an oil finish.  The bird project is carved from a basswood goose egg and is painted.  Start to finish step-by-step painting photos/instructions are also included as part of completing this unique carving design.

The back of the book has a 17 page Gallery of color photos showing some of Tom’s completed projects which give the reader several terrific ideas to try on their own.

Sample Ga;;ery Page

If you’re looking for something different to carve then EGG HEADS & Other “Eggcellent” Things is ‘eggcactly’ the book you need!  Get yourself a copy and start cracking some eggs!  You never know what you’ll discover inside.  Basswood eggs also lend themselves well to carving Santa faces, just in time for your Christmas carving projects!

Basswood goose eggs are available from most woodcarving suppliers.  The Greg Dorrance Co., Stadtlander Woodcarving, and The Woodcraft Shop are three just to name a few.

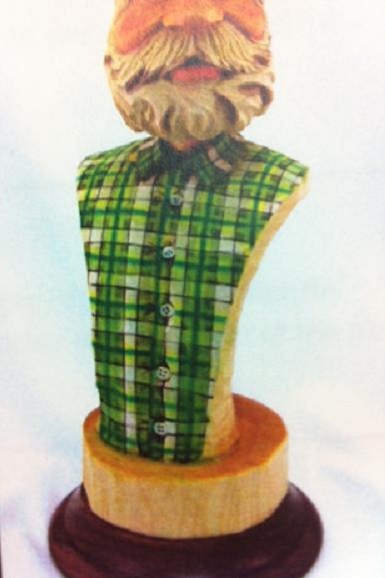
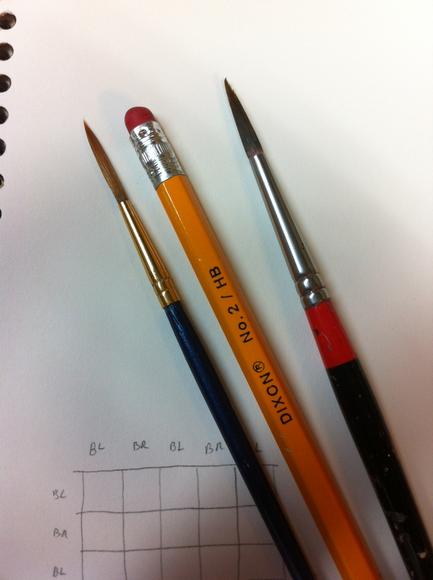
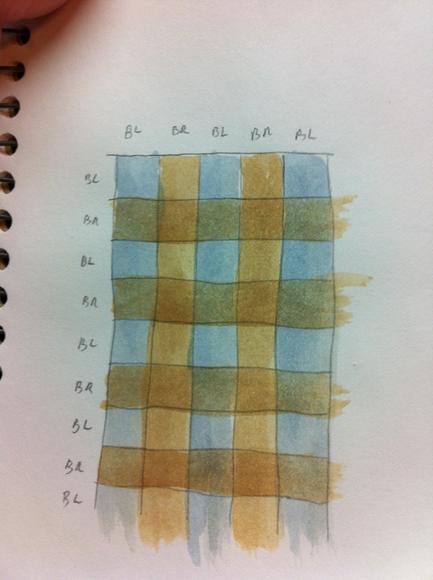
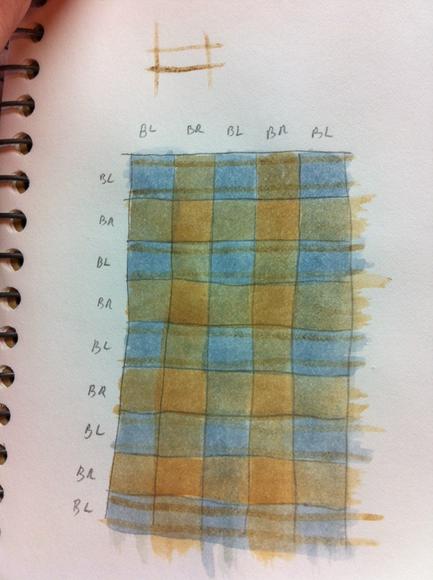
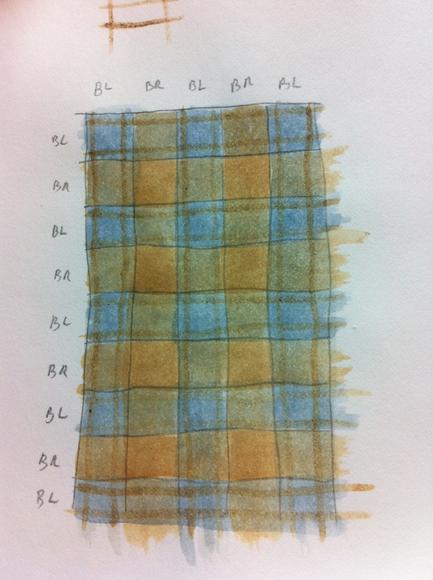
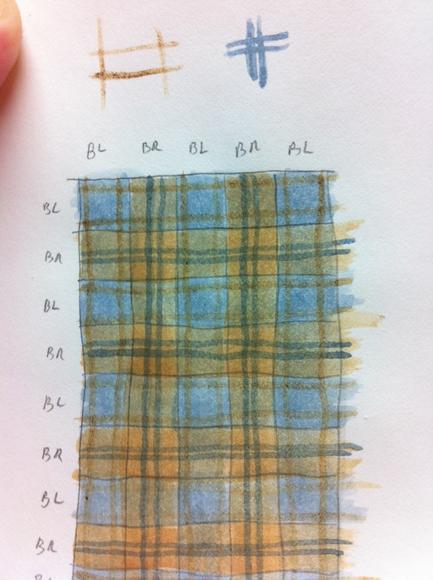
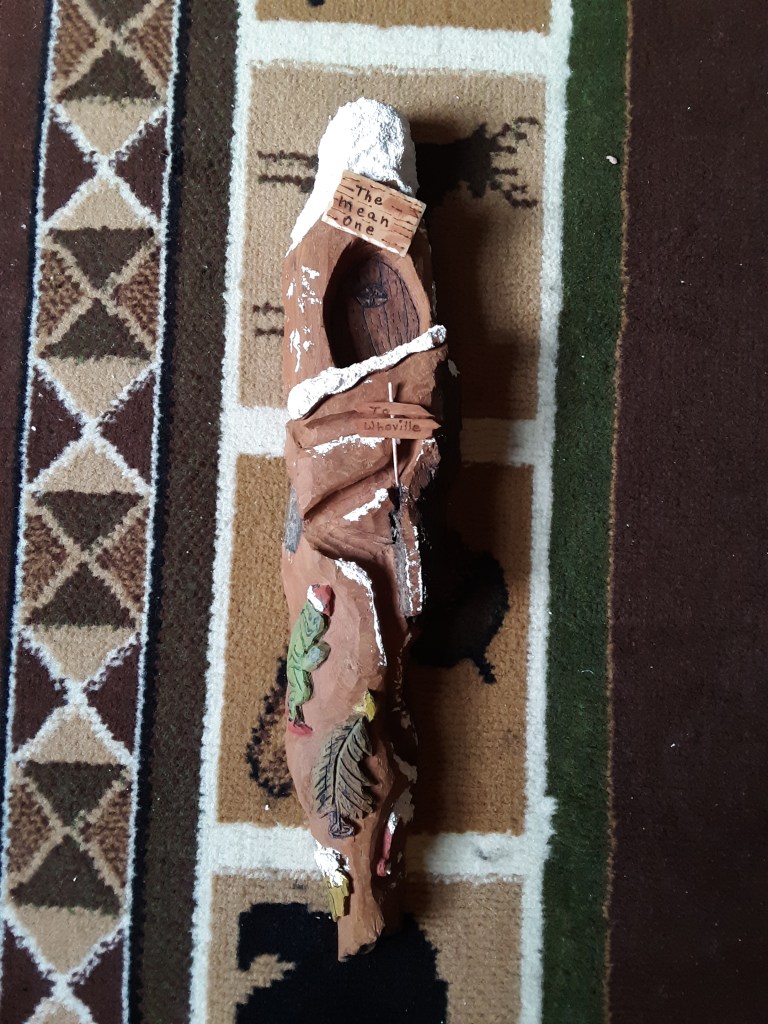
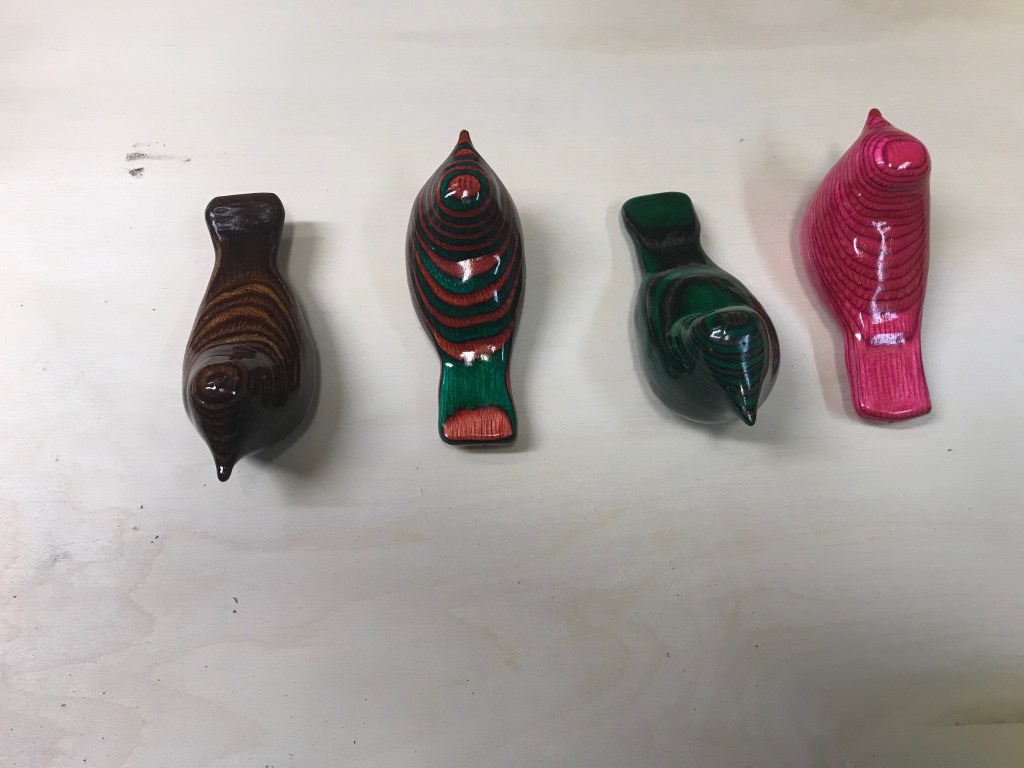
The following photos show my rendition of the bird project from Tom Wolfe’s book:

Hatching Bird Carved by Bob Kozakiewicz

Tom Wolfe, who unfortunately passed away in September, 2020 was one of America’s most recognized and respected carvers.  A long-standing member of the Caricature Carvers of America, Tom was also a well known instructor and author who was originally from West Virginia, but was most recently living in North Carolina.

QUESTIONS & COMMENTS

Our first question today comes from Ernie Kelley in response to my post on Strops & Stropping.  Ernie asks:

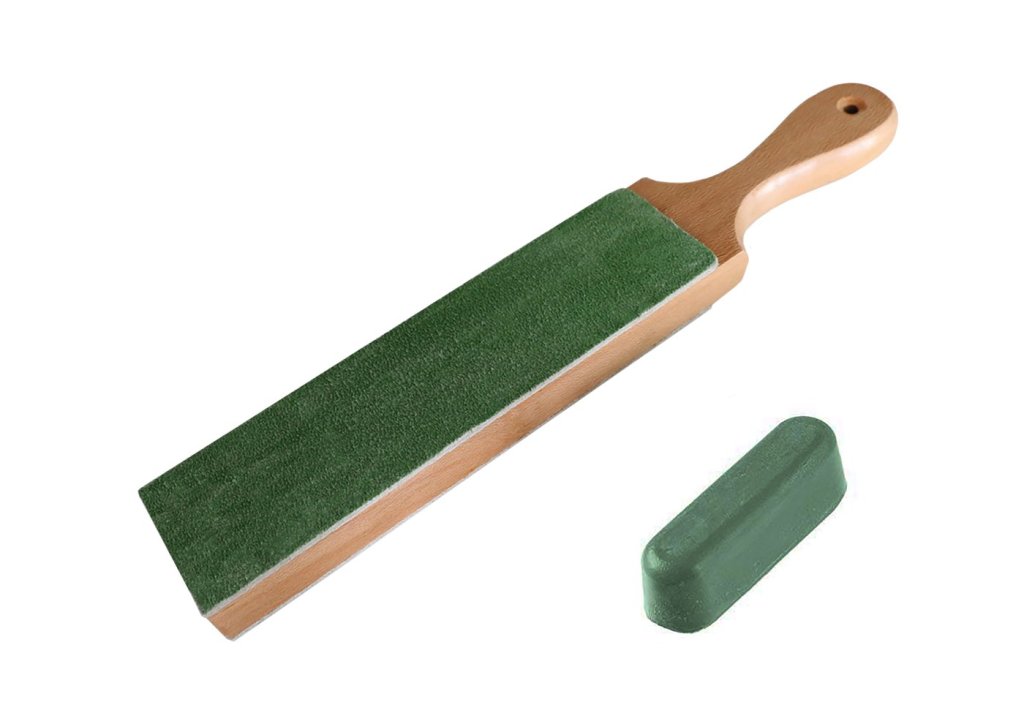
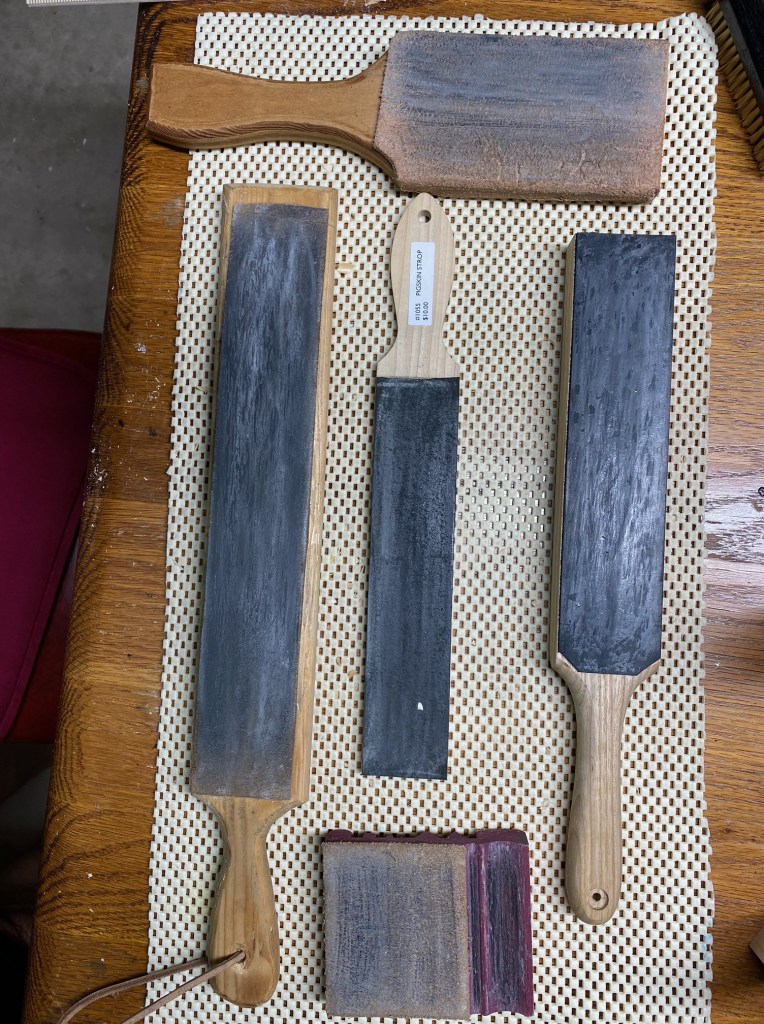
“Since you brought up stropping again, what are your thoughts on stropping on wood coated with compound compared to leather?”

Thank you for writing in, Ernie!  That’s a very good question.  Many carvers use cardboard strips (like those cut from cereal boxes) coated with compound with excellent results.  Although I have never tried it personally, a nice piece of a hardwood (like walnut) should also work well.

My thinking, though is that because the wood has no ‘give’ to it you will likely have to lift up slightly on the back of the knife in order to get a micro bevel on the blade.  Because leather ‘gives’ when you press down on it, it helps to form the micro bevel more easily, even when you lay the blade flat on the strop.

As always, a little experimentation will probably be necessary until you get it just right.  I will be going into stropping and how to strop your knife in more detail in my next post.

How about some of you other readers out there?  Do you ever use cardboard or wood for stropping.  Give us your thoughts!

Our next comment comes from Dan Bennett on his favorite method of stropping:

“Hi Bob,

Stropping was so troublesome when I started. Like most, I have progressed through several methods and although I was very satisfied with leather and green compound a while back I decided to give the thin Dinkle strop and Blue powder – WOW!  It works very well and I’m pleased – seems to me I read you liked it and I took your direction.  Seems to me everyone will be happy with this method.

Dan Bennett”

Thanks so much for your valuable input, Dan!  I DO like the John Dunkle strop and his “Blue Velvet” stropping powder, and use them regularly.  The John Dunkle strop is made with pig skin which is thinner (about 1/16″) than cow hide and, therefore has less ‘give’ when you press down on it.  And his ‘Blue Velvet’ stropping powder is pure aluminum oxide powder (with no fillers or binders).  I just rub the blue powder into the strop with my finger and it works like a charm!  Both the John Dunkle strop and “Blue Velvet” powder are available through most woodcarving suppliers.

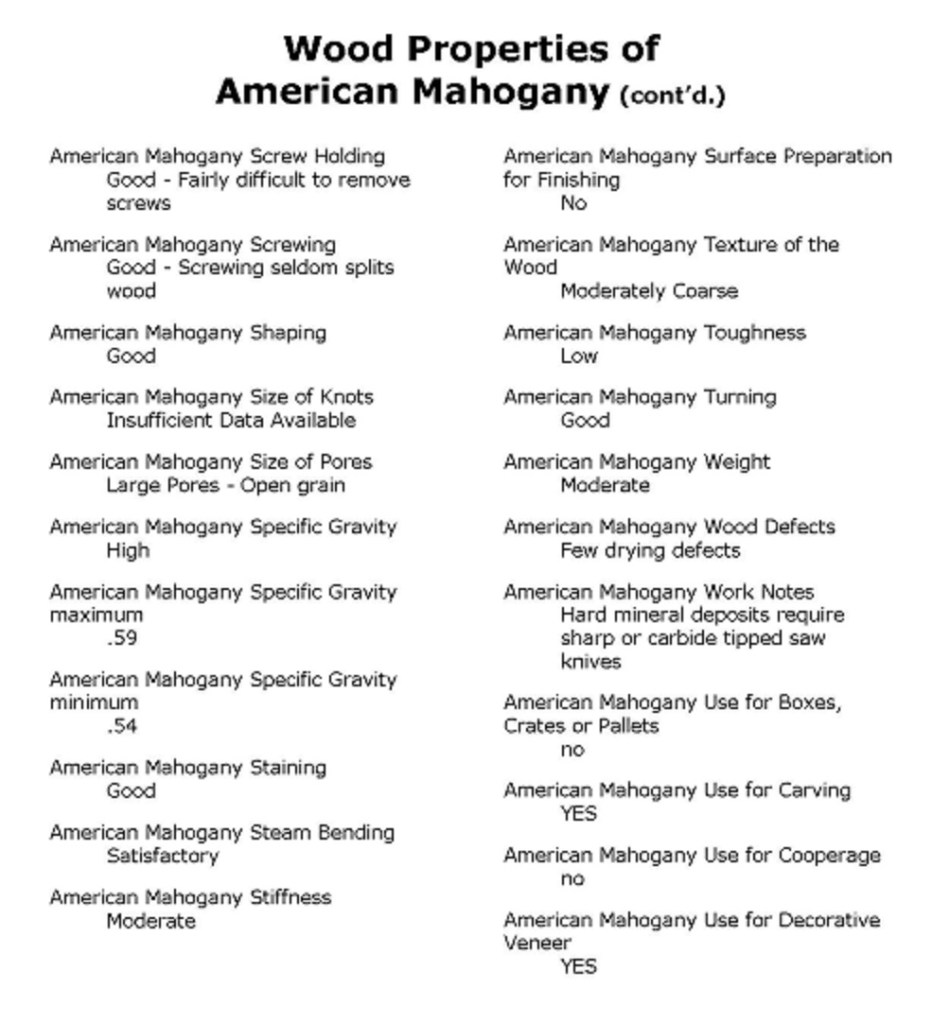
Our next comment comes from Ed Lysak along with a photo of the stunning spoon he carved from African Mahogany.  Ed writes:

“Bob,  This spoon was carved from African Mahogany.  I don’t know what the differences might be from American Mahogany but it carved nicely.

I enjoyed your blog on strops.  I have been using old belts that have shrunken over the years!

I am enjoying your blog.  Thanks,  Ed Lysak”

Spoon Carved by Ed Lysak

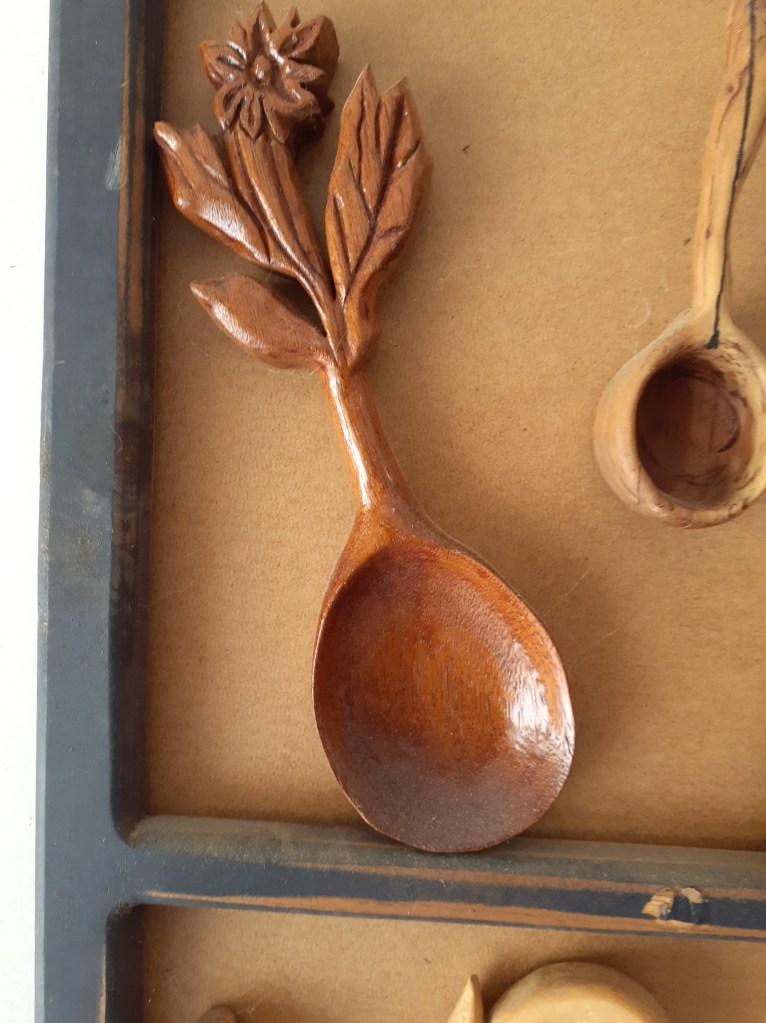
Thank you so much for writing in and especially for the photo of the magnificent spoon you carved, Ed!  It’s absolutely beautiful.  From what was able to research there is not much difference between African and American Mahogany.  In General, both African and American Mahogany are grown in tropical (rain forest) climates.

Genuine American Mahogany (Swietenia macrophylla) is an endangered species grown in South America, particularly Brazil.  The trees can be hundreds of years old and grow 150 ft. in height.  Genuine Mahogany has a long history of abuse and illegal logging so much that it is now protected by most governments.  The mahogany seen in today’s market is either an imitation or plantation grown. Plantation grown mahogany tree only grow to about 50 ft. in height.

Genuine American Mahogany lumber is used for the finest musical instruments, counter tops and bars, yacht decking and furniture.

Old belts are great sources of leather for making your own strops.  Generally the nap on the back side of belts is smooth and stiff.

Our next comment comes from Rick Rice in the form of a very much appreciated compliment.  Rick writes:

“Hey Bob, Rick here I’m new to the chanel. I’ve enjoyed reading what I have missed. Just for the record I am all but cyber illiterate. I was one of the old farts that thought computers would never go anywhere . Please keep the information flowing! Woodcarvers are good people and love to share but a big portion want to be paid for sharing. Thank you for what you do!”

Thank you so very much for your kind words, Rick!  It’s comments like that from folks like you that keep me going.

Let the chips fly!  Tell your wood carving friends and spread the word about Wood Chip Chatter, and don’t forget to click the ‘Comment’ button at the bottom of the page to send in your questions and comments so we can keep Wood Chip Chatter active and keep the conversations going! 

And remember, we need your photos!  I’m sure you all have some terrific carvings to share and photos of your carvings will help to liven up the blog’s appearance and make it more interesting.  Perhaps we can start a carvers photo section!  Email your photos to carverbobk@woodchipchatter.com

Keep a sharp edge and keep on carvin’!

Give a man a fish and he’ll eat for a day.  Teach a man how to fish and he’ll sit in a boat and drink beer all day.

Wood Properties of American Mahogany

Wood Properties of American Mahogany

Although American Mahogany is considered a hardwood, it carved relatively easy and has an appealing grain and finishes beautifully.  Here are the wood properties of American Mahogany:

READERS’ COMMENTS

This is going to be a very short blog post today since I have received no readers’ comments or questions this time, at which I am kind of surprised.  I thought my last post on “Strops & Stropping” would have generated more enthusiasm.

Wood Carving by Bob Kozakiewicz

Let the chips fly!  Tell your wood carving friends and spread the word about Wood Chip Chatter, and don’t forget to click the ‘Comment’ button at the bottom of the page to send in your questions and comments so we can keep Wood Chip Chatter active and keep the conversations going! 

And remember, we need your photos!  I’m sure you all have some terrific carvings to share and photos of your carvings will help to liven up the blog’s appearance and make it more interesting.  Perhaps we can start a carvers photo section!  Email your photos to carverbobk@woodchipchatter.com

Keep a sharp edge and keep on carvin’!

Courtesy of Wayne Smith

Strops & Stropping

Strops & Stopping

by Del Stubbs, Pinewood Forge

Strops & Stropping

A Strop for carving tools needs a very fine surface for accepting compound – yet is thin enough to not cause gross rounding of the micro bevel.  I go through lots of hides at my leather wholesaler before I choose the ones that have a knap and thickness that is ideal.

When you get a new strop it will need a bit of preparation.  Take the sharpening compound and rub it diligently into the leather – about 50 strokes around the entire surface, pushing down fairly hard, to work the compound into the leather.  Commence with stropping a few tools, watching for ‘dry’ spots that will inevitably appear.  Rub in more compound there, strop tools, repeat…..until it has an even appearance.  Before long it will need very little compound re-applied.  Long term I re-apply just a couple of strokes of compound after every 4 or 5 heavy uses.

Compound for strops is a formula of super fine abrasive powder mixed with various waxes.  Sometimes called ‘rouge’ it can be confused with jewelers’ rouge, (which is generally made of very mild abrasives good for only gold and silver, not for hard steel).                                                                                                       There are many brands of compound to choose from that can work well.  We have chosen “White Gold” to offer our customers because it is formulated specially for hand stropping – it polishes the edge while micro sharpening it.  If you have another type of compound, just check that the leather is turning black as you strop – this indicates that the compound is hard enough to be removing metal – (remember that stropping is sharpening) – but it must also leave the tool shiny (not dull) as this proves that the abrasive is a super fine ‘grit’.

When stropping, lay the tool flat on the leather and with your finger on the blade draw it backwards away from the edge.  Use a fair bit of pressure, the finger turns a little white.  This is needed because the compound is so super fine.  (Do not flip the tool up and away at the very end of the stroke – this usually means an unconscious twist of the wrist – which will blunt the edge).  All knives flex slightly towards the tip so one must slightly raise the handle as one nears the end of the stroke – to provide the same pressure to the last third of the tool as you do to the first third.  If you have a tool whose edge is not holding up as well as you’d like after honing – try adding a micro bevel to the edge by raising the back of the knife about the thickness of itself off the strop.  This will put much more pressure on the edge.  Be careful with this technique as too much pressure will round over the edge and make it cut poorly.  What you are looking for is a compromise between too fragile an edge – and too rounded an edge.  It is an important technique to learn and refine, think of it as adjusting the very edge of your tool microscopically.  When an edge gets too rounded – that’s what hones are for, a strop cannot re-flatten an edge.

Strop Maintenance

Every so often I get an inquiry about strops that have become uneven / irregular / lumpy with compound, normally occurring only after considerable service.  But the fix is easy!

Firstly, the hard wax that is the binder for the oxide polish is soften-able, so it may be softened by holding the strop – leather side down – over low heat (hair dryer, cookstove, etc.) till it is just warm to the touch.  Don’t make it hot to the touch, just warm.  This should make it easy to scrape off the old compound.

Secondly, take a knife you’re not particular about, say an old butter or paring knife, and just scrape away, going sideways, to get down to leather – holding the edge at 90o / perpendicular to the strop surface.                                                   In the future strive to apply the compound in even, long strokes and use a bit less  – properly used a strop should never get ‘lumpy’ – it means far too much compound is being applied.

Del Stubbs is the owner of Pinewood Forge, a maker of fine Scandinavian woodcarving knives & woodcarving supplies from Leonard, MN.  Del makes some of the best woodcarving and spoon carving tools on the market, which are in very high demand.  His Fine Leather and Ash Bench Strop ($19.00) is the best strop I have found anywhere…I own 3 of them!  Check out Pinewood Forge at: http://www.pinewoodforge.com

QUESTIONS & COMMENTS

First, before we get into readers’ comments I want to address Jakobo’s comments from my last post regarding a new kangaroo leather strop and the way it is used.  Although I have never used one I’m sure the kangaroo strop works well.  When properly used almost all strops will work.  The problem I have is with Tom’s explanation of the proper way to strop a knife.

First of all, the illustration Tom shows of the leather being compressed and the knife edge being rounded is grossly exaggerated (see the link provides by Jakobo).  When we talk about stropping knife blades we are talking about microscopic changes to the edge.  However, those microscopic changes can make the difference between a sharp edge and a dull one, and unless the blade edge has been extremely over rounded further proper stropping will bring it back to where it should be.

Proper stropping all comes down to a technique that you must learn and refine.  As Del Stubbs explained above you want to press down with just enough pressure to form that micro bevel on the knife edge, but not too much so as to round the edge off.  Tom neglects to address this micro bevel which is so critical to a truly sharp knife edge.

Regardless of what kind of strop you are using, as Del further states, if after repeated stropping you are still not getting that all important micro bevel you need to try lifting the back of the blade about 1/16″ (the thickness of the blade) off the strop when you strop it.  Think of it as microscopically fine tuning the edge of your knife.

Secondly, I would like to address Del’s comments on strop maintenance.  In the beginning, Del mentions strops that have become lumpy, uneven and irregular with compound.  This is caused by too much wax built up from repeated applications of the compound to the strop leather.

For this reason, I have found waxy stick compounds to be a pain to use.  They more often than not go on unevenly and build an excess amount of wax in a short amount of time.  And regardless of what compound you use (red, white, green or yellow) they all do it.

For this reason, I use aluminum oxide powder which is pure aluminum oxide with no wax binder.  My thinking is that if it’s the aluminum oxide that’s sharpening your knife why add the unnecessary waxy binder that only clogs up your leather?  With the aluminum oxide powder I have never had to perform maintenance on my strops. 

I just sprinkle a little powder along the length of the strop and work it in with my finger.  No rubbing, scrubbing or scraping!  Easy peasy!  Aluminum oxide powder is available in 2 oz. containers through numerous woodcarving suppliers.

Our first question today comes from my good friend Jim Arnold who makes the finest chess sets I have ever seen.  Jim writes:

“Bob,

Thanks for the blog…very informative, but fun too.   Doing a chess set commission and my client wants a ‘painted’ set that also has that glassy glossy shine to it.  Can I apply a gloss lacquer over acrylic paint and still make it shine?  You have any alternate suggestions for me?

Thanks, Bob, always enjoyed your painting abilities along with your carving work,

Jim Arnold”

Hi Jim,

I’ve always liked to use Deft spray lacquer.  I’ve used the semi gloss which give a shine but it’s not what you’re after.  Go with the gloss spray with two or three coats.  That should do it.  If you don’t want a spray Deft also come in a brush on form.  As usual, try it on a scrap piece first.

Thank you so much for your kind words.  I greatly appreciate them.

Our next comment is in the form of a compliment from Timothy Sisko on my posting of his method for Drying A Wood Project.  Tim said:

“Nice article Bob, you did a good job of putting the information together.”

Thanks, Tim!  Unfortunately, your diagram and the table didn’t transfer over when I put the blog post together.  I’m bummed about that but it’s a problem with the WordPress web design that I use.  Thanks for sending it in!

 Una Schlaebitz from Montana sent in a comment along with some photos of the fine Simple Santas he has been carving lately.  Una writes:

“Hi Bob!  I’m really enjoying your newsletter.  You already know I love your no-eyes Santas and I’ve made lots of them.  I make different hats with long tails and hands down so they can hold a sign or stocking or candy corn.  Most recently mine have a long braided beard and I taught a short class on the beard at the West Glacier Rendezvous last month.  The bottoms of my photos are partly cut off because I had the names below to remind me of who I sent them to.  There’s a Santa with brown coat and black fur and an unfinished sign below – – It ended up being  a “Bah-Humbug”.  I did one as a joke for myself and then during COVID it seemed appropriate for a couple people.   One with “Go Diggers” was for the A.D. of Montana Tech in Butte.  It’s fun to do team logo Santas with stickers or small pieces of logo fabric on the bases or packages.  This is a great pattern.    Una Schlaebitz”

Hi Una…I’m really happy you’re enjoying Wood Chip Chatter.  I work very hard to make it informative and interesting every time.  Your Santas are awesome!  My Simple Santa was designed to be very adaptable.  You can make unlimited changes to it and get a lot of mileage out of the pattern.  I like the way you do your braided beards…cool idea, and they look great.  I especially like the candy corn Santa!  It’s very unique.  I’ve done a few Santas with sports logos and they come out very cool looking.  Have fun making more Santas!  You’re on a roll and Christmas is right around the corner!

My Simple Santa was written up in an article by me (as the “Quick Wizard”) in the Summer 2017 #79 issue of WCI and again in their 2017 Holiday Pattern Collection.  If anyone hasn’t seen it and would like a copy of the pattern, just drop me a comment or email and I can get one out to you.

Let the chips fly!  Tell your wood carving friends and spread the word about Wood Chip Chatter, and don’t forget to click the ‘Comment’ button at the bottom of the page to send in your questions and comments so we can keep Wood Chip Chatter active and keep the conversations going! 

And remember, we need your photos!  I’m sure you all have some terrific carvings to share and photos of your carvings will help to liven up the blog’s appearance and make it more interesting.  Perhaps we can start a carvers photo section!  Email your photos to carverbobk@woodchipchatter.com

Keep a sharp edge and keep on carvin’!

Drying A Wood Product

Drying A Wood Product

I received a message from Tim Sisko this week with a question and comment along with some photos of the Native American masks he carved, which has opened up an intriguing topic of discussion that I’m sure you will all want to read about.  The message reads:

“Bob , I enjoyed your article on wood burning but I am curious that under the species of wood commonly carved I don’t see Alder listed. I began my journey in carving by taking classes from Jim Ploegman a Master carver who specialized in Northwest Native Carvings. Many of the projects we carved were out of Alder. We would always prize green Alder for carving of bowls and masks inspired by the carvings of the First Nation’s People.

Northwest Native American Mask
Carved by Tim Sisko
Northwest Native American Mask
Carved by Tim Sisko
Northwest Native American Mask
Carved by Tim Sisko
Northwest Native American Mask
Carved by Tim Sisko

When we get fresh cut Alder we would wet it down and bag it in plastic bags and freeze them to keep them wet between carving sessions.

Alder gets very hard when it is dry.  It grows very well around the coastal areas of the Pacific Northwest.  The other wood that is used for masks is old growth cedar.  One of my masks out of cedar had as many as 48  growth rings per inch.

This procedure of carving wet wood necessitated a method of drying the finished project. We would use the following method.”

Before I go on to show the ingenious wood drying method you have sent in, let me first answer your question about alder.  The only reason why alder was not shown on the list of carving woods I posted is simply because it wasn’t mentioned in the particular database from which I got my information.

Alder grows mainly in the Pacific Northwest of the United States.  It is a member of the birch family and can be an excellent wood for carving.  Electric guitars, most notably Fender Guitars, have been built with alder bodies since the 1950s. Alder is appreciated for its tone that is claimed to be tight and evenly balanced, especially when compared to mahogany, and has been adopted by many electric guitar manufacturers.

Drying a Wood Project

  1. Weigh the project and record the weight (”IN” weight).
  2. Heat project in microwave at full power for ½ the time it takes to do Microwave popcorn *.
  3. Rotate project in oven each heating cycle.
  4. When project comes out of oven. put on scale for 8 min. to let heat come out of wood then record the weight (“OUT” weight).
  5. Put project into cardboard box with box opening on side. Set project on sticks to allow air to circulate around piece. Put box and project into a plastic bag and let cool to room temperature before doing the next heating cycle.
  6. Turn plastic bag inside-out each heating cycle to remove moisture.
  7. When you are finished drying, put project back in the box and plastic bag. Punch holes in the top and sides of the bag and box.
  8. Let project set in the box and plastic bag until you put on a clear stain base.
Weight
INOUTINOUTINOUT


When “IN” and “OUT” weights are the same for 3 cycles in a row you are finished

Jim Ploegman, Master Carver

*  A little explanation may be in order here.  The reason for testing your microwave with the popcorn is because microwave ovens vary in power so we use about 6 or7 kernels of corn to see how long it takes to pop on max power, we time this and when we put our carving in to dry it we cut the time in half.

             NOTE: The drying process is used before painting for wet or green wood.                        Some of my masks or bowls have lost as much weight as to equal almost a pint       of water.  Remember that saying “  A pint is a pound the world around “

Thank you very much, Tim, for the photos of your magnificent Native American masks.  They are bright and brilliant, and so very well done.  And thank you especially for the interesting method of drying wood (projects).

NOTE: Tim’s drying method also included a diagram and a blank “IN” and “OUT” weight table which I was unfortunately unable to transfer when I put this post together. My apologies to you, Tim. If anyone is interested in having the diagram and table just drop me a message and I will be happy to email Tim’s complete drying method with the diagram included.

Your information brought some thoughts and questions to my mind:

1. Since alder is in the birch family I imagine it’s pretty hard to carve (when dry).

2. I realize you wet it to soften it but why do you soak it so much?  Does the excess water make it that much easier to carve?

3. FOOD FOR THOUGHT: We have all heard about using 50:50 water/alcohol mixture to soften our basswood for carving.  When the wood gets dry again, you have to reapply it…or basically keep the wood wet.  Sometimes when I’m away from home and don’t have my mixture I’ll just run my carving under tap water and soak it.  The wood carves like butter after that!  I just keep the carving wet with tap water.

So my first thought is…do we really need the alcohol in the water?  Why not just use the water alone?  My second thought is…should we be carving wood with more moisture in it to begin with?

I would love to hear some readers’ comments on this subject.

QUESTIONS & COMMENTS

Our first question today comes from Jakobo Santiago with regards to knife stropping.  Jakobo writes:

 “hello everyone, hello Bob

I have a question about knife stropping and I would like your opinion. Surely someone has already heard about this, because it is generating some controversy on social networks.

I have found an account, ‘spoon carving with tom’, very interesting.

Tom claims that stropping knives on thick leather, such as cow or pig, is detrimental to the edge and does not achieve a fine finish, as the thick leather compresses and sharpens the knife blade with more angle than it should.

Tom proposes kangaroo fur as optimal option. It is only 0.6mm thick and harder and softer than cow. No compression

I let you the Instagram link

https://www.instagram.com/p/CN7Ras8jP3O/?utm_medium=copy_link

what do you think about this?”

You’ve touched on a wide open topic here, Jakobo.  The questions you raise are valid and have been discussed among carvers for many years.  First, I will say that the kangaroo hide strop sounds like an excellent idea.  In fact, I think I would like to try one out myself.  However, Tom’s theory on knife stropping, while somewhat correct has some holes in it, and I will address them in my next post when I discuss “Strops & Stropping” in more detail.  Stay tuned!

Our next comment comes from Wade Harvey regarding How To Paint Plaid, which I posted in my last blog post.  Wade writes:

“Bob, Thanks for the tutorial.  This is my one and only attempt at painting plaid (circa 2015).  I’ll save the tutorial and do some practicing.  wh”

I‘m glad you found the article helpful, Wade!  Practice, practice, practice!

Our next comment comes from Sue MacCullum regarding How To Paint Plaid.  Sue writes:

“What a helpful article.  I’m anxious to try plaids again now.  My previous attempts were pretty bad!  Thanks Bob and Mike..  I am enjoying your blog.”

I‘m glad you found the article helpful, Sue.  With just a little practice I’m sure you’ll become an expert.  And I’m pleased that you are also enjoying Wood Chip Chatter!

Connie Teeters sent in our next comment on How To Paint Plaid and says:

“Thank you so much for the instructions love them”

I‘m glad the article on How To Paint Plaid was helpful, Connie!

We received one last comment on How To Paint Plaid.  This one comes from my friend Bob Nesbit from Pennsylvania who says:

“Bob,

WOW now that was very interesting on painting the plaid shirt and the steps taken to achieve this.  Will add this to my notebook and give it a try.  Never seen this done on a carving before.

Thanks

Bob Nesbit”

I‘m glad you found it interesting, Bob, and I definitely agree with you.  I will be trying this out on my next opportunity as well.

Let the chips fly!  Tell your wood carving friends and spread the word about Wood Chip Chatter, and don’t forget to click the ‘Comment’ button at the bottom of the page to send in your questions and comments so we can keep Wood Chip Chatter active and keep the conversations going! 

And remember, we need your photos!  I’m sure you all have some terrific carvings to share and photos of your carvings will help to liven up the blog’s appearance and make it more interesting.  Perhaps we can start a carvers photo section!  Email your photos to carverbobk@woodchipchatter.com

Keep a sharp edge and keep on carvin’!

                             Darth Vader had a corrupt brother, Taxi Vader.

HOW TO PAINT PLAID

HOW TO PAINT PLAID

How To Paint Plaid by Mike Pounders*

I recently completed a Mark Akers rough out and several people were interested in how I painted the flannel shirt the guy was wearing.  It won’t seem so difficult once you go through the steps a time or two!  I used 4 different colors for mine: a light coffee color, dark blue, darker brown, and a darker blue.  The colors can be your choice but a light color and dark one usually work better together.  These are acrylic paints thinned to a wash.

 I bought these little plastic containers in the paint section at the hobby store and  I like to use them to mix slightly larger quantities of paint.  I really like adding the paint and water and being able to shake it to get a really well-mixed shade that I like…plus to keeps longer and is ready to be used immediately when I get the urge to paint.

1


I use a round brush that holds a good bit of paint, but has a fine tip that lets me paint details as needed.  I use it for the wide stripes, but a flat brush might work better.  The other brush is a long liner, that I use for the thinner lines and stripes. I have a smaller one but this one holds a bit more paint so I can make a line in one continuous stroke.                                                 

2


I practiced first on a sheet of drawing paper, to make sure I have the process down and get some idea how the colors combinations look together.  After doing that, you will also want to practice at least once on a piece of basswood, to make sure your colors look right.  What looks good on a piece of white paper may need to be darker or thinner on a piece of yellow-tan basswood …..it will look different. 

I just roughly draw a pattern of squares that are close to the size that would be appropriate for your carving. These are about a ¼ inch.  Notice that I have labeled them for brown or blue in alternating columns on the top and side. 


3


I start by just painting the vertical brown stripes. Try to not make too many passes in order to keep the color consistent.  I use a hair dryer to blow it dry after I finish them.                                                    

4

Now I do the horizontal lines of brown and you can see that the second coat over the intersections makes those squares darker. 


5

Blow dry and then do the vertical blue stripes, then blow dry and do the horizontal blue stripes.  All these are just roughly done with your larger brush.


6

7

Now, in photo 8, we’re going to use the smaller liner brush to paint a “corral” pattern using a slightly darker brown.  And it will only be painted in the darker blue squares.                                                         

8

Start by doing the horizontal ones and paint the line all the way across.  I start at the far left and work to the right, so that my hand is not resting in the lines I just painted. I hold the brush like a pencil and use ring finger or pinkie finger to steady my hand. 


9

Blow dry when finished and then do the vertical lines (brown-on-blue) to form the corrals, as shown in photo 10. Blow dry when finished. 


10


Now we can do the darker blue intersections.  These will be painted blue-on-brown and will consist of two lines fairly close together, right down the middle of the rows and columns.  I do the vertical ones first, dry and then do the horizontal ones. Again, work from left to right. 


11

12

And there you have it…something that looks like a faded flannel shirt.  I actually used one of my own as a reference for the colors and patterns.  I think the faded colors add to the softness effect, but I also sand the shirt to make sure there isn’t too much sharpness. 


13

If there are a lot of sharp marks or facets from cutting, it can make the shirt look overly-wrinkled or like it was made of paper.  You want something that is soft and flowing…like a real shirt.  The last picture is Mark’s carving, showing the colors and pattern he used.  On his carving, he also burned the larger squares (rather than using just pencil lines) before painting.  This would give your shirt a newer, crisp appearance.  Mark also used colored pens for the thinner stripes.  That gives some nice lines and has a similar transparent effect. 


14

I couldn’t find the colors I wanted or liked, so I ended up using my liner, which again seemed to give a more faded effect that I liked.  When I paint on the wood, I keep the wood damp if I am painting the face and areas where I want to blend colors.  But I paint the shirt with the wood dry, and also dry between the colors and rows I paint, just like I did with the paper.  Now, when I’ve finished all the plaid, I will spray it with water and get it damp and may then add some washes of gray for shadows in the wrinkles around the buttons and other places.  That’s so I can blend them in, rather than just having a big blotch of color.  So that’s how I did mine…..If you try it, you will find it is not as complex as it appears and it can give a nice effect to a carving.

*This tutorial was provided through the gracious courtesy of Mike Pounders from Arkansas, which he had posted in the Woodcarving Illustrated Woodcarving Forum on 1/9/2017.

READERS’ COMMENTS


Our first comment today comes from Jakobo Santiago from the Canary Islands on our earlier topic on wooden spoons.  Jakobo writes:

“I have learned that you have to rub the spoons with something soft and hard (like a deer horn, a pipe, or something similar) to seal the pores. I’ve tried it and it works! A smooth, shiny finish is achieved before applying the oil”

Thank you for that information, Jakob.  The word spoon is derived from an ancient word meaning a chip of wood or horn carved from a larger piece.  The practice of rubbing wood with a hard tool such as a hard piece of wood or metal is called burnishing, and is widely used here in the United States for all types of woodworking projects, including woodcarving.

Burnishing means to polish (a surface) by friction with a tool to make the wood smooth and bright.   It is particularly useful in furniture making although I have personally done it on some of my wood carvings.

Our second comment comes from Bob Nesbit from Pennsylvania who appreciates the information on wood burning from my last post:  Bob said:

Bob,

Thanks for the information on wood burning and the different kinds of wood to burn on. I’m also new to wood burning my carvings so this information is helpful.

Regards,
Bob Nesbit

Thank you for writing in, Bob.  It that kind of feedback which lets me know I’m on the right track with the information I am providing to my readers.  I’m glad you found it helpful.

I’m hoping to get some feedback on today’s post about Painting Plaid.  There are a number of ways this can be done so it would be great if we can open up some discussion of this topic.  Let’s hear your questions and comments.

Our third comment today comes from Ed along with a picture of the stunning fan bird he carved:

“Hi Carvers,  Here is an example of one of my carvings.  I use northern white cedar from Carver’s World.  Anyone have experience with trying other woods?  Thanks,  Ed”


Ed’s Fan Bird

That’s a magnificent looking fan bird you carved, Ed, and beautifully painted as well.  Although I have never tried carving a fan bird yet I have carved many different types of wood which include: basswood, white pine, sugar pine, red cedar, mahogany, black walnut, butternut, yellow poplar, sassafras and red oak. Do fan birds carve well from basswood?

Let the chips fly!  Tell your wood carving friends and spread the word about Wood Chip Chatter, and don’t forget to click the ‘Comment’ button at the bottom of the page to send in your questions and comments so we can keep Wood Chip Chatter active and keep the conversations going!

And remember, we need your photos!  I’m sure you all have some terrific carvings to share and photos of your carvings will help to liven up the blog’s appearance and make it more interesting.  Perhaps we can start a carvers photo section!  Email your photos to carverbobk@woodchipchatter.com


Keep a sharp edge and keep on carvin’!


Wood Burning A Black Background

The following is a short tutorial for all you wood burners out there, on how to burn a black background.  There’s much more to it than just rubbing your burning pen back and forth all over (as I would have thought).  Read on and learn some tips on proper wood burning technique.  

Wood Burning A Black Background

Burning a black background is quite simple, but produces a lot of smoke and can add a few extra hours of work to a piece. The key is to be patient and take your time. (It’s also a good idea to use a respirator or work in a well-ventilated area.)

I use the Walnut Hollow Creative Versa-Tool wood burner and the shading point. Lay the point flat on the wood move it back and forth, very slowly, in small half inch sections. Working in smaller sections helps to hold the heat in the wood and keeps the point from cooling down too fast.

Go in the same direction as the wood grain if possible. Keep moving the tip back and forth until the wood gets very black then move over to a new section.

Don’t use too hot of a setting or you can scorch the upper layers of wood, causing irreparable damage. (I use the high temp setting on the Versa-Tool but other burners may be too hot on their highest setting. Experiment on a scrap piece of wood first to dial in the temp.) Just be patient and keep the burner moving at all times, keeping a soft touch. If you press really hard then you’ll dent the wood and bend the tip.

The burner will cool down a lot after a few minutes of black burning and you will see some carbon buildup as well. If you set the burner to the side and wait 5 minutes, it will regain optimal temperature and most of the carbon will burn off on its own. I usually use two burners and switch back and forth between them so I always have a hot burner ready to go.

Also, the type of wood plays a large factor in creating a nice black background. In my experience, it is almost impossible to get a good black on Pine. My preference is Basswood for making smooth, dark backgrounds. And as always, sand the wood until super smooth before burning.

Woods Commonly Used For Carving

  • American Mahogany
  • Apple
  • Basswood
  • Black Walnut
  • Butternut
  • Cherry
  • Dark Red Meranti
  • Holly
  • Padauk
  • Pau Marfim
  • Persimmon
  • Purplheart
  • Red Alder
  • Soft Elm
  • Sycamore
  • Yellow Poplar
  • Zebrano

READERS’ COMMENTS

We have only one readers’ comment this time around.

spandexsplinters commented on my last post on Fitting a Baseball Hat on a Head and said: “This is super helpful! Thanks”

I‘m glad you found the information useful.  I hope more people did.

Let the chips fly!  Tell your wood carving friends and spread the word about Wood Chip Chatter, and don’t forget to click the ‘Comment’ button at the bottom of the page to send in your questions and comments so we can keep Wood Chip Chatter active and keep the conversations going! 

And remember, we need your photos!  I’m sure you all have some terrific carvings to share and photos of your carvings will help to liven up the blog’s appearance and make it more interesting.  Perhaps we can start a carvers photo section!  Email your photos to carverbobk@woodchipchatter.com

Keep a sharp edge and keep on carvin‘!

Someone told me half of all car accidents happen within a mile of your home.  So I moved.

Fitting a Baseball Hat on a Head

Fitting a Baseball Hat on a Head

The picture tutorial shown below demonstrates how a baseball hat can be fitted onto a head to give the natural look that the head is actually inside the hat rather that the hat sitting on top of the head.  This method is the one used by Lynn Doughty to fit cowboy hats onto his figures and can be used for fitting any kind of hat.

1.  Patterns used.

1

2.  First carve, paint and finish the head.  Then cut off the top of the head with a band saw, scroll saw or disk sander.

2

3.  Carve the outside of the hat but do not carve anything on the inside yet.

3

4

4.  Place the hat on top of the head exactly the way you want it to look.  Then carefully mark around the head on the underside of the hat with a pencil.

5

5.  Carve out a shallow area in the bottom of the hat staying inside your pencil lines.

6

6.  Continue carving and adjusting the underside of the hat until it fits over the top of the head the way you want it.

7

7.  Once the hat fits, carve the inside of the hat bill with a # 3 gouge to give it a rounded look.

8

8.  At about the center of the head drill a 9/64″ hole about 1/2″ deep.

9

9.  Insert a 5/8″ long 1/8″ dowel into the hole (the 9/64″ hole and 1/8″ dowel allow for a little play when fitting the hat for the final time).  Blacken the end of the dowel with the pencil.


10

10.  Refit the hat onto the head and press down firmly.  The graphite on the end of the dowel will leave a black mark on the inside of the hat.

11

11.  Replace the 5/8″ long dowel in the head with a longer 1/8″ dowel and glue it in place.

12

12.  At the black mark inside the hat drill a 9/64″ hole being careful not to drill through the hat.  Fit the hat into the head  (usually I only set the hat down over the head 3/6” to 1/4”… Just above the top of the ears) just enough to give the impression that the head is up inside the hat and not that the hat is sitting on top of the head.  Glue the dowel into the hat as you make the final adjustments fitting the hat on top of the head.

Tip:  Paint and finish the head and hat BEFORE fitting them together.

READERS’ COMMENTS


Our first comment today comes from Phyllis from Pennsylvania with some invaluable advice on taking photographs of your wood carvings.  Phyllis writes:

“Hello CarverBob, my friend,

These 4 photos are a picture of a Grinch carving I did last year. It is carved in cottonwood bark, which I really love to carve.

The subject isn’t about the carving but about taking pictures of your carvings. So many times on FB I see pictures of carvings that have a very busy background and it is sometimes very hard to make out the carving. The 4 pictures I posted give you somewhat of an idea which backgrounds might look better and which ones make the picture too busy.”


“Think about your picture before you post it, see if the background suits the carving and if people can actually make out the carving and it’s details. Sometimes I actually have to tilt my phone to get a better picture also.

That being said, I am not a professional photographer, but I try my best to make the photo turn out great.

Thanks,

Phyllis”

Excellent advice, Phyllis!  I, too see so many otherwise great carvings displayed in photos having cluttered backgrounds.  I see them taken on tables with lamps and pictures in the background, or on workbenches with paint bottles, brushes and assorted other stuff in the background.  Many carvers don’t think of how the background affects the look of the carving, and your photos illustrate that perfectly.

You can see in the first two photos with the cluttered backgrounds how difficult it is to see the carving.  The clutter detracts from the carving.  On the other hand, in the second two photos with the plain, uncluttered backgrounds the carving shows up clearly.  So you can easily see what a difference the background makes when taking a photo of your carving.  Think about that the next time you are photographing your carvings.

Thank you so much for sending in that fine information!  I’m sure there are a lot of carvers out there who can benefit from it.

Our next note comes from Susan Rindchen who comments on carving extreme pumpkins and the ‘Extreme Pumpkin Carving’ book I reviewed in my last blog.  Susan writes:

“I have carved pumpkins for yrs. I have carved every one in the book. I bought the book when it was first published. I used to carve my pumpkins with my wood carving tools. Now I carve with a knife and clay ribbon tools. I find they work better. Try carving a pumpkin it is fun to carve.”

Thank you for writing in, Susan!  You must be a very accomplished  pumpkin carver by now, and we would love to see photos of some of the pumpkins you have carved.  I have dabbled in carving extreme pumpkins (I’m not very good at it yet) and have also found that the clay ribbon tools work best.  I believe the world renowned pumpkin carver, Ray Villafane, uses ribbon tools when he carves his magnificent pumpkins.  Any carver who wants to have some fun and try something new should pick up a copy of ‘Extreme Pumpkin Carving’ and a set of clay ribbon tools and give pumpkin carving a try.

Let the chips fly!  Tell your wood carving friends, and spread the word about Wood Chip Chatter, and don’t forget to click the ‘Comment’ button at the bottom of the page to send in your questions and comments so we can keep Wood Chip Chatter active and keep the conversations going! 

And remember, we need your photos!  I’m sure you all have some terrific carvings to share and photos of your carvings will help to liven up the blog’s appearance and make it more interesting.  Perhaps we can start a carvers photo section!  Email your photos to carverbobk@woodchipchatter.com

Keep a sharp edge and keep on carvin’!

Courtesy of Wayne Smith

Extreme Pumpkin Carving

“Extreme Pumpkin Carving”

by Vic hood & Jack A. Williams

A Book Review

It’s already just 2 months until Halloween and you’re all probably thinking about carving your Halloween pumpkins.  Well “Extreme Pumpkin Carving” is just the book to help you turn out one of the most outrageous big orange gourds in the neighborhood.

Front Cover

Back Cover

“Extreme Pumpkin Carving” is a fascinating book written by award-winning carvers Vic Hood and Jack A. Williams that will take your Halloween decorating to a new level!  This revised and expanded second edition of “Extreme Pumpkin Carving”, published by Fox Chapel Publishing in 2013 is a revised version of the book originally published in 2004.

Comprehensively written, this book covers everything you need to know to create the best jack-o-lantern on your block.  Filled from beginning to end with color photos this 103 page book takes you step by step through two projects…one being a little more difficult that the other.  The first four page cover selecting the right pumpkin and preserving your pumpkin.  There are also a list of interesting Pumpkin Facts and a captivating story about Halloween lore.

Sample Page

Included are 20 fabulous patterns which show not only the pattern but a color photo of the finished pumpkin.  Also, there are 23 color photos of examples of amazing finished Extreme Pumpkins, some of which were winners at state fairs and competitions around the country.

Sample Pattern


Finished Pumpkin


The one drawback I found with this book was that it doesn’t specifically cover the tools needed, although you can get somewhat of an idea of the tools being used from the photos.

For any carver who wants to take his pumpkin carving to the next level this fall “Extreme Pumpkin Carving” is a great book to help you get there.

READERS’ COMMENTS

Our first comment today comes  from Jerry Stennett about the use of walnut oil and other wood conditioners prior to painting.  This seems to be a wide open topic as many carvers have differing methods on what they use.  Jerry’s comment goes like this:

“Enjoying your blog. I have been carving bowls and spoons for past 4-5 years. Started carving figures( mostly santa ornaments) over past year or so including some of your patterns seen in Woodcarving Illustrated. Related to your comments about using walnut oil as the base layer of your carvings I was wondering if you dilute it with mineral spirits or do you use it straight? Do you paint acrylic paint directly over this layer? I have been using minwax wood conditioner with good results as suggested by Doug Linker. Thanks again for your efforts.
Jerry Stennett”

Thanks for your kind words, Jerry.  I’m glad you are enjoying my blog.  First off, we would love to see some photos of these terrific bowls, spoons and Santa ornaments you’ve been carving lately!  To answer your question about walnut oil, I do use it straight (undiluted) out of the bottle, and I let is sit for about 30 minutes before painting.

I didn’t know Doug Linker has been using Minwax Wood Conditioner.  I’ve always seen him (at least in the videos I’ve watched) paint directly over the wood.  I’m sure, though that the Minwax product works well too.

Our next comment comes from my friend Jakobo Santiago from the Canary Islands with a captivating explanation about how wood is cured there.  Jakobo writes:

“Hi there. How are the wood carvings going?
I’ve been doing a bit of research on curing wood in salt water. It is the traditional method of curing the wood where I live and it was used both to build boats and houses, docks or statues.
The process consists of submerging the freshly cut logs in the sea for a period of 6 months to 3 years, depending on the type of tree and its size (normally pine but other woods also).
With this process, it is achieved that all the fluids of the wood (at the cellular level) are replaced by salt water. Then they allowed the wood to dry for 3 months to 1 year in the sun.
In this way, the wood was protected with salt from the attack of fungi and insects, and its resistance and structural stability were increased. transporting freshly felled trees down rivers and storing them in backwaters or lakes serves the same function. Today this traditional technique is still used.
Hope you liked it!”

That is some compellingly interesting information, but if you think about the chemistry behind the process (I have a chemistry background) it all makes very good sense.  After this process I imagine the wood becomes rather hard to carve.  Do you find that it is harder to carve this treated wood rather than carving fresh cut pine or pine that has just been allowed to air dry for about 6 months?

Our next comment comes from Bob Nesbit in response to our recent topic on stropping.  Bob writes:

“Bob,
Enjoyed the article on stropping which gave me an idea. My strop is smooth on one side which I use Cape Forge stropping compound on and the other side is a rough leather. I use this side after stropping after the smooth side. I try the final strop on a smooth leather now and see if the results are better. Correct stropping is one of the most talked about subjects in our club, so thanks for the information.
Also enjoyed the older couple walking along the beach, as that is where my wife of 48 years and I are at. It sure would have looked different when we were in our 20’s.
Regards
Bob Nesbit”

Thank you for writing in, Bob.  Let us know how the change in your stropping method works out.  I’m interested to know.

Let the chips fly!  Tell your wood carving friends and spread the word about Wood Chip Chatter, and don’t forget to click the ‘Comment’ button at the bottom of the page to send in your questions and comments so we can keep Wood Chip Chatter active and keep the conversations going! 

And remember, we need your photos!  I’m sure you all have some terrific carvings to share and photos of your carvings will help to liven up the blog’s appearance and make it more interesting.  Perhaps we can start a carvers photo section!  Email your photos to carverbobk@woodchipchatter.com

Keep a sharp edge and keep on carvin’!

Wood Properties of White Pine

White Pine is one of the wood species requested for a Wood Properties list, so today’s blog begins with the list of the Wood Properties of White Pine.

Wood Properties of White Pine


READERS’ COMMENTS


Dean Stewart wrote in to comment on the topic of strops from my last blog:

“Bob,
Thanks for the tip on the smooth strop. I’ll try that and see how it works. To answer your question the strop is the only Beavercraft item I have. The quality is first rate. Its made of hardwood with leather on both sides and the leather is right up to the edges. Your entire blade can fit on the strop.”

BeaverCraft Strop & Green Compound

Thanks for the input on the BeaverCraft strop, Dean!  From your photo it looks like an excellent, well made strop so I can see why you’re pleased with it.  As I had mentioned, I don’t know anything about BeaverCraft but from what I’ve heard everyone who has bought their products has been more than happy with them.  Did you buy the strop directly from BeaverCraft or from a supplier who carries their products?  Has anyone else had any experience with BeaverCraft?

Our next comment comes from my good friend Wayne Smith from Nova Scotia is response to my comments about the use of BLO on our wood carvings.  Wayne writes:

 “Hi Bob,…. I’ll add my .02 cents worth on the BLO discussion. I used to use a mix of blo and burnt umber, but for several reasons ,…convenience being #1 I switched to a Danish Oil based product that I get from Lee Valley Tools that they sell listed as “Tried &True “. Sure it’s a bit more pricy than blo, but heck, it’s not like I’m using gallons of it, and it gives a great finish IMO”

It’s true, Danish oil (and walnut oil) are a bit more expensive than commercial grade BLO but for my money they’re well worth it for the benefits you get from them.  I too like the finish results I get and I must say the finish on your carvings always looks great as well.

PRODUCT NOTE

In my last blog Dennis Hess sent in some photos of the beautiful Comfort Birds he’s been carving from a product called ‘Spectraply’.  I never heard of ‘Spectraply’ so I did some research on it.  The response to my query comes from Rockler who sells ‘Spectaply’ as bottle stopper and pen blanks for wood turners.  Here is Rockler’s response:

“Spectraply is made from veneered layers of premium yellow birch that have been brightly dyed,  The veneers are dyed under extreme pressure for full penetration of the dye throughout the wood. After drying to 5% moisture content, they are then laminated in a radio frequency press for an unfailing bond.”

This is an educated guess on my part but I believe ‘Spectraply’ is the same material Helvie uses to make their beautiful multicolored knife handles.


Let the chips fly!  Tell your wood carving friends and spread the word about Wood Chip Chatter, and don’t forget to click the ‘Comment’ button at the bottom of the page to send in your questions and comments so we can keep Wood Chip Chatter active and keep the conversations going! 

And remember, we need your photos!  I’m sure you all have some terrific carvings to share and photos of your carvings will help to liven up the blog’s appearance and make it more interesting.  Perhaps we can start a carvers photo section!  Email your photos to carverbobk@woodchipchatter.com

Keep a sharp edge and keep on carvin’!

I’ve got a new job with 500 people under me.  I cut the grass at the cemetery.

Question & Comments

We received several fascinating questions and comments this week which I believe everyone will benefit from so today’s blog is dedicated to discussions surrounding those thoughts.

QUESTIONS & COMMENTS

Our first comment comes from Mike Rowe from the UK regarding the last blog where I talked about Comfort Birds.  Mike says:

“you can never have enough comfy birds”

You are so right, Mike.  There are so many people in need of them.

Our next comment comes from Phyllis Stone from Pennsylvania.  Phyllis relates to the joke in my last blog and writes:

My friend Bob,

“I couldn’t help but laugh about your joke about vegetarians killing all the plants.  It was hilarious especially since I’m one of those vegetarians. Lo!”

Well the only thing I can say to you, Phyllis is “You should be ashamed of yourself!”  Lol

Our next comment comes from Dean Stewart in response to the topic of stropping knives.  Dean writes:

Regarding Strops. I have about 5 at this point. Two that I made myself with thick 1/8 inch cow hide glued to a board backing. One of the is an old paddle I found at a flea market. It has a nice handle and I can run the leather over the side for gouges. My others include a flexcut tool strop, a pig skin and a double sided cow hide from Beavercraft. The Beavercraft is smooth side up. Since all my others are smooth side down, I was never sure this strop was useful. Maybe some others could comment on which side of the leather is best or if you have to use them differently.

I use the yellow compound for all mine even though the Beavercraft came with green. I found the green too soft and it seemed to gum up the process. I think I might try you idea of oxide powder. I may like that better.

Great topic of conversation.

Dean also sent in a photo of his strop collection:

Thanks for your comments, Dean!  We need more of you to send in your comments on what kind of strops you use and how you strop your knives so we can get a conversation going.  It’s real easy!  Just click the Comment button below and add your comment.  We all want to hear what you have to say.

The yellow compound is the one recommended by Flexcut and it is include when you buy their strop.  I think the green compound is soft because it uses chromium oxide rather than aluminum oxide which I believe is a softer metal oxide compound.

The strop you have with the smooth side up is very useful.  It can be used after stropping with compound to give an even finer edge to the blade.  The smooth leather also cuts the steel on your knife blade but extremely slowly so it actually polishes the blade and gives a finer edge.

I see one of your strops comes from BeaverCraft.  Have you ever bought anything else from Beavercraft?  I know of carvers who own knives from them.  I think BeaverCreaft is   relatively new company but other than that I don’t know anything about the quality of their products and services.  Can you or anyone else comment on BeaverCraft?  I’d like to know more about them.  Just click on the ‘Comment’ button below.

Dennis Hess sent in some comments and wanted to share a couple of pictures of the beautiful Comfort Birds he’s been carving.  Dennis says:

I wanted to share my comfort birds that I have been making for awhile. They are made out of Spectraply turning blanks for Cousineau Wood products and I use my power carver to shape these birds. The wood would be too hard for a knife. I love the different colors that you can get and make. I hope that you enjoy them.

Secondly, I thoroughly enjoy your emails and I would like to see the wood properties of butternut, white pine, red oak, and tupelo. I enjoy the book reviews as well. 

One question I have deals with either soaking or painting a carving with BLO. What are the benefits with BLO and do you paint with acrylics after BLO sets for a day or two or do you paint right away?

Thanks for what you do as I am a fan of yours now.

Dennis Hess

Those sure are some mighty fine looking Comfort Birds, Dennis!   I really like the various colored stripes you get in them.  I’m assuming Spectraply is some sort of plywood product, or is it man made, like a resin?  Unless you’re a knife purist or don’t have a power carver, power carving seems like the way to go when carving Comfort Birds.  One reason is that it’s faster, especially if you are carving many of them.  The second reason is Comfort Birds are mostly carved from hard woods like walnut, cherry and maple, and it goes without saying that hardwoods are hard to carve with a knife.

Thank you so much for the photos of your Comfort Birds, Dennis.  I’m sure everyone enjoyed seeing them…I know I did.  How about some of you other carvers?  What types of woods do you use to carve your Comfort Birds, and do you use power or a knife?  Let’s hear from you!  Just click on the Comment button below.

I’m glad you’re enjoying Wood Chip Chatter and appreciate your input about wanting to see more wood properties lists and book reviews.  Since you mentioned butternut, white pine, red oak and tupelo I will try to post those lists soon in future blogs.

Now let me answer your question about painting and using BLO (Boiled Linseed Oil).  When using BLO before painting my carving I have found that it doesn’t really make any difference whether I let the BLO dry for a day or paint right away.  However, if I paint right away I will allow the BLO to soak in for about 30 minutes to 1 hour before painting. 

Now for my speech on BLO.

After using BLO over many years of carving I have sadly discovered that the BLO caused the carvings to ‘yellow’ over time.  The reason I believe this is that commercial grade BLO, which everyone uses and buys in the hardware store is not highly refined, and so it has a lot of impurities in it.

There is, however, an ‘Artist Grade’ BLO available from Amazon or art supply stores that is more highly refined and much purer than commercial BLO, which is not supposed to  yellow over time.  The problem with this ‘Artist Grade’ BLO is that it is very expensive when compared to the cost of commercial BLO.

My solution to the BLO problem is to use either Danish oil or walnut oil.  These two oils have several advantages over BLO.  They work the same way as BLO (I get the same results), they don’t have a strong odor like BLO (walnut oil has no odor at all), they will not yellow your carvings, and they don’t have the same safety (combustibility) concerns as BLO.  Walnut oil is my personal favorite and is what I’ve been using for the past year.

Let the chips fly!  Tell your wood carving friends and spread the word about Wood Chip Chatter, and don’t forget to click the ‘Comment’ button at the bottom of the page to send in your questions and comments so we can keep Wood Chip Chatter active and keep the conversations going! 

And remember, we need your photos!  I’m sure you all have some terrific carvings to share and photos of your carvings will help to liven up the blog’s appearance and make it more interesting.  Perhaps we can start a carvers photo section!  Email your photos to carverbobk@woodchipchatter.com

Keep a sharp edge and keep on carvin’!