Happy New Year and congratulations! You’ve all made another trip around the sun and 2024 is here! I hope you all had a very pleasant holiday season, and now it’s time to get back down to business.
As I usually do at the beginning of each new year I will start off this month with the current list of Woodcarving Shows & Events coming up for the first half of 2024. I hope you will all find some time to get out and participate, or at least visit a show or two this year. Attending a show is a great way to learn about what’s going on in the woodcarving community. meet other carvers, purchase some new tools, wood or accessories, and to also pick up some new carving ideas. So find a show near you and get out there!
Upcoming Shows & Events for 2024
January 12-13 – Punta Gorda, Florida. Southwest Florida Wood Art Ex position & Competition at Charlotte Harbor Event and Conference Center, 75 Taylor Street; 9 to 4 both days. Jim O’Dea (941) 697-2002, jeodea@aol.com. swflwoodartexpo.org
January 14 – Port Orange, Florida. Friends Carving Club hosts show at Adult Center of Port Orange, 4790 S. Ridgewood Avenue; 9am to 4pm. No entry fee. Call Connie Teeters (386) 624-2334; or email Connieteeters49@gmail.com.
January 19-20 – Pharr, Texas.. Rio Grande Valley Woodcarvers’ 37th competition/show at Nomad Shrine Club, 1044 W. Nolana Loop. Fri. 10-4; Sat. 9-4. Donation $5; children under 12 free with adult.
Email: rgvcarvers@rgvcarvers.org. Web: www.rgvwoodcarvers.org.
January 22-27 – Pharr, Texas. Rally on the Rio woodcarving classes at
Nomad Shrine Club, 1044 W. Nolana Loop. Email; rgvcarvers@rgv
carvers.erg; web: www.rgvwoodcarvers.org.
February 8-19 – Tampa, Florida. Woodcarving show and competition
at Florida State Fair. Competition open to all Florida residents, in i
cluding seasonal. Call Brenda Gregory (813) 734-2810; or email brenda.gregory@floridastatefair.com.
February 24-25 – Mesa, Arizona. 34th Desert Woodcarving Show and Sale at Mesa Centennial Hall, 201 N. Center St. Bobby Gray (480) 323-8981; bgray839@gmail.com.
March 2-3 – Middletown, Ohio. Miami Valley Woodcarvers present annual show and sale at Christ United Methodist Church, 700 Mar shall Road South. Saturday 10 to 5; Sunday 12:30 to 5. Visit website miamivalleywoodcarvers.com.
March 9-10 – Millersville, Penn. 49th annual Wonders in Wood pre sented by Lancaster County Woodcarvers at Millersville University, 108 Shenks Lane. Bob Hershey (717) 951-5569; bzcarvn@ptd.net.
March 23-24 – Shelby Twp., Michigan. 42nd Metro Carvers of Michi gan Artistic Creations in Wood Carving Show at Packard Proving Grounds, 49965 Van Dyke Ave., 10am to 4pm, $7 for adults, Sharon Hill (586) 557-3712, sharon0229@att.net.
March 23-24 – Rochester, Minn. Rochester Woodcarvers 48th Show at Aune Hall (formerly 4-H Building), Graham Park (formerly Olmsted County Fairgrounds), 1508 Aune Drive SE, 10am to 4pm. Free admission, Call (507) 254-5445; email rochcarve@gmail.com. Website: http://www.rochesterwoodcarvers.com.
April 13-19 – Kerrville, Texas. Texas Woodcarvers Guild hosts SpringRoundup at Kerr County Youth Activity Center. Show and sale April 13-14; classes April 15-19. Website: https://texaswoodcarversguild.com/.
April 20 – Westby, Wisconsin. “Karve in 8” at Westby High School Gymnasium, 206 West Ave. So.; 10am to 4pm. Free Admition. Steve Michaels (608) 769-8498, stevemichaels@westby-norse.org; or John Sutton at lbarnfarms@gmail.com.
June 10-15 – Maquoketa, Iowa. 56th annual international Woodcarvers Congress at Jackson County Fairgrounds, 1212 E. Quarry St. Competition and seminars sponsored by Affiliated Wood Carvers. Websites: http://www.woodcarverscongress.org. and http://www.awcltd.org. Cindy Potthast (608) 712-2989; cynthia.potthast@gmail.com.
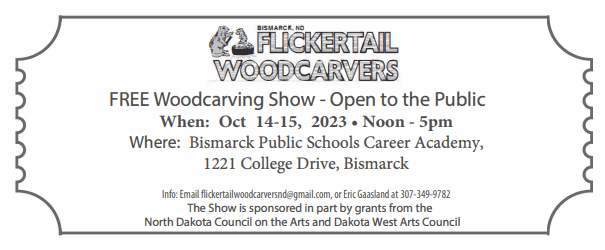
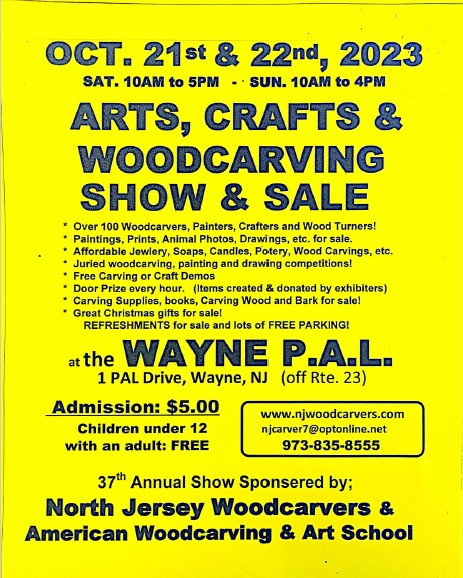
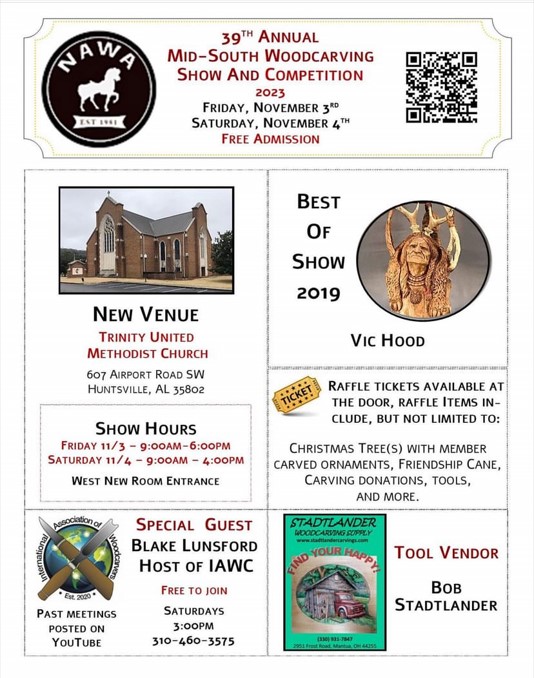
Note: If anyone has a particular show or event you would like to see promoted in Wood Chip Chatter just send my a copy of your show brochure or ad and I will be happy to include it in my News & Announcements section.
Reader’s Comments
I received a friendly little comment from my friend, Greg Gibson regarding last month’s newsletter on “Five Myths of Woodcarving.” Greg wrote:
This is a terrific post. Many thanks!
Thank you, Greg! I’m glad you liked it.
My friend, Mark Brown of Sutton, Massachusetts wrote in with an inspiring story and an excellent recommendation for all wood carvers. Mark writes:
Hi Bob,
Really enjoy your posts on Wood Chip Chatter!
I started whittling in the Summer of 2019 as a completely analog escape from my digital life as a Software Engineer. I have really enjoyed the hours spent on this fantastic hobby.
Wanted to share a recent experience I had.
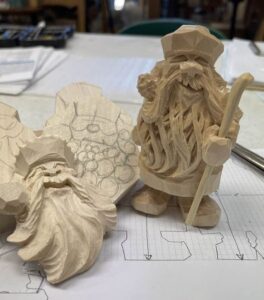
This past October I was approached by a parent from a local home schooling group wondering if I would consider doing a whittling workshop with the group. This was not something I had any previous experience with, but the thought of sharing the hobby with the next generation was appealing to me so I said “Yes”. Remembering your “Simple Santa” carving from the article in Woodcarving Illustrated, which I had done several variations of in the past, I thought that would be a great subject for this workshop. The plan was to volunteer my time and the participants would only incur the expense of materials needed (basswood blocks, shared knives and safety gear).
From that point, things moved very quickly. Before I knew it I had 17 kids between the ages of 11 and 17 signed up, which we split into 3 groups of 5-6 (which I felt would allow better interaction and 1-on-1 as needed). Overall it was a great experience! We all learned a lot and had a great time doing it!
We met once more (due to scheduling issues, 10 of the original group were able to attend) for a finishing session (touch up whittling and paint or bees wax finish). They all did a fantastic job! I have attached a picture of those finished carvings (including 1 Wizard Jockey variation) and one of my example carvings from the workshops. Since then, several of the participants have gone on to obtain basic kit and begin projects of their own (even a few parents have joined in the fun).
I found this was a very rewarding experience and I would encourage any whittlers out there to jump at the chance to do this with any age if the opportunity is there!
- Mark Brown
Sutton, Massachusetts

That’s a great story, Mark, and an excellent suggestion for all other wood carvers. It’s so important to spread the word about our craft, and especially to get the younger generations involved. Giving back and helping others is so rewarding and one of the best ways to promote woodcarving. The way I see it, woodcarving has been good to me for so many years and I feel that paying it forward is the least I can do. Congratulations on your great work!
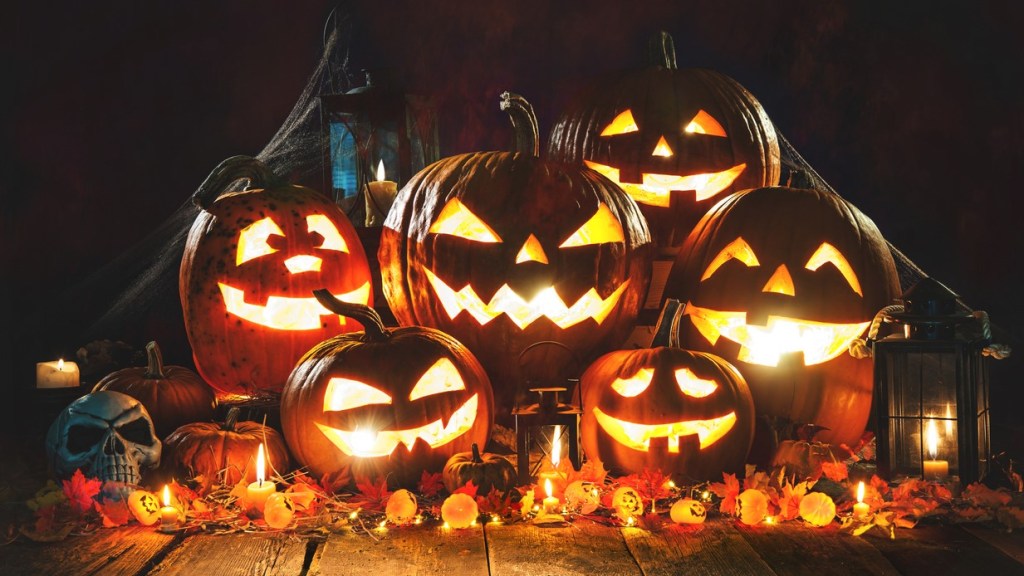
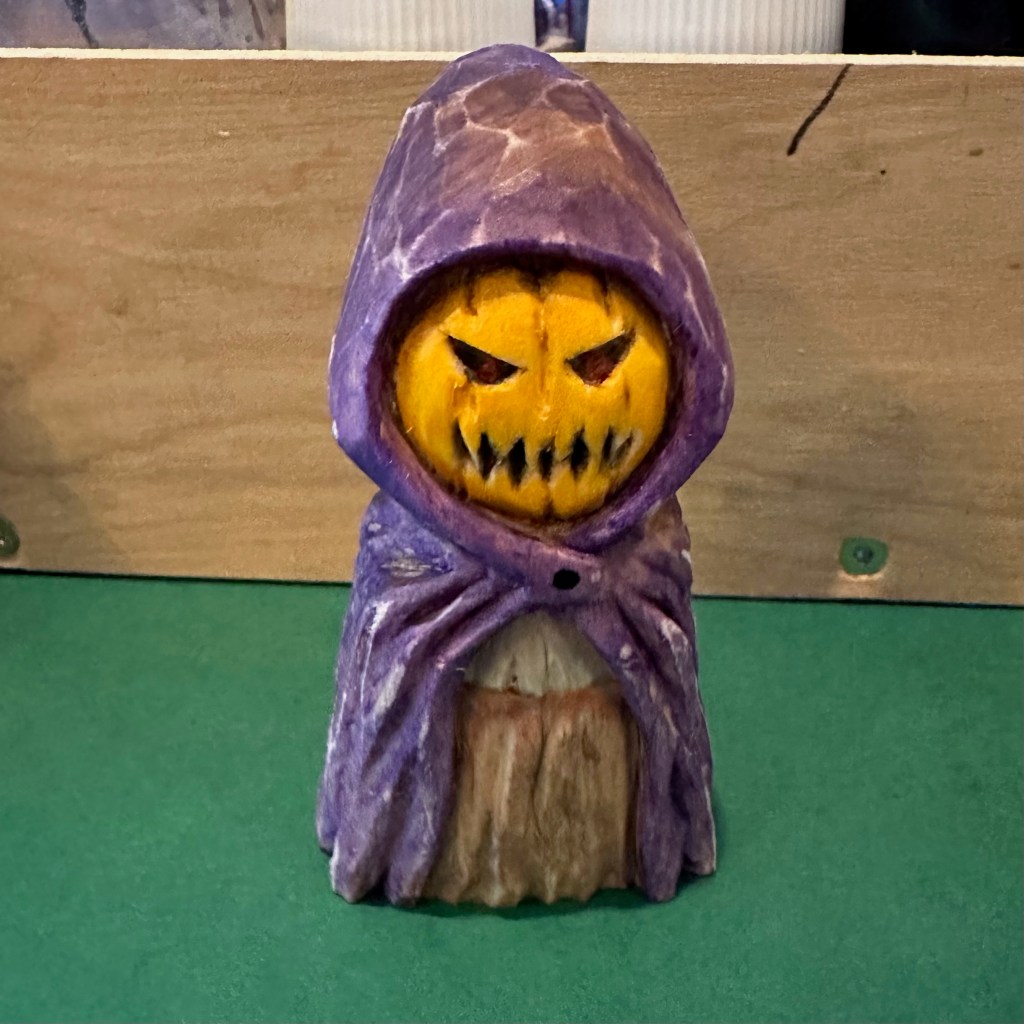
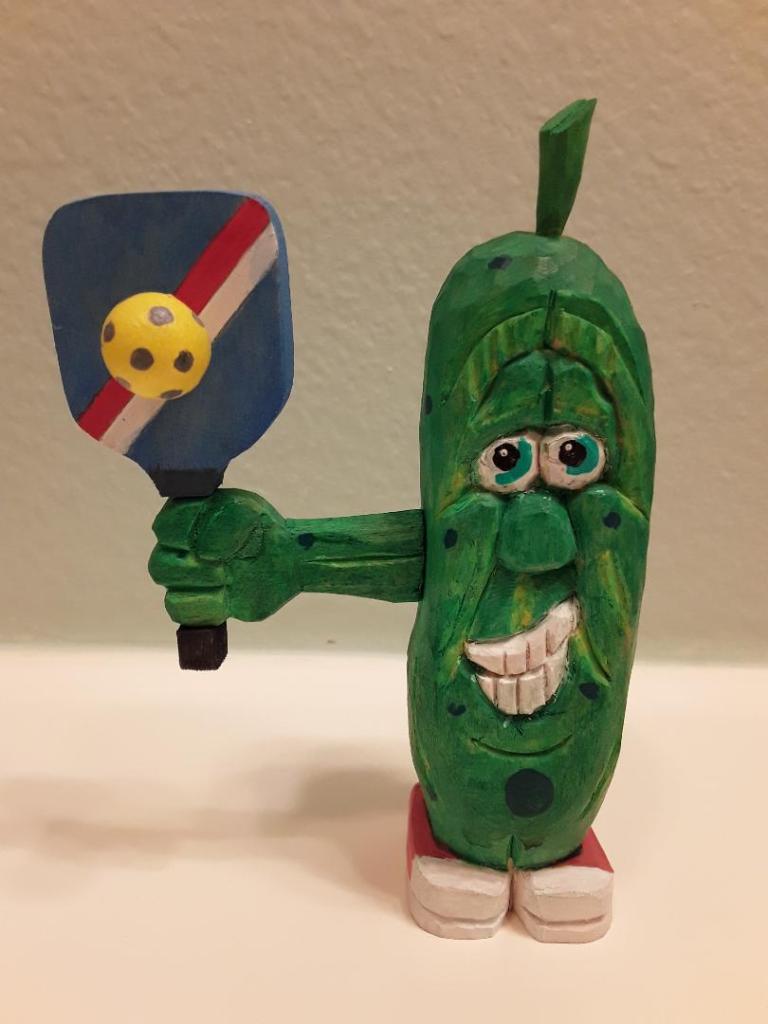
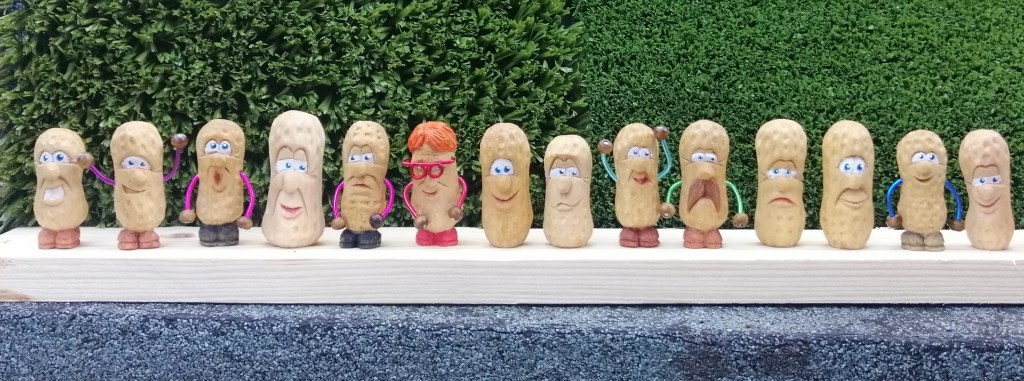
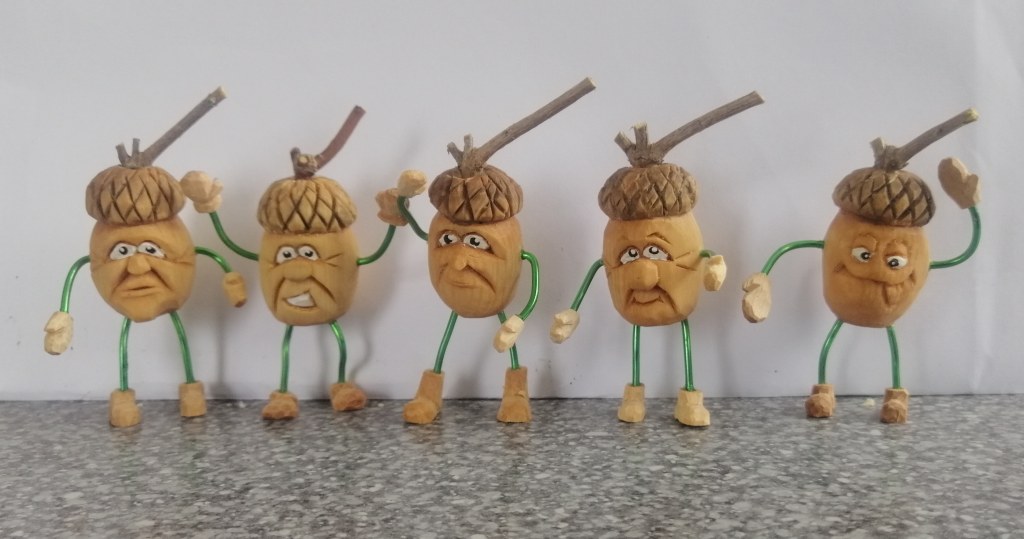
Photo Shop

“Photo Shop” is the section of Wood Chip Chatter where carvers can send in photos of their wood carvings for display. It’s your chance to show off your work…sort of a show and tell. The photos will only be displayed and no comments or critiques will be made. For critiques on your carvings send them in to the “Carver’s Corner.” Send your photos to: carverbobk@woodchipchatter.com
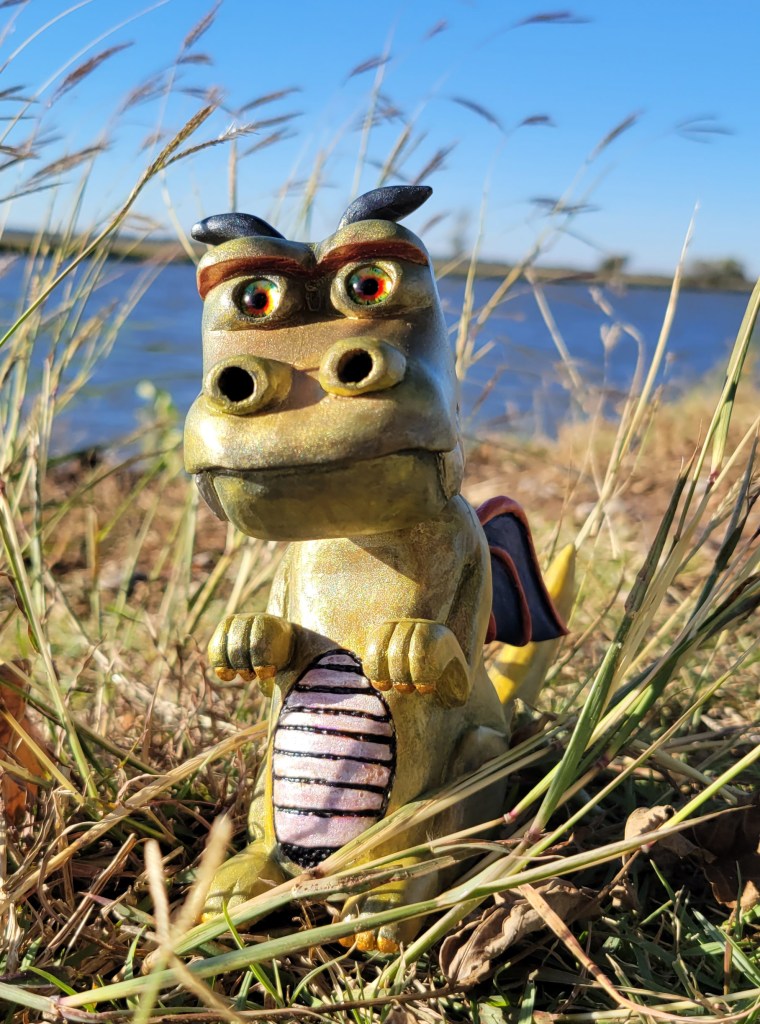
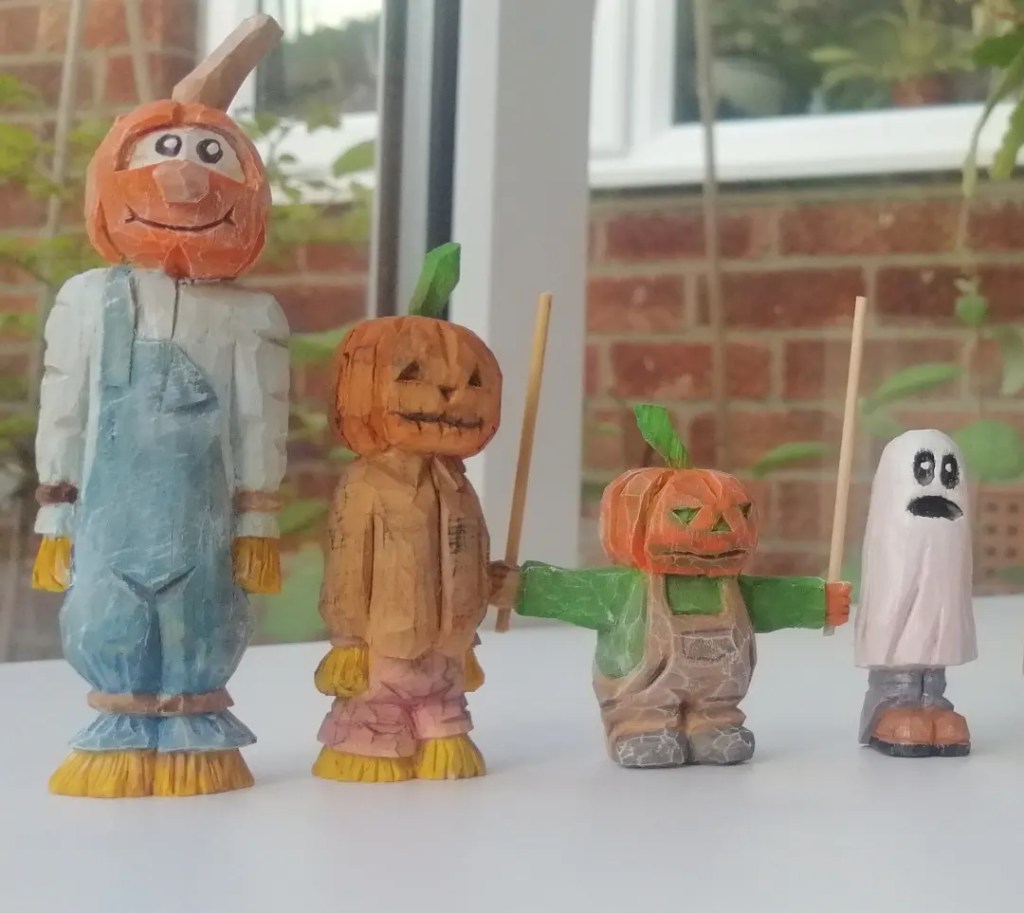
My friend, Jim Byrne who likes the “YMCA” song and evidently also likes ducks sent in a photo of his really cool “Village Ducks” dressed as the Village People who wrote the song. Jim writes:
“I always liked “YMCA” from the Village People so I made them as my Village Ducks. By the way I enjoy your postings and information.
Regards
Jim”
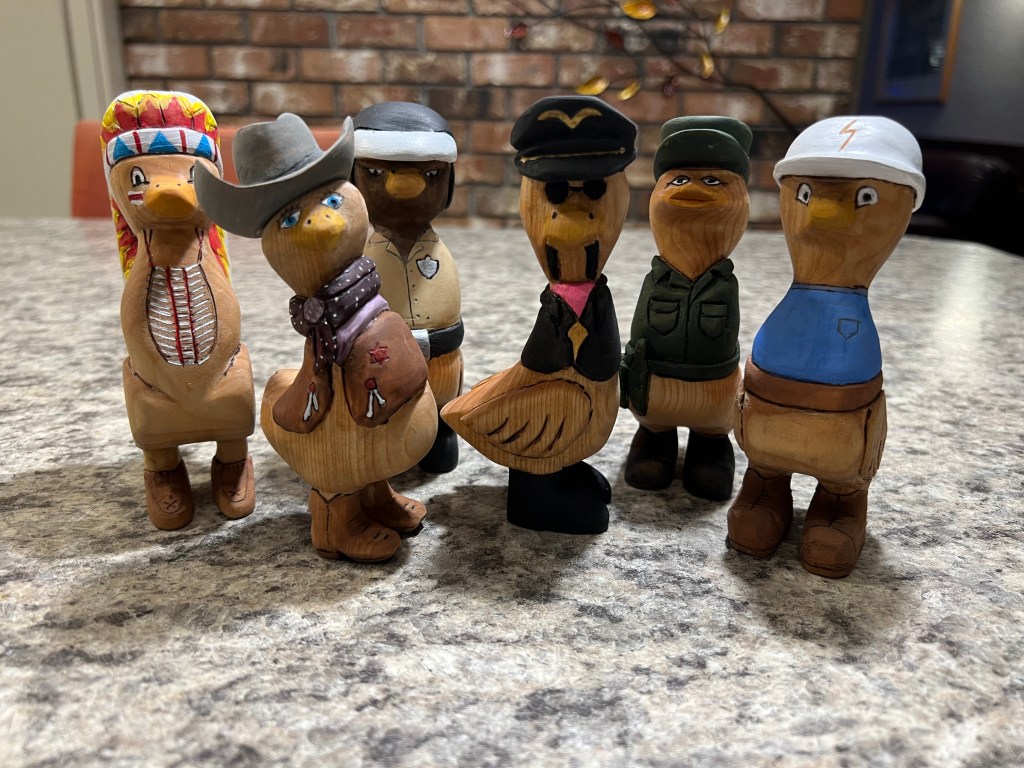
Those are great, Jim! Very original and creative, and excellently done. Thanks so much for the photo and I look forward to seeing more in the future.
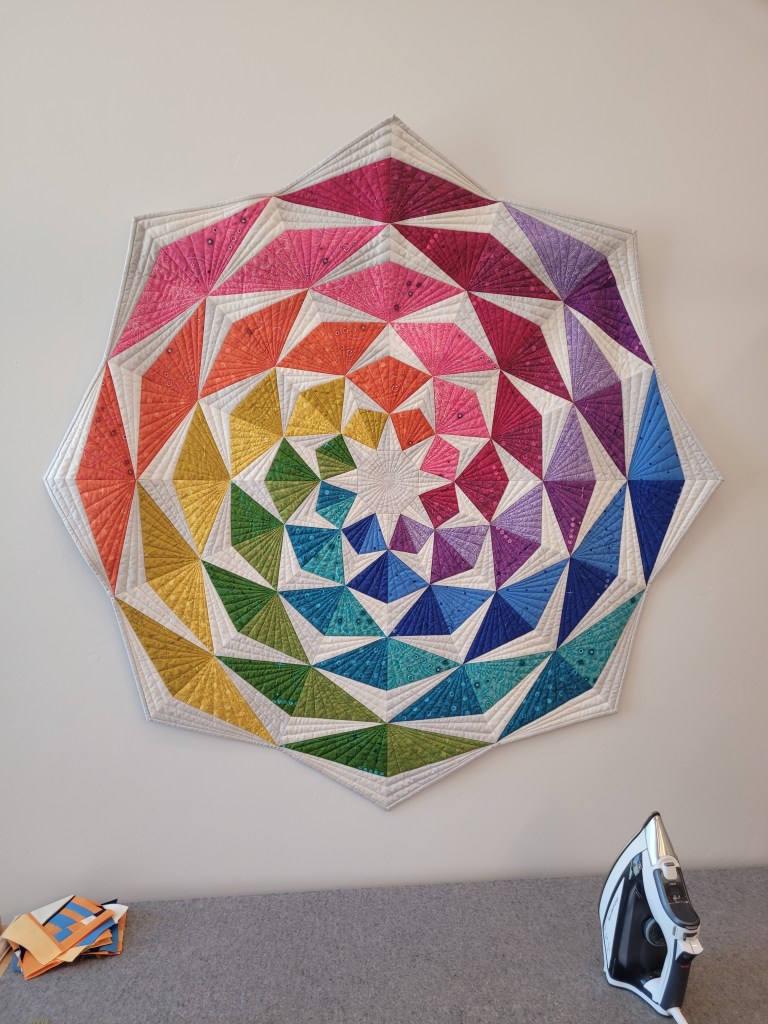
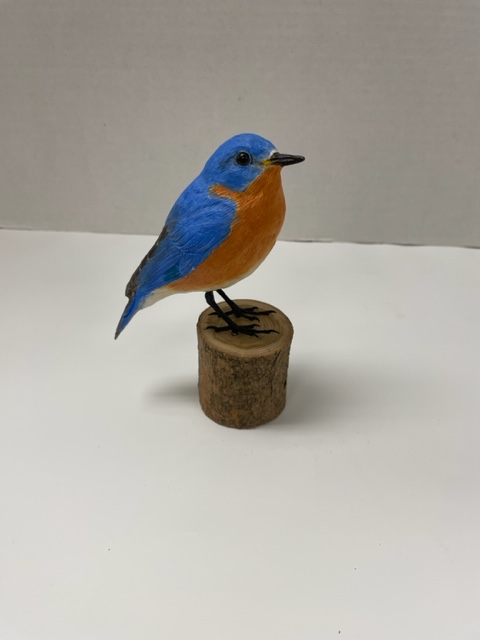
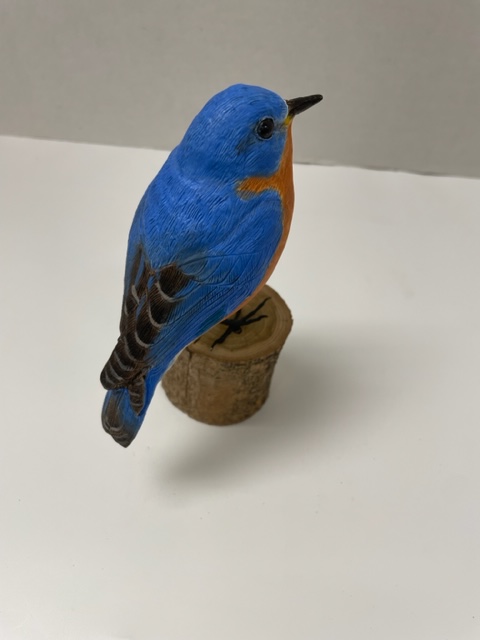
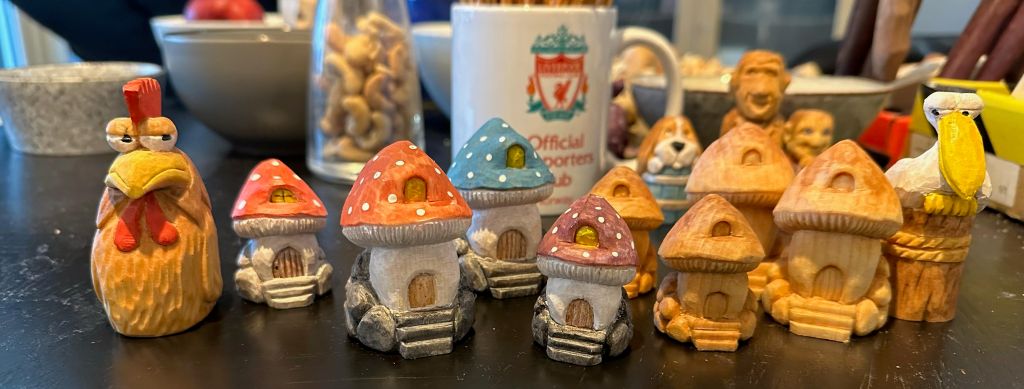
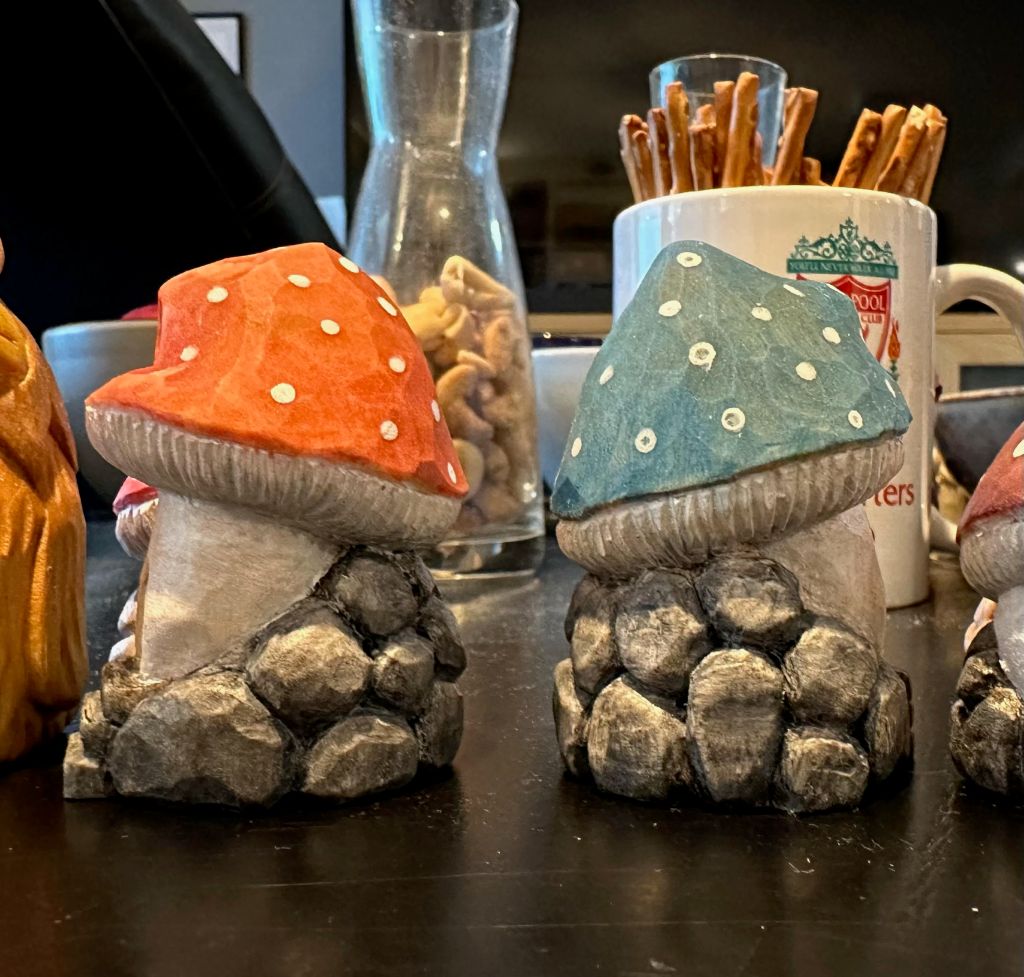
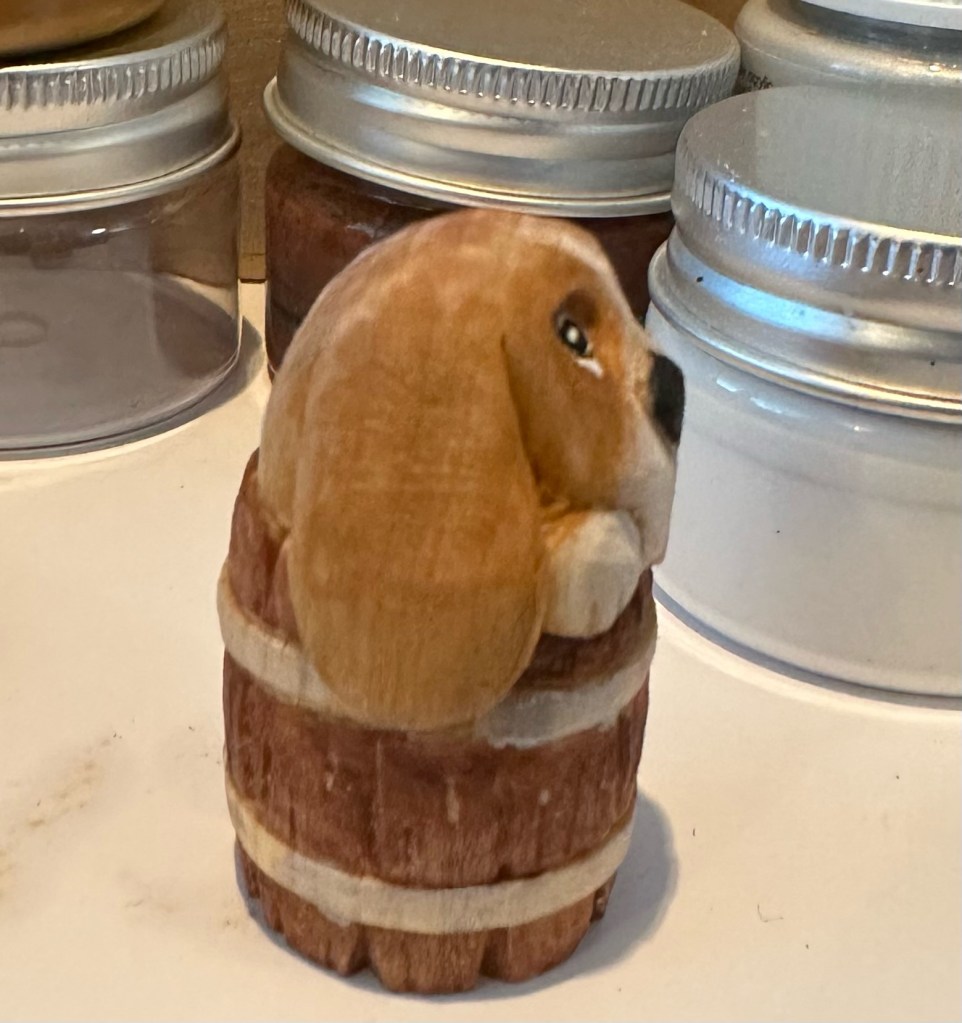
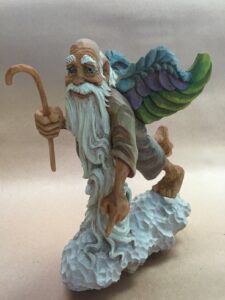
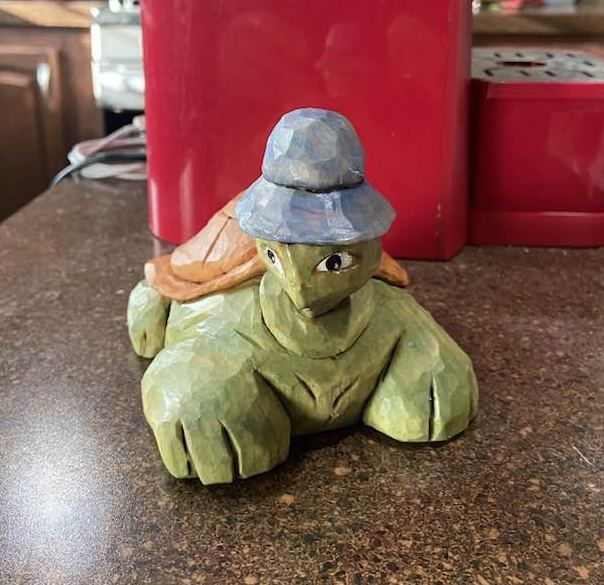
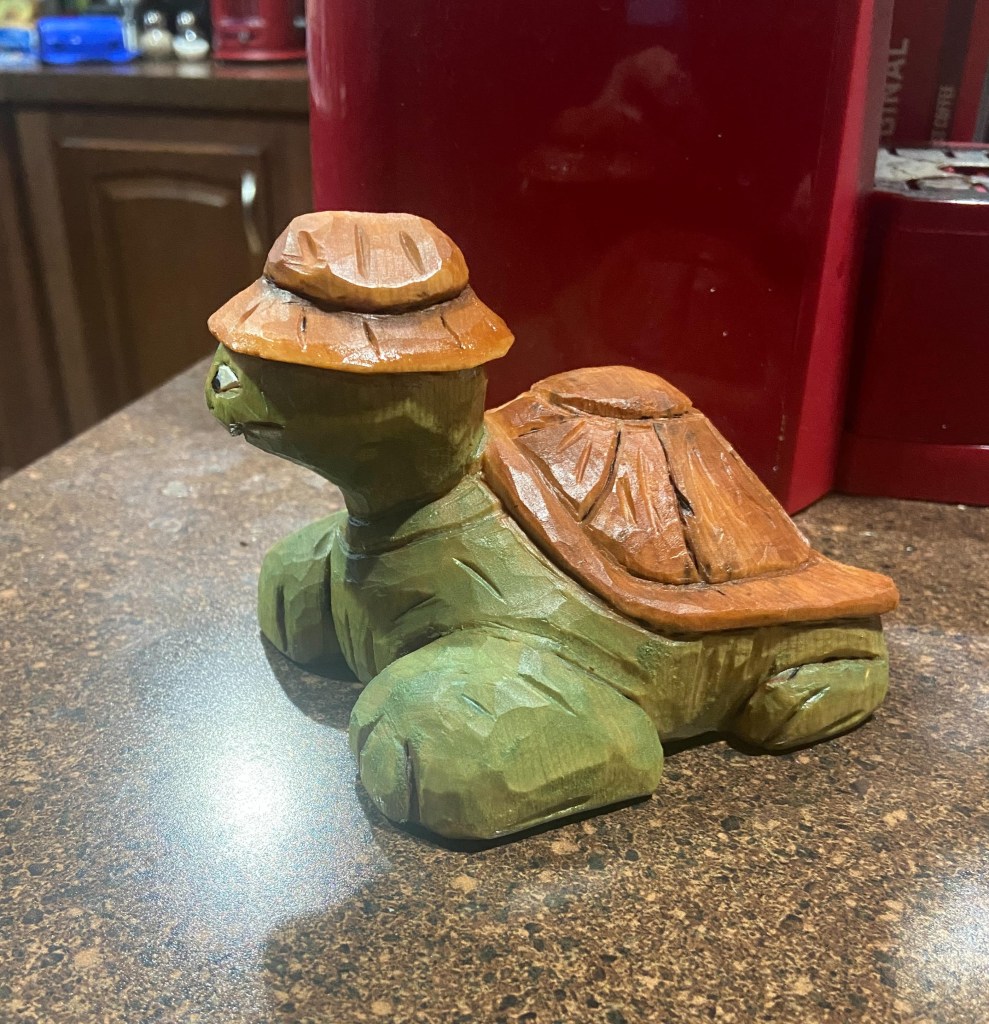
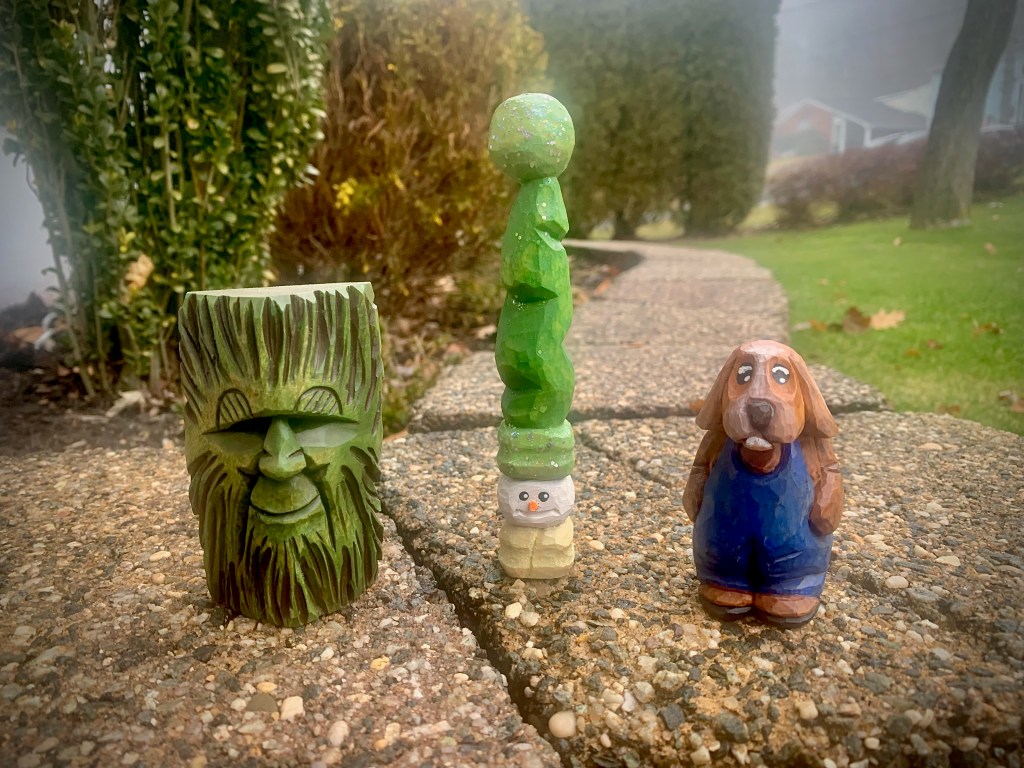
My good friend, Geir Larson of Norway has been busy and sent on a photo of his pups in barrels which you saw in a Ddalo Carving video:

Those are fantastic, Geir! I love all the variation you put into them. Also love your Ddalo pelican and your signature chicken, Olaf. Thanks for the photo and keep them coming!
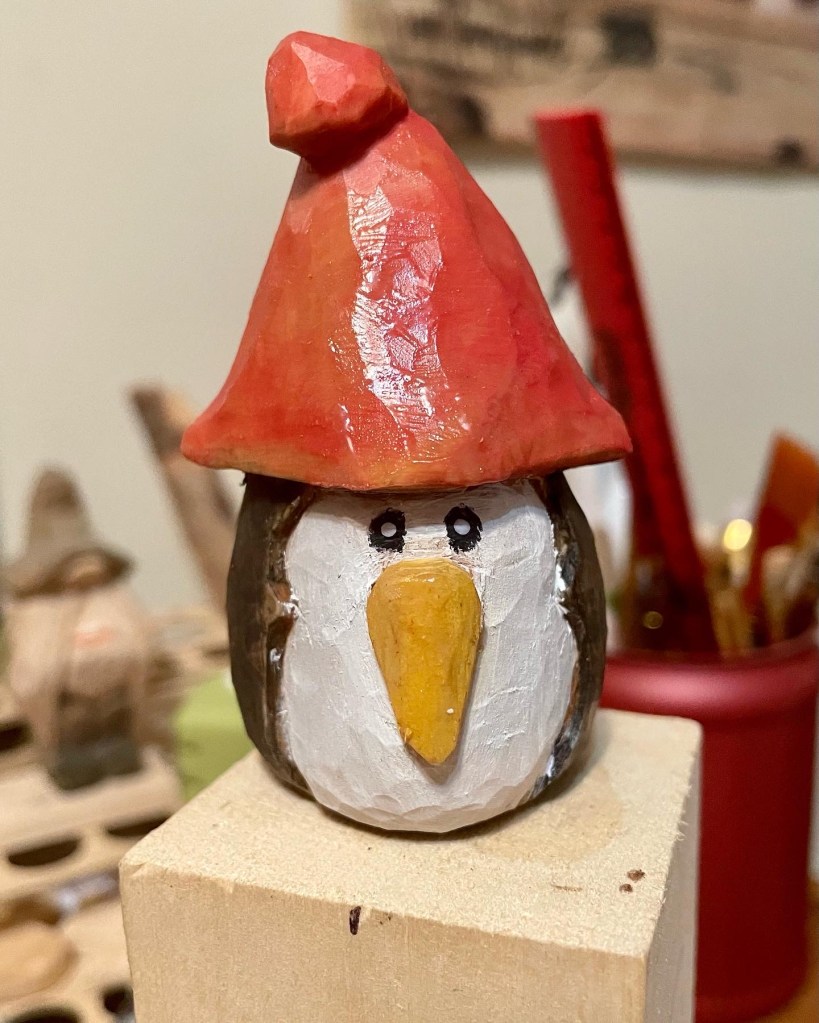
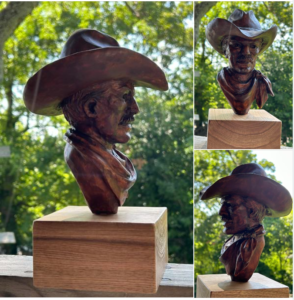
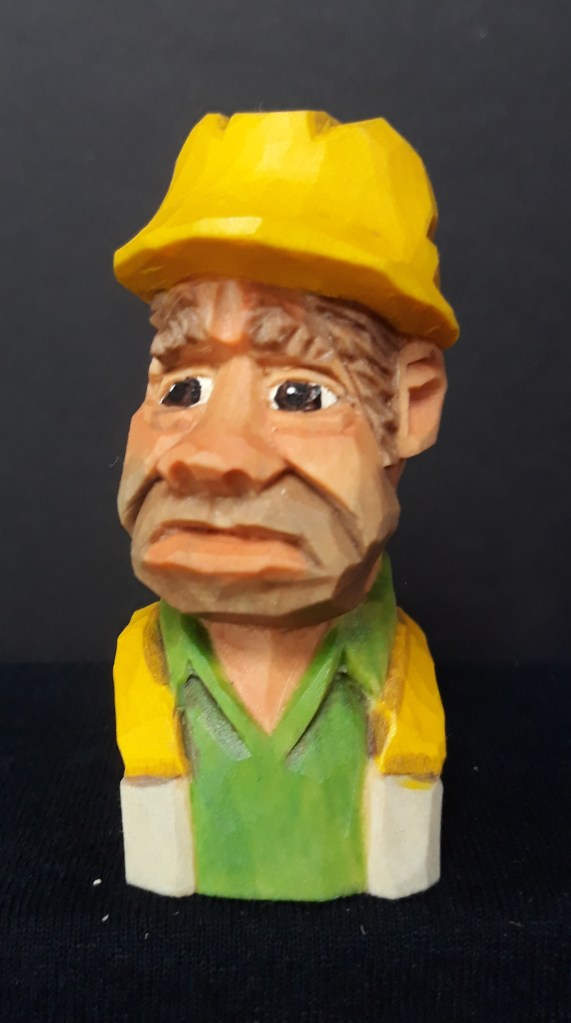
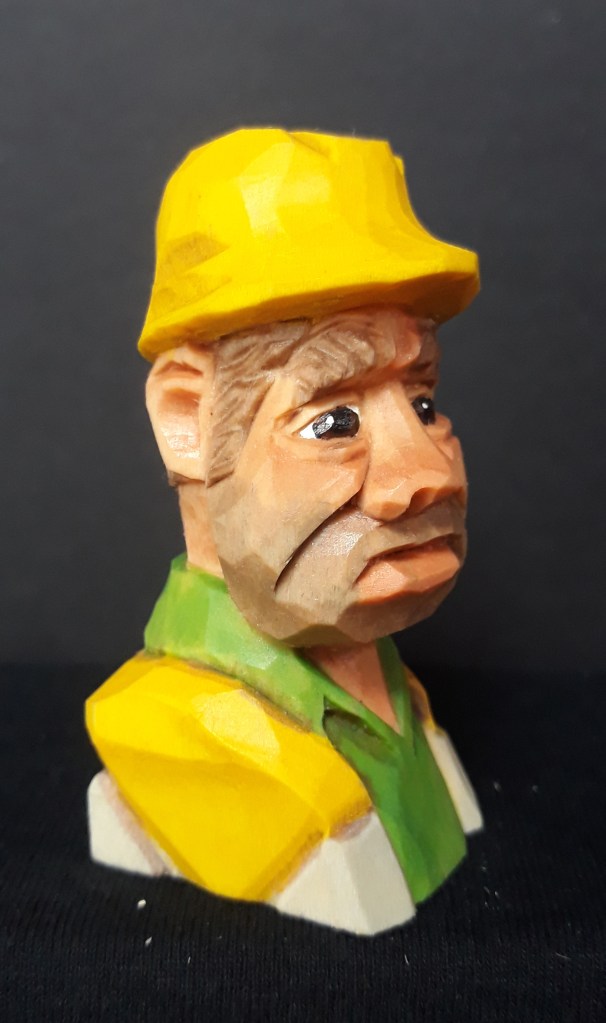
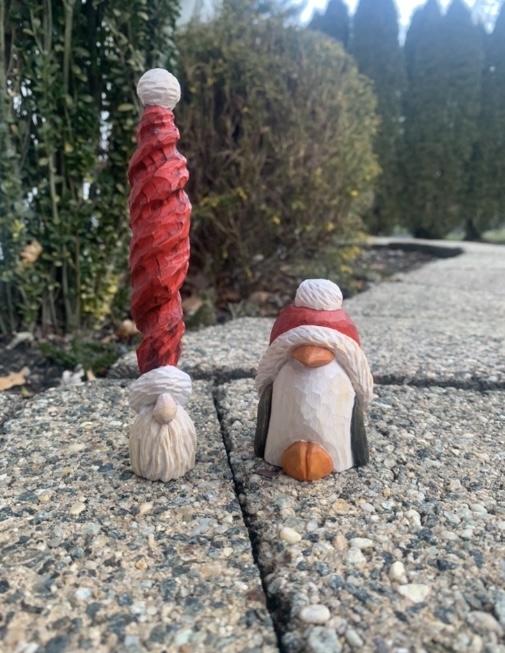
My very good friend, Vern Freer of Ontario, Canada sent in some very kind words of praise and encouragement along with a few photos of his recent carvings. Vern writes:
“Hi Bob,
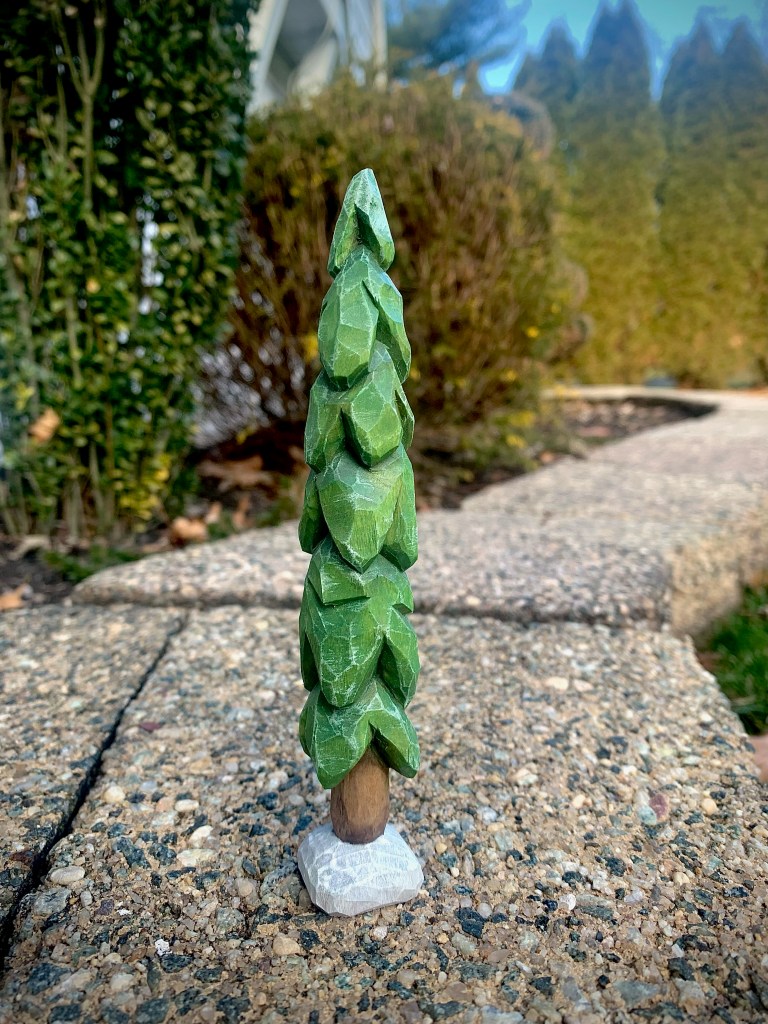
Thanks for putting together this great resource every month! There’s always something new to learn or consider. This month’s article from “The Complete Woodcarver’s Handbook” gives lots of food for thought for sure. I’ve attached a some pictures of recent projects – the Larry Green Christmas tree (modified by Doug Linker), a fun penguin from your tutorial in Wood Chip Chatter (September 30th 2022), and a rather squat looking snowman. They were all great little carves which can easily be modified.”
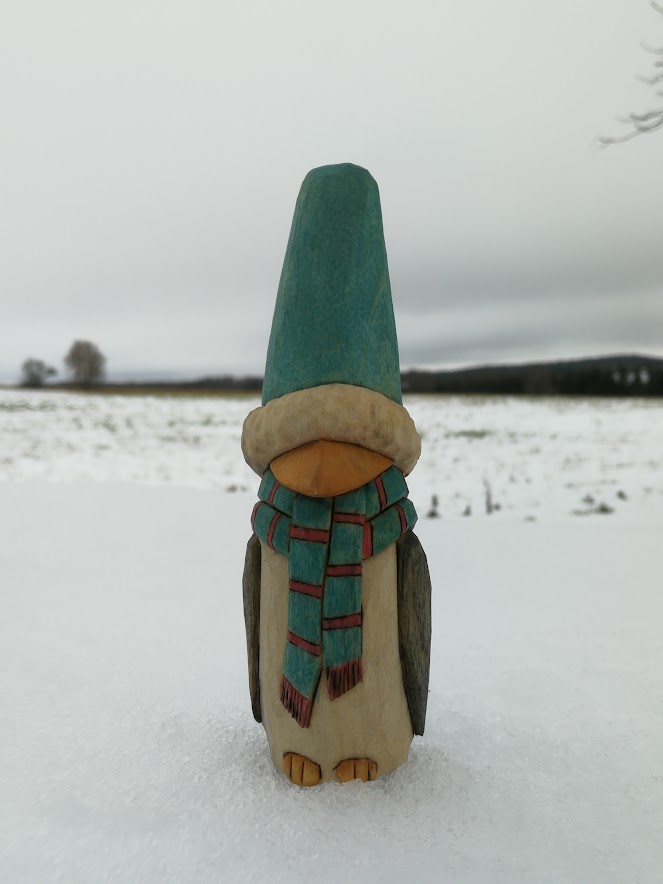
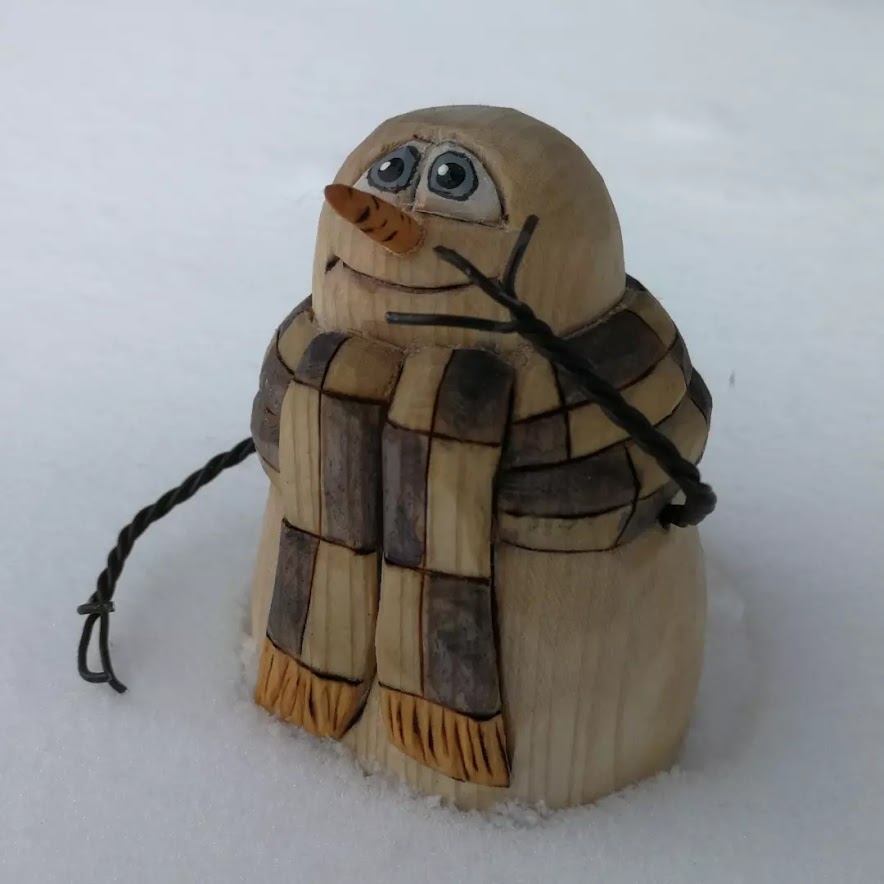
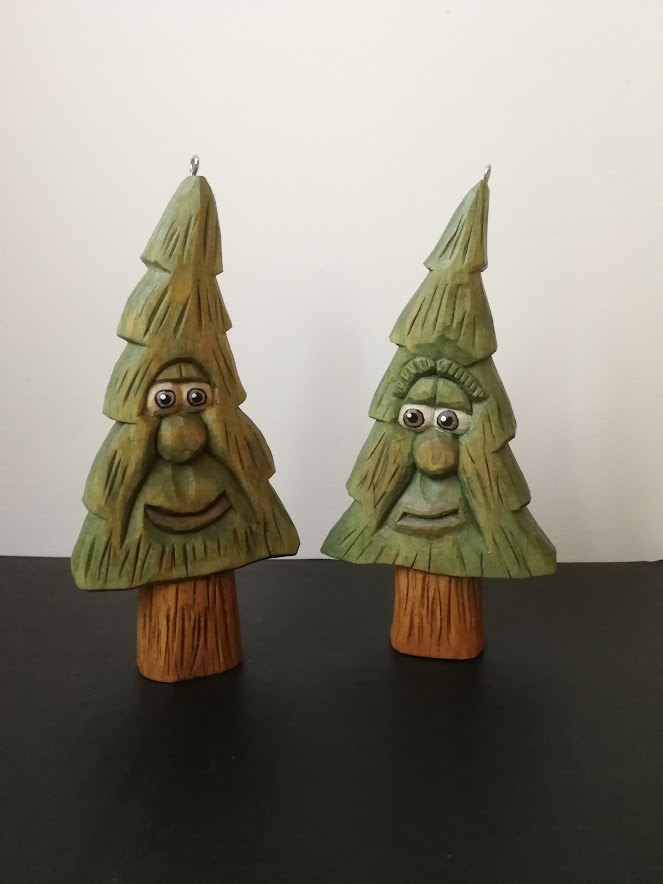
Thank you so much for your very kind words and the photos of your terrific work, Vern! I always enjoy seeing what you’ve been carving and I’m also glad you enjoy reading Wood Chip Chatter and had fun carving my Christmas penguin.
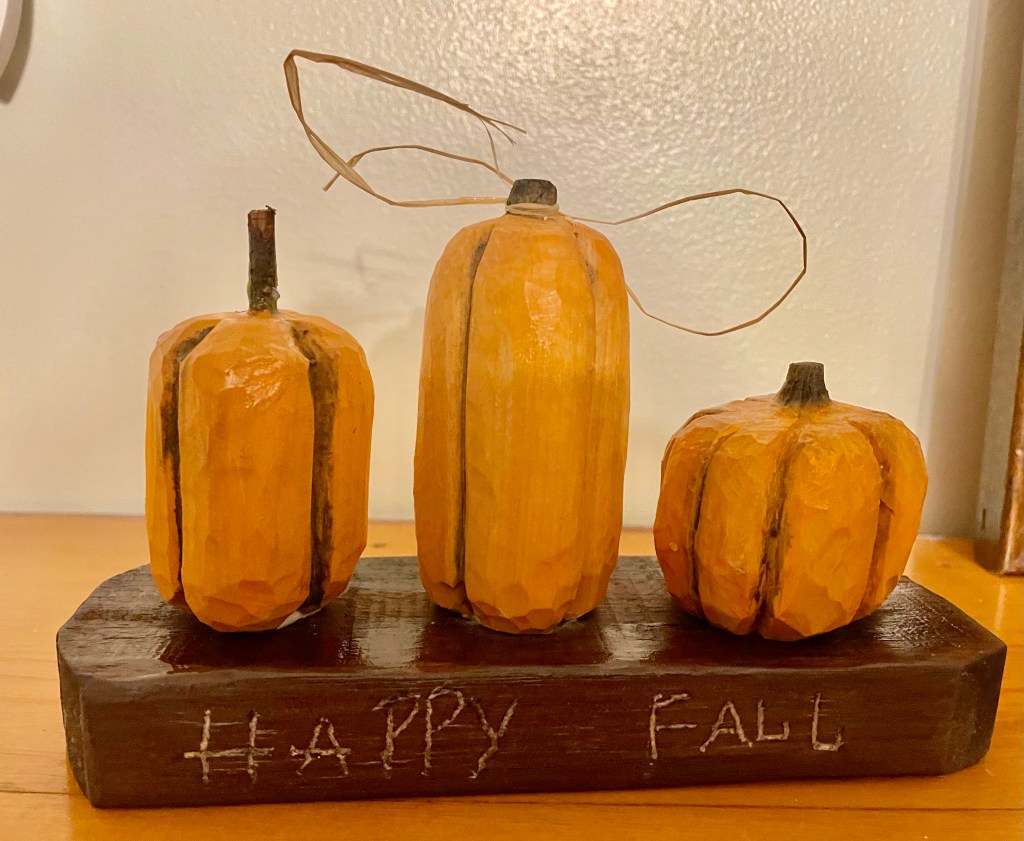
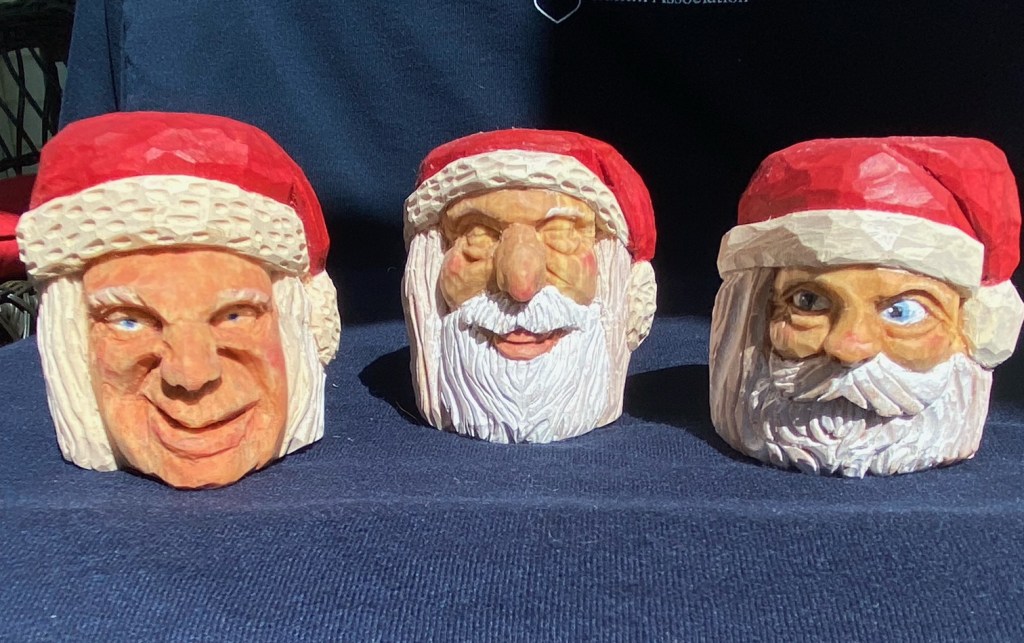
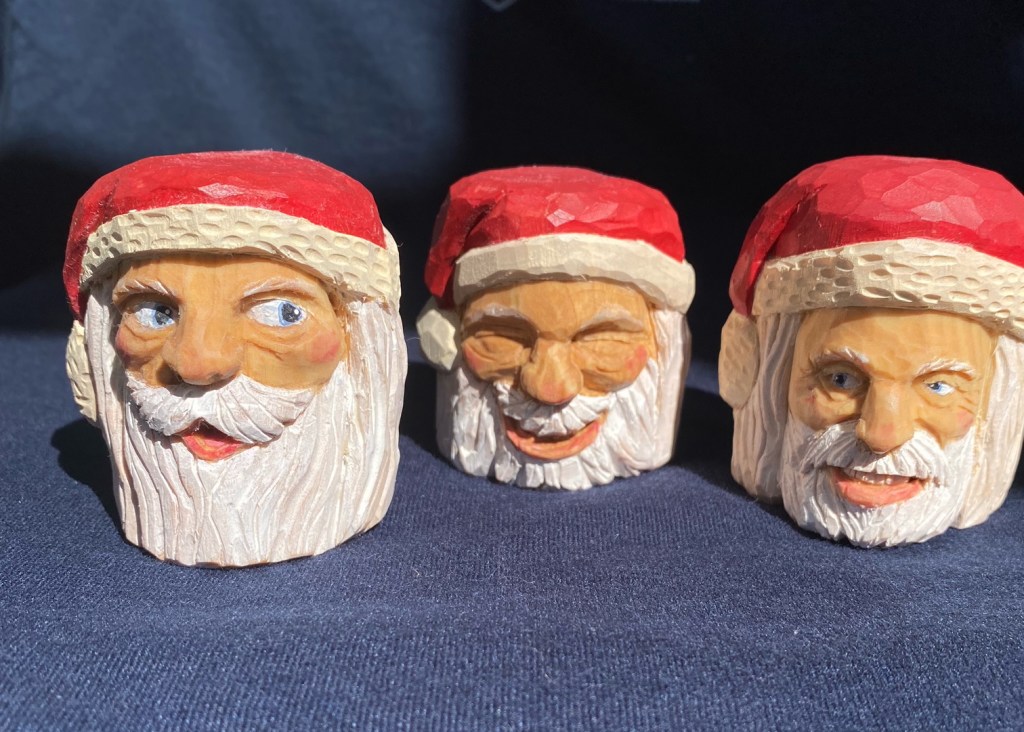
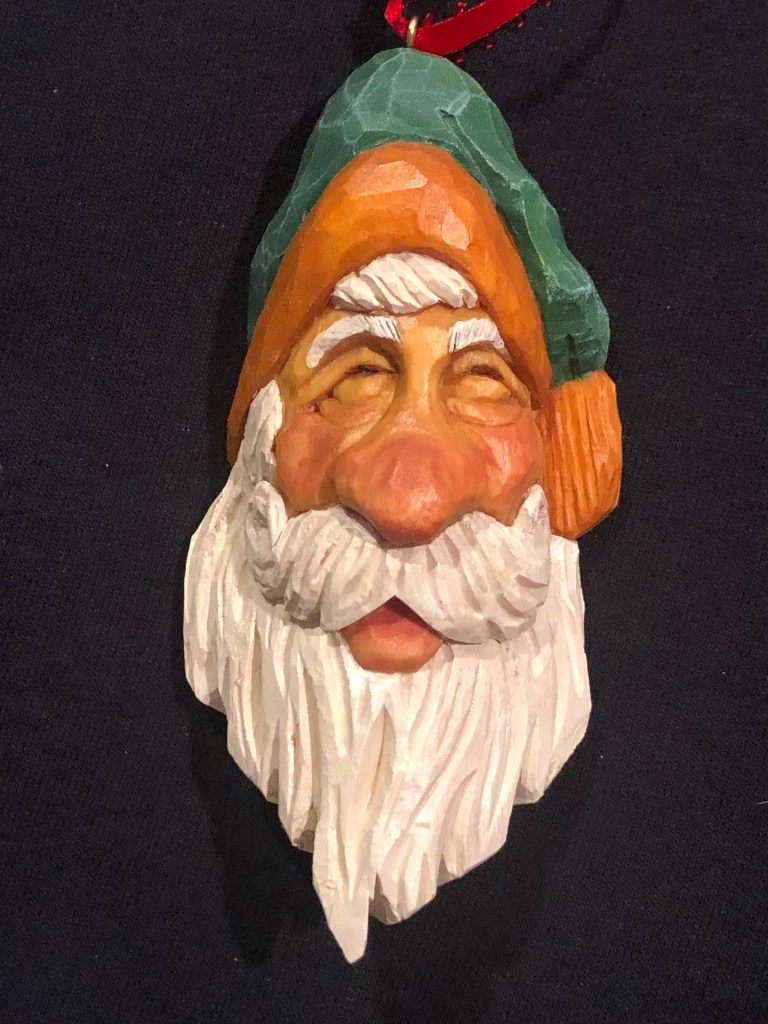
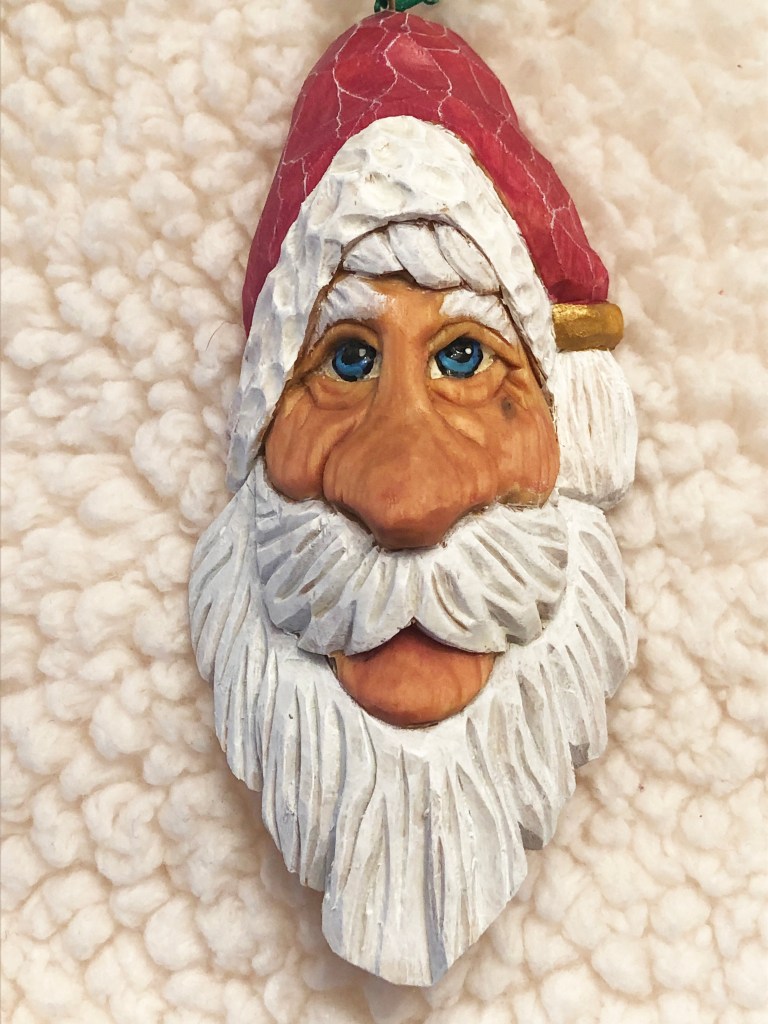
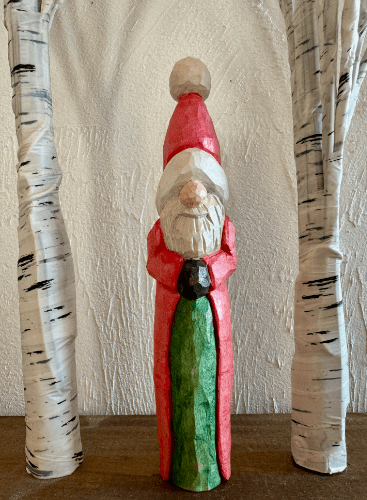
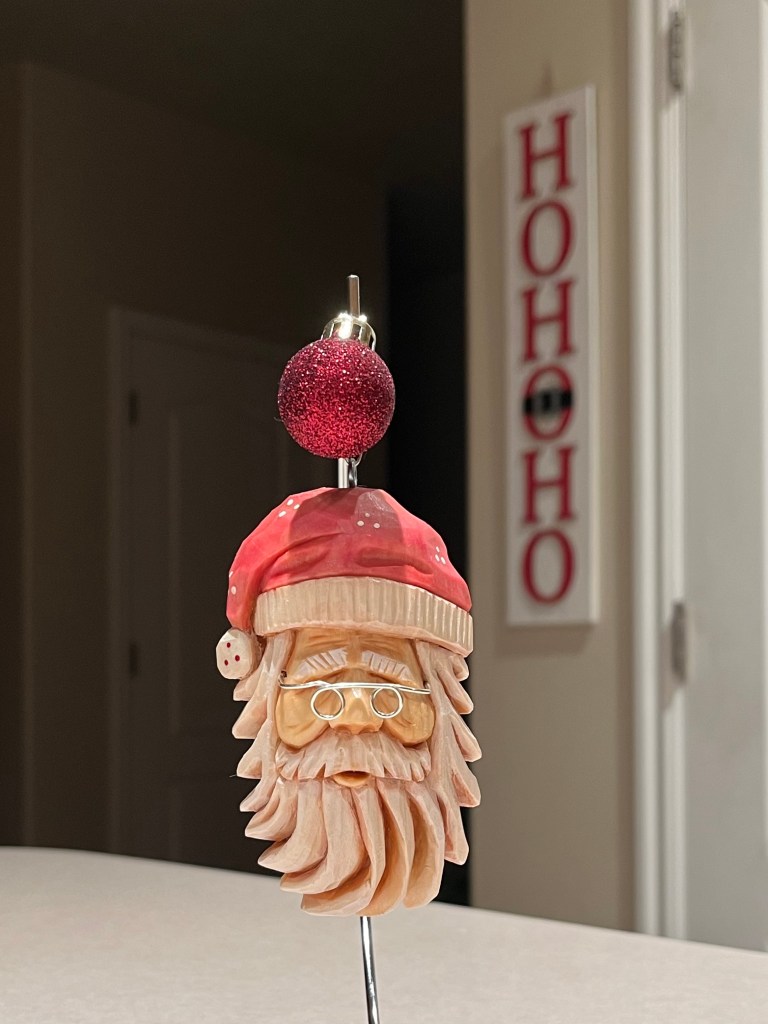
Next, I received some carving photos from my good friend, Doug Prior of West Jordan, Utah. Doug has been quite busy lately carving gifts for his family and friends, and writes:
“Bob …
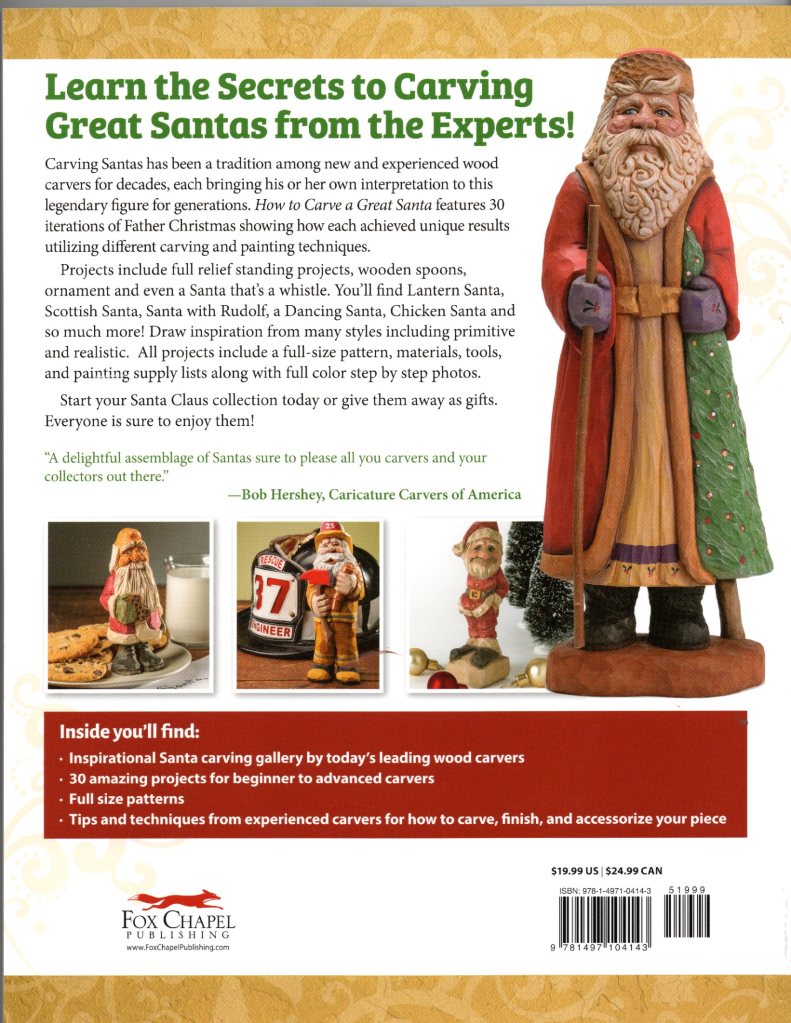
I just wanted to send you these 2023 pictures as you had quite a bit of influence in my pieces. The Santa ornament with the holly painted on the hat brim was my first Santa ornament from back in late September 2023 and the Santa ornament with squinty eyes and glasses was my 20th that I just completed. I do not sell any of my pieces and gave many away to family and friends. Because of you, Bob, and my friends Blake Lunsford, everyone that received one of my Santa ornaments seemed to be very happy with it.
On the middle shelf of the cabinet I made for my wife a few years ago, is an “old world Santa” that I made in early 2021. I made maybe 10-12 of these Santa’s by following your well made step by step instructions. I also am a great fan of your finish process using walnut oil, Krylon matte spray, and Howard’s Feed-N-Wax. So, I thank you for being a great carver who shares his knowledge and experiences.
I am hoping you have a great and safe Holiday season.
Doug Prior
West Jordan, UT”


Thanks for the photos, Doug! They’re always greatly appreciated. All of your carvings look fantastic and I’m sure they all made cherished gifts. Also, your Christmas display looks beautiful. Impressive work that you should be proud of.
Thank you so much for your kind words of praise, Doug. I’m glad I’ve been instrumental in influencing your woodcarving journey.
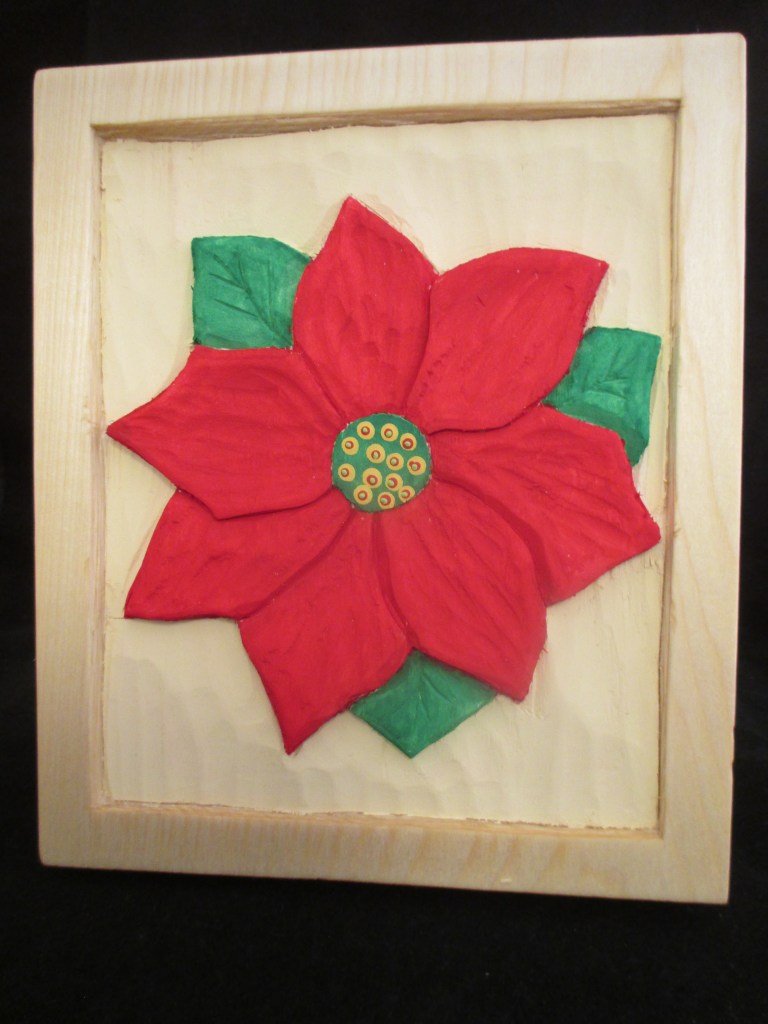
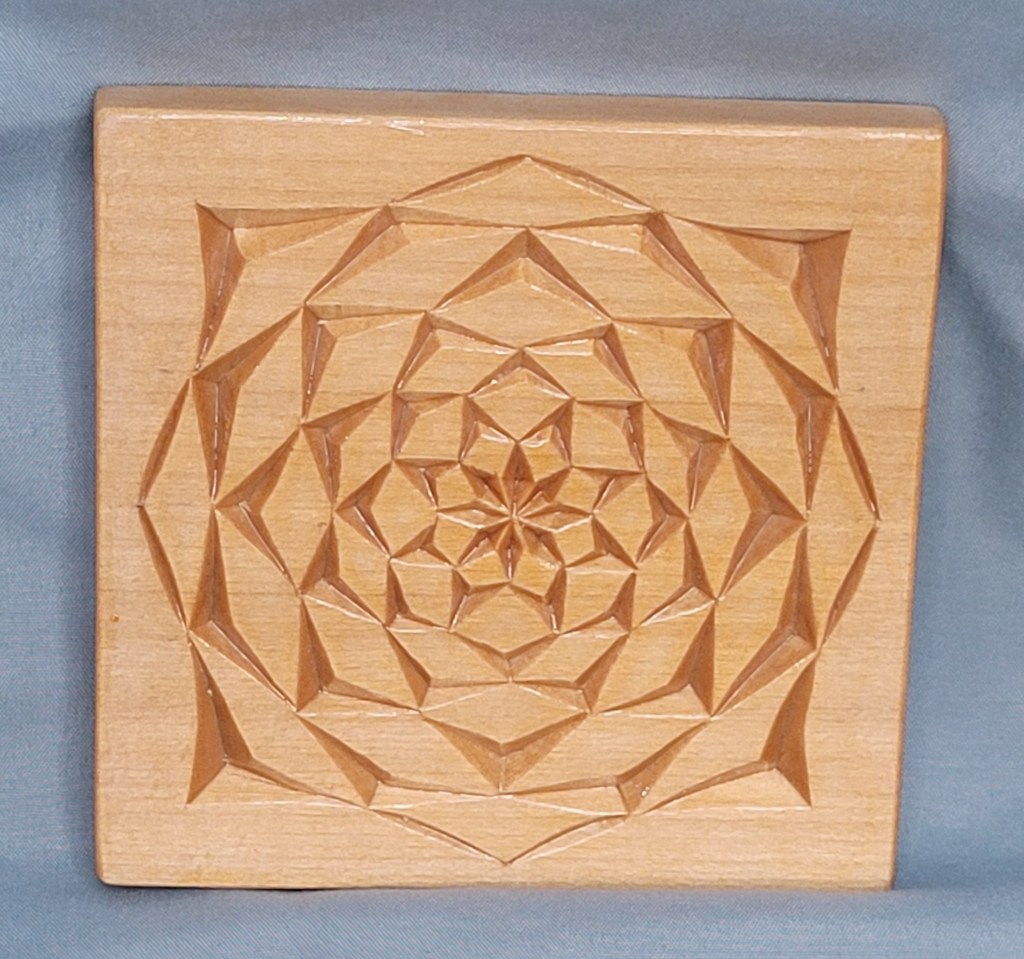
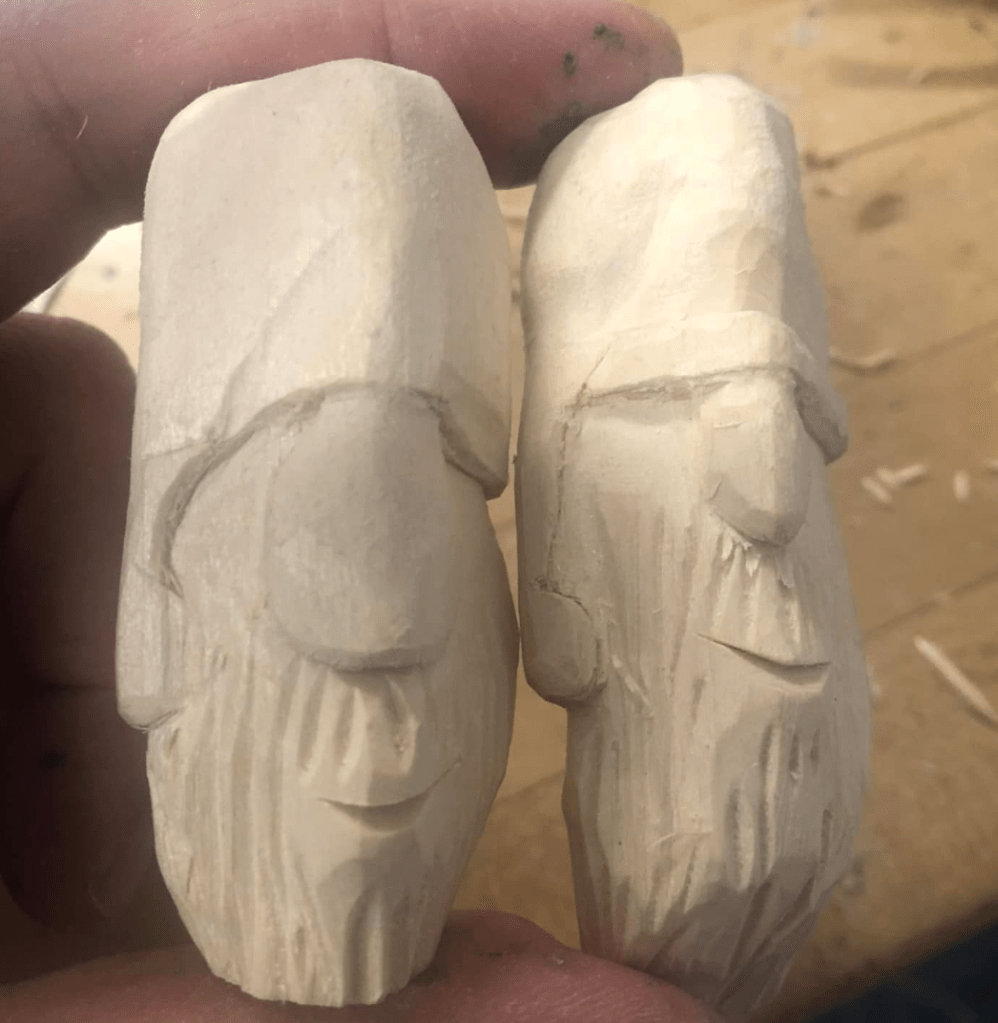
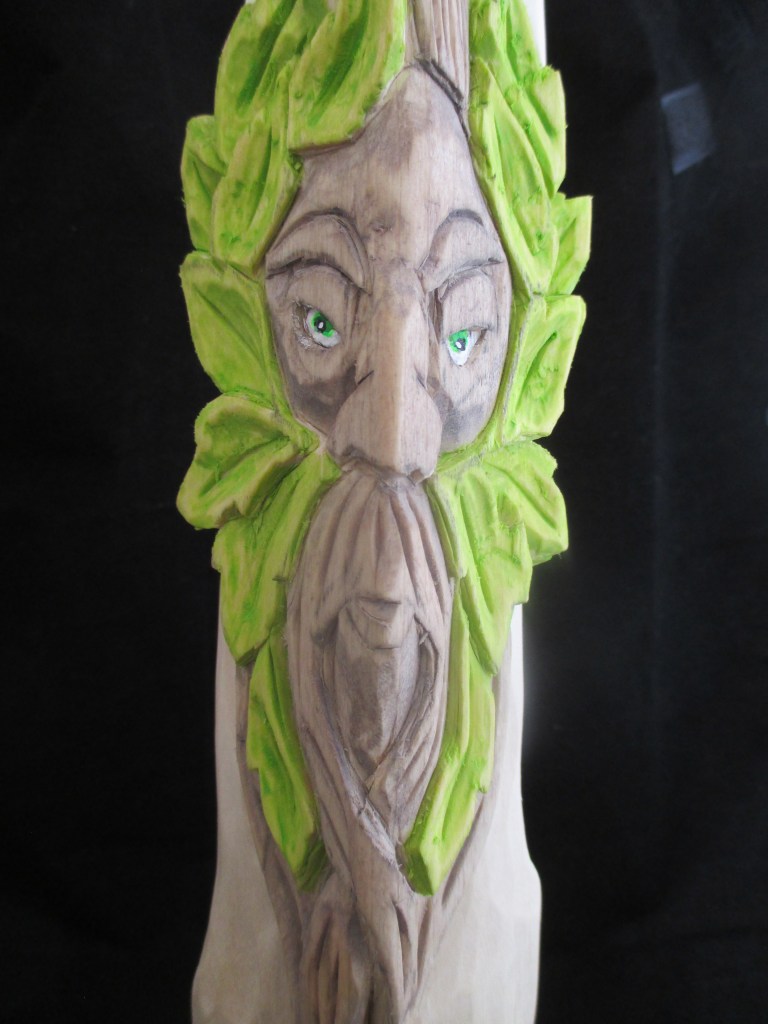
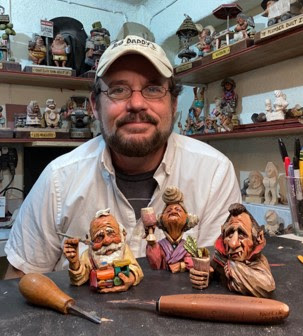
My friend, Jon Gledhill of Hurricane, Utah sent in some photos of the beautiful chip carving work he’s been doing. Jon writes:
Bob,
Thanks for another wonderful email!
And thanks a million for the Christmas tree Chip Carving Ornament pattern. It is perfect for beginners, and I plan to use it in my classes starting next year.
I’ve been doing quite a bit of chip carving for Christmas gifts over the past couple of months. Here a few examples:
Merry Christmas and Happy New Year!
Jon Gledhill
Hurricane, Utah
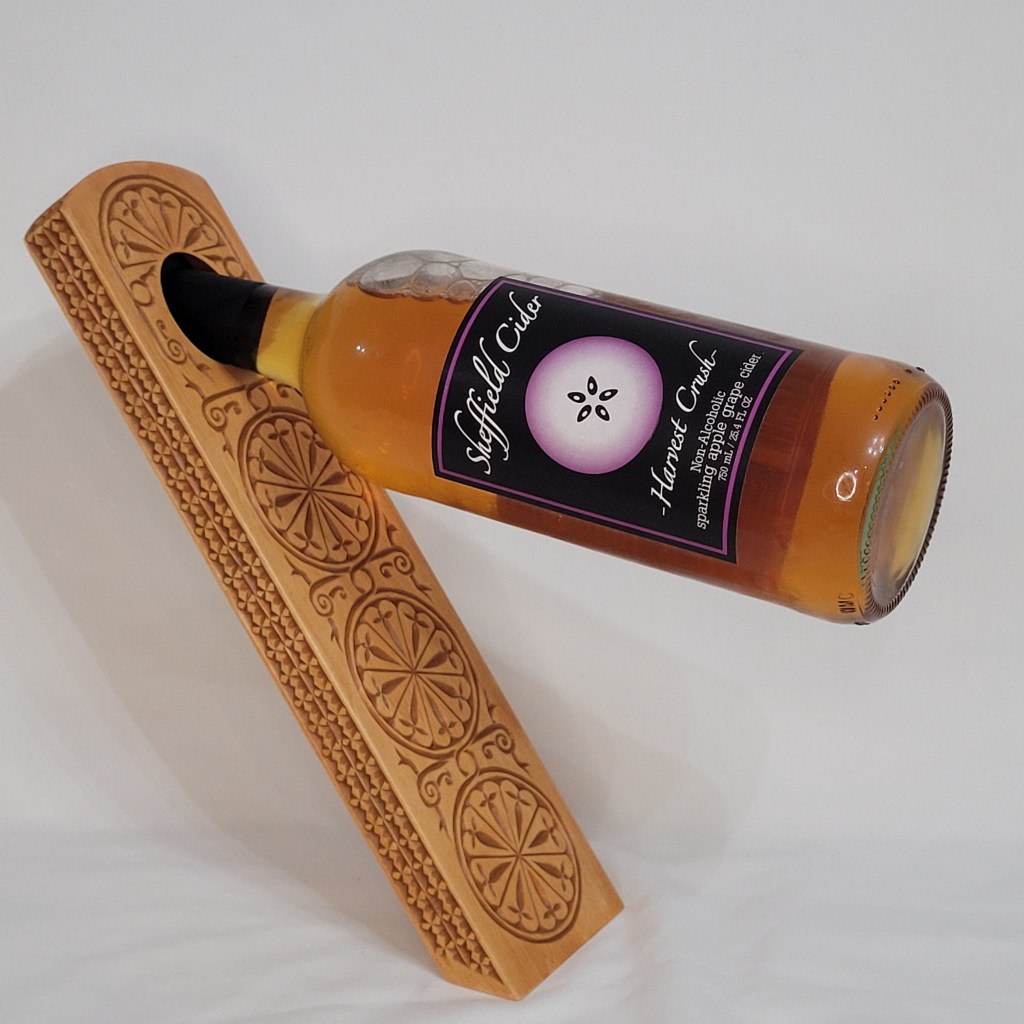
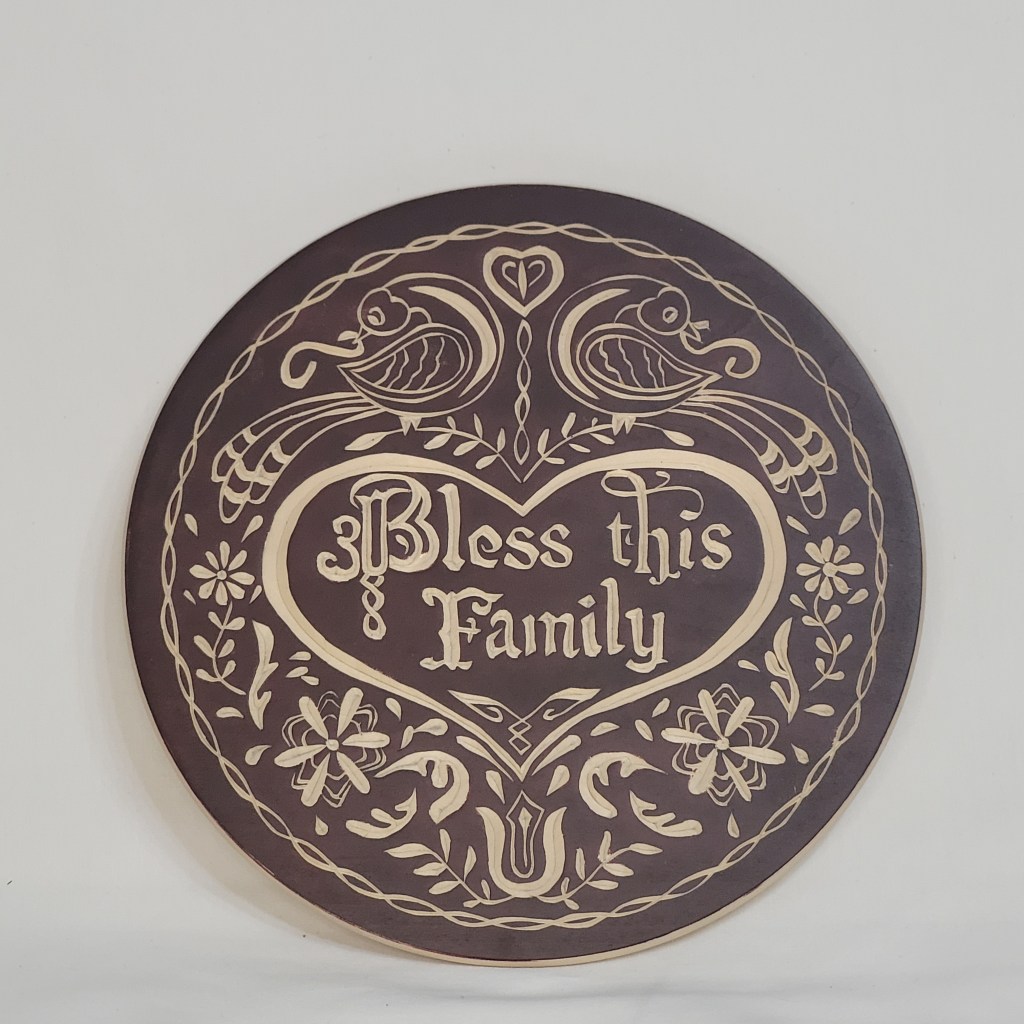

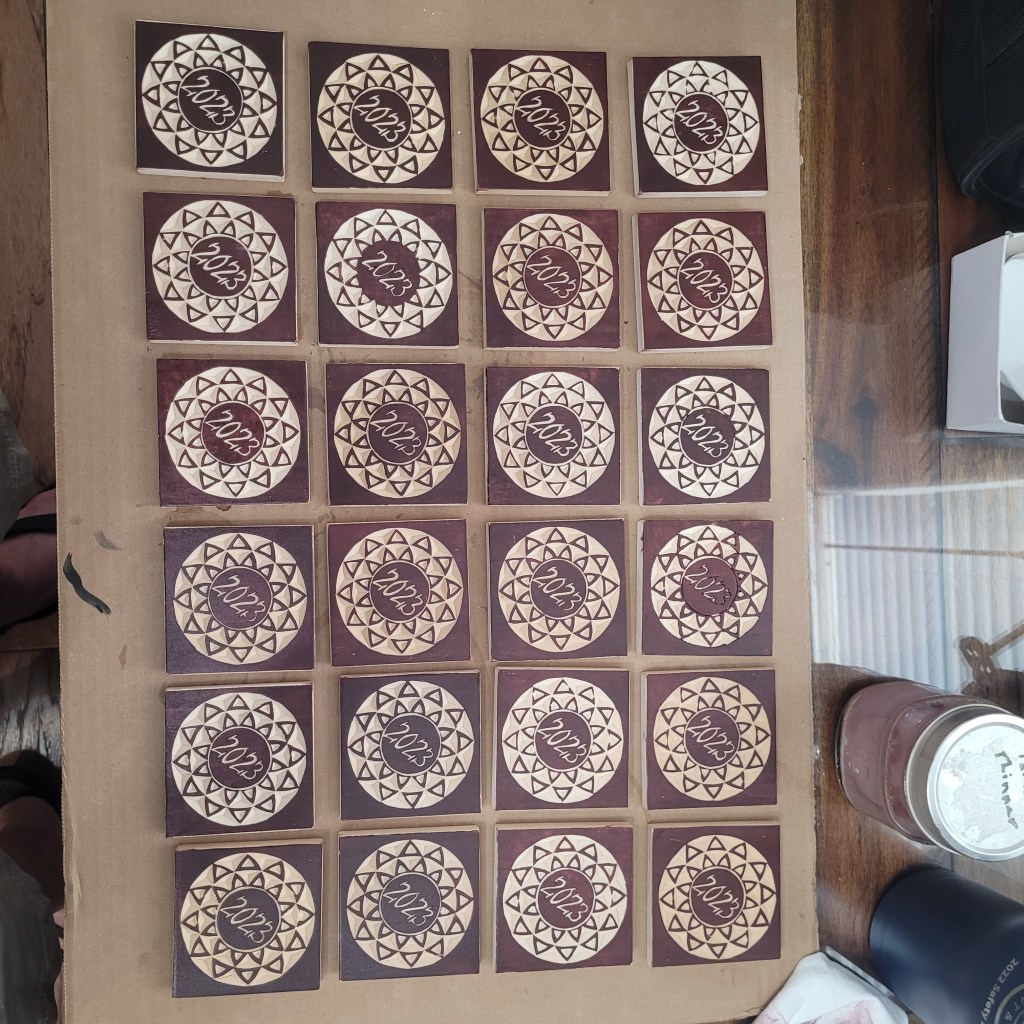
Thanks for the photos, Jon! You’re doing some magnificent chip carving work. I think that wine bottle holder is so cool. I would love to see some photos of your class’ chip carved ornaments when you get them.
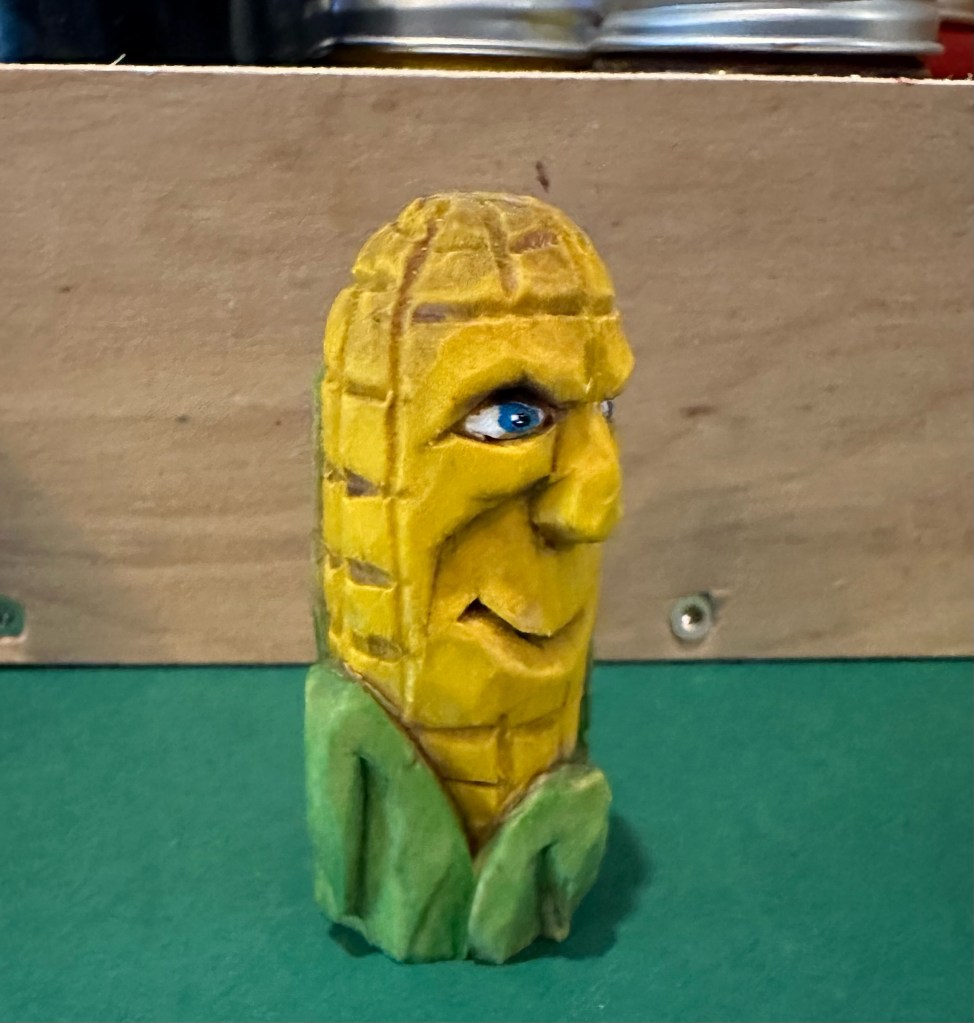
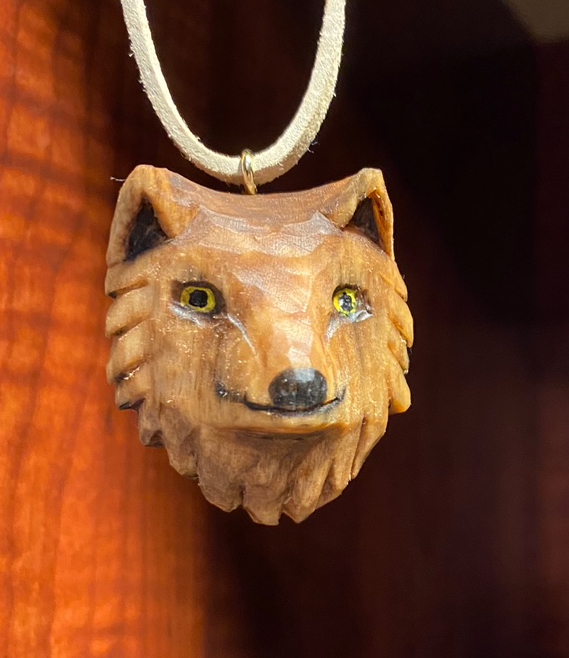
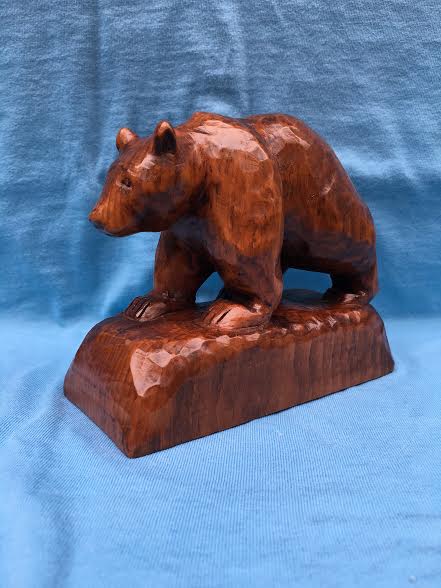
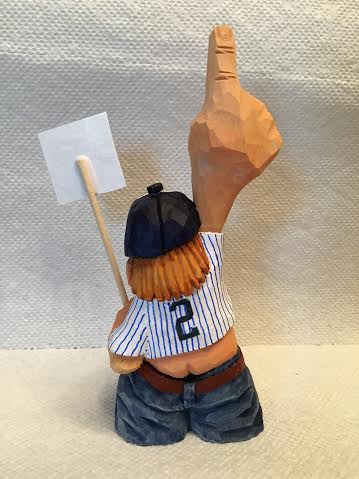
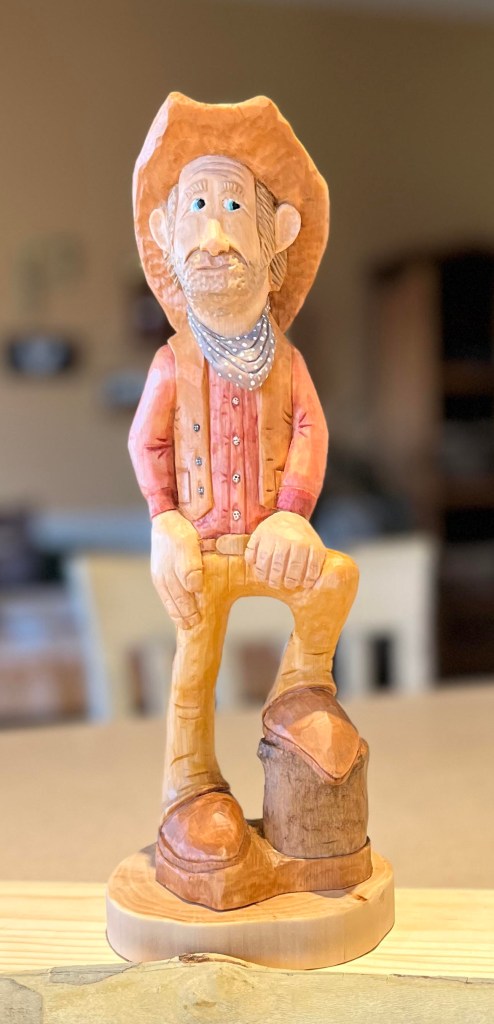
My friend, Ray Steinhart also sent in a few photos of his latest carvings. Ray writes:
Hi Bob just wanted to send you a thank you. I have very little vision, so stealing everyone else’s ideas really helps me. That’s what makes the carving community so special. I haven’t met one person that wasn’t willing to help, or share an idea. So thanks again, and Merry Christmas![🎄]()
Ray
Thank you for the photos, Ray! Your work looks great and each of your carvings show a lot of character. Keep up the good work!
My friend, Shannon Coker wrote to say she is branching out into a new woodcarving direction and said:
Hi Bob ,
I have step into a new adventure in my woodcarving
Spoons and ect.
Shannon
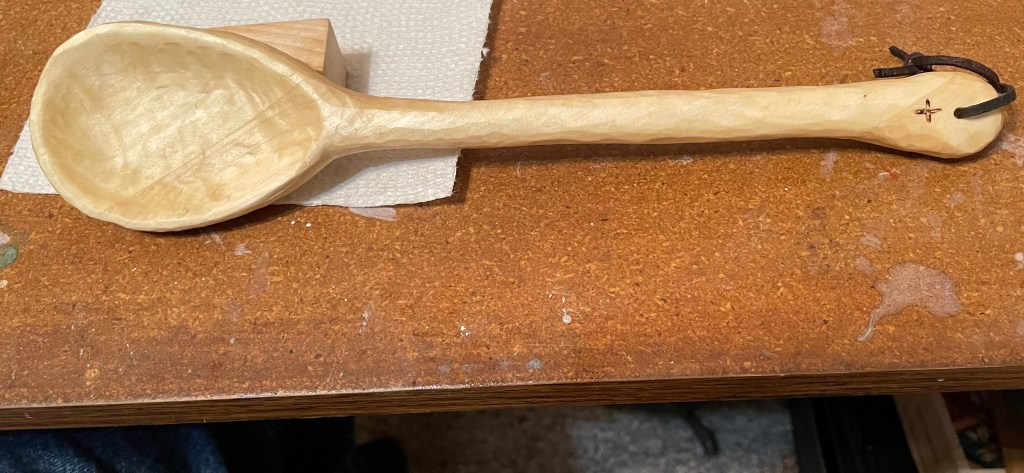
Very nice work, Shannon! It’s a clean looking carving and the bowl is scooped out well. I look forward to seeing more.
Woodcarving Tip
Wood Alternative
If you’re looking to practice your carving techniques and don’t have any scrap wood, and don’t want to use your precious basswood try practicing on high-density craft foam. It is soft and easy to carve, and holds detail reasonably well. Paint it with acrylics as you would your basswood carvings. High-density craft foam can be found in most craft and hobby stores or on Amazon.
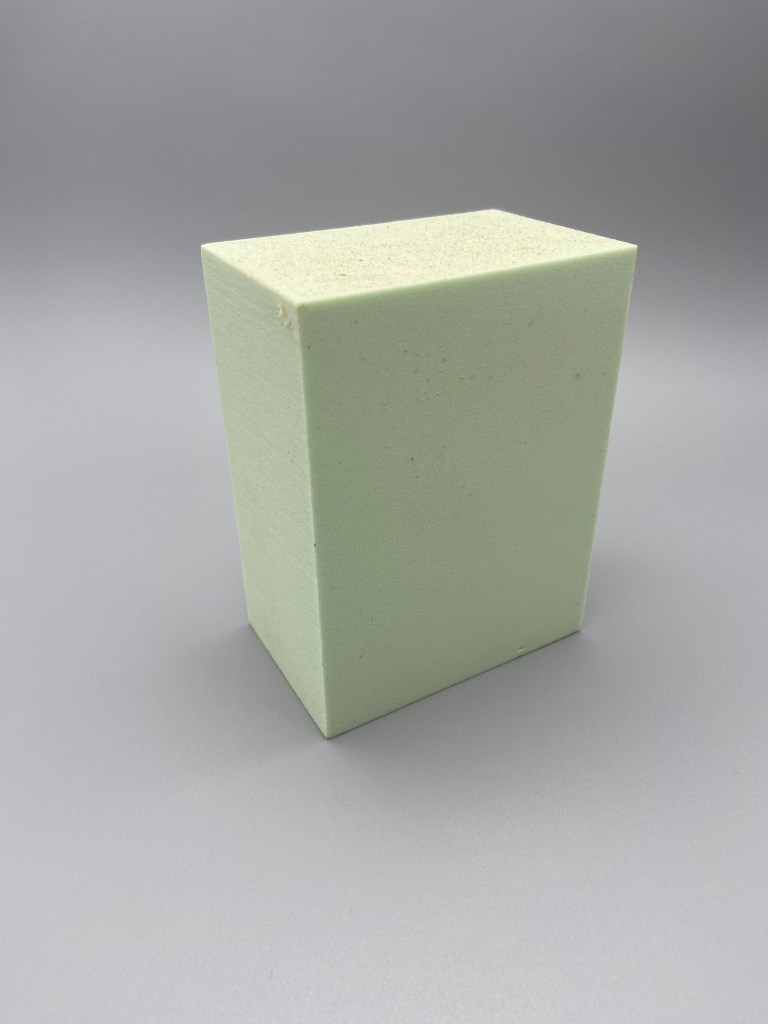

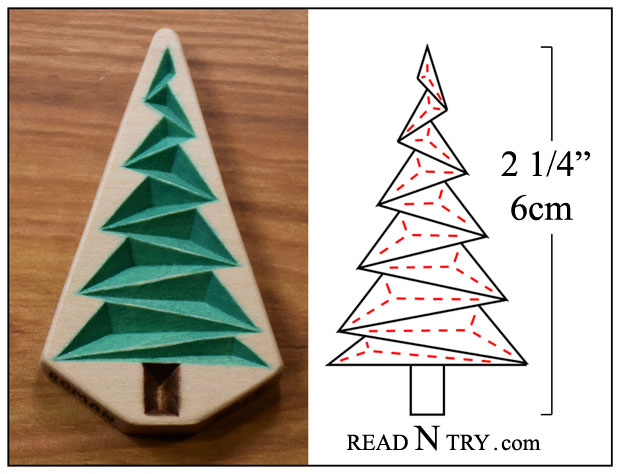
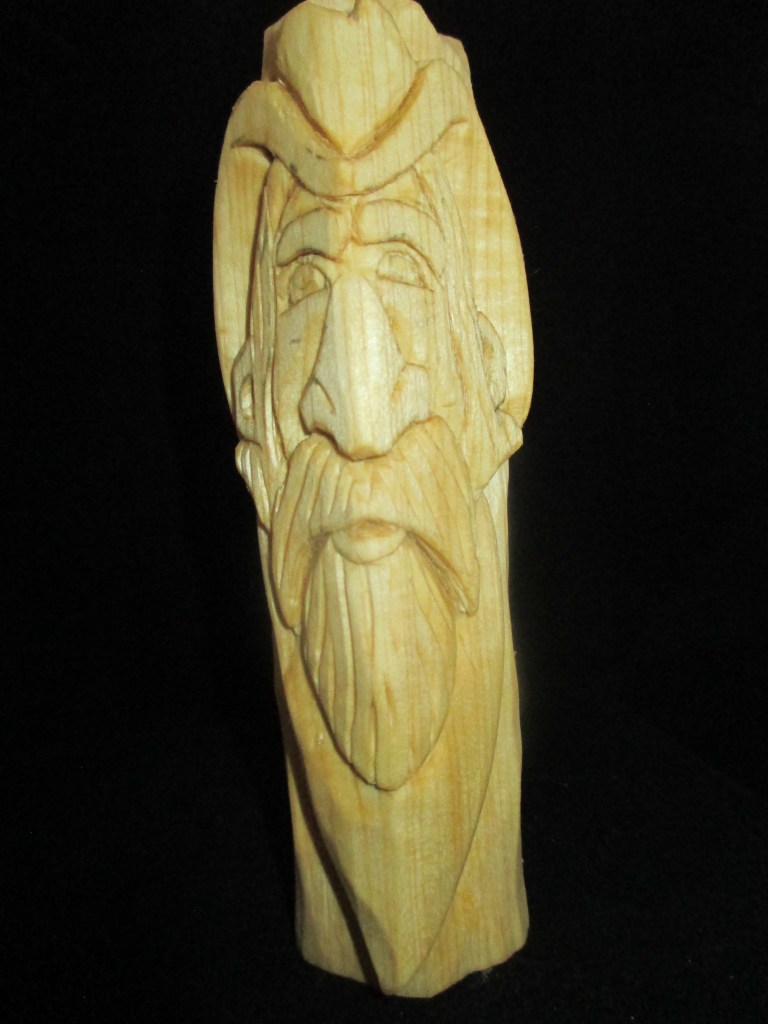
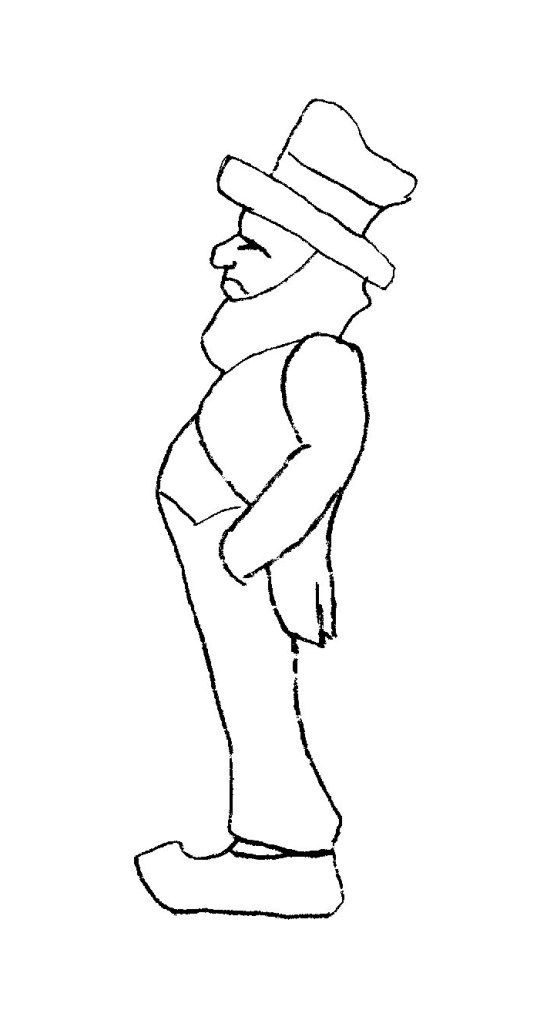
Pattern of the Month
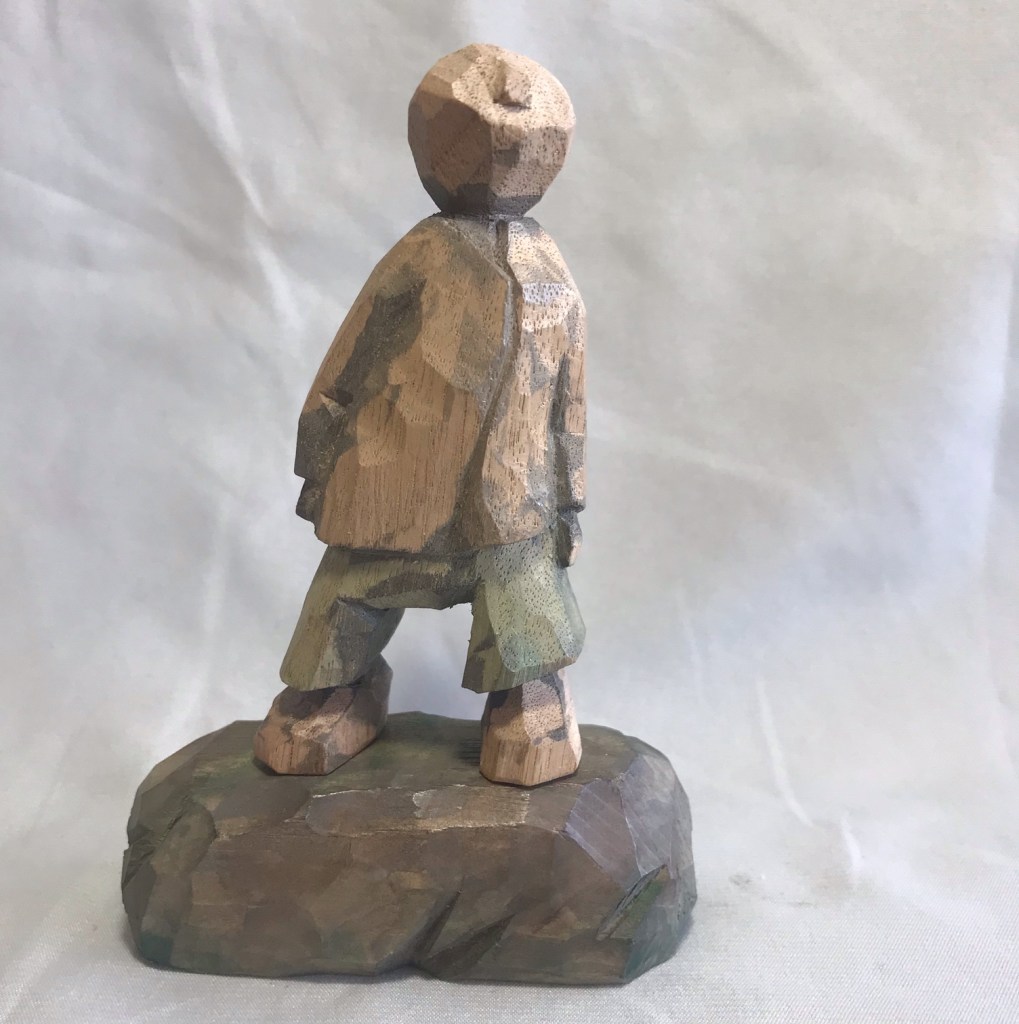
Basic Little Man Pattern

1.5″ x 1.5″ x 4″
This pattern can be scaled to any size you want.
Upcoming Workshops & Seminars
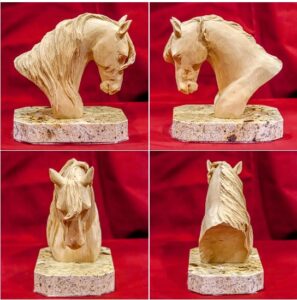
Horse Head
Teacher: Janet Cordell
Dates: January 5, 8, 12, 15, 19, 22, 2024
Times: 2-4 p.m. Pacific Time 3-5 p.m. Mountain Time 4-6 p.m. Central Time 5-7 p.m. Eastern Time
12 hours ( 6 sessions – 2 hours each day)
Location: Online (Via Zoom)
Cost $175 cost includes one blank.
For details and to sign up email Janet Cordell
Contact Janet
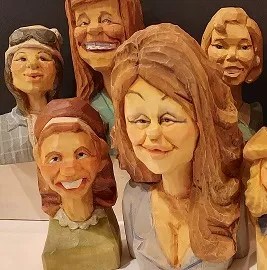

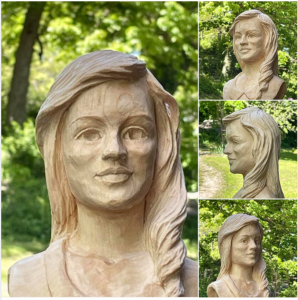
Woodcarve Cute ‘n quirky busts Pretty females with character
Teacher: Ryan Olsen
Dates: January 6,7,13,14 (PM Sessions)
Time: Sat, Sun – 1:30pm-3:30 Pacific /3:30pm-05:30pm Central / 4:30pm – 6:30pm Eastern
8 hours ( 4 sessions – 2 hours each day)
To sign up Contact Ryan Olsen ryanscaricatures@gmail.com
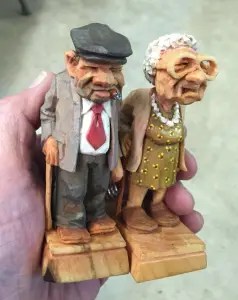
Woodcarving Elderly Couple
Teacher: Dave Stetson
Dates: January 20, 21,27,28
Times: Sat, Sun – 9:30am-11:30 Pacific /11:30am-01:30pm Central / 12:30pm – 2:30pm Eastern
8 hours (4 sessions – 2 hours each day)
Location: Online (Via Zoom)
For details and to sign up email Dave Stetson

Online Classes With Chris Hammack
Teacher: Chris Hammack
Chris Hammack is offering a new series of online classes to help students learn and sharpen their woodcarving skills. Individual and Group Classes are available through his web site chrishammackart.com/groupclass

Whittle Wednesdays
Teacher: Dwayne Gosnell
Dates: Two – 2 hour classes each month on Wednesdays
Location: Online (Via Zoom)
To sign up contact Dwayne Gosnell via email dagwood_76@gmail.com

Woodcarving Academy
Established in 2020, the Woodcarving Academy offers dozens of videos and seminars created by some of the country’s top level instructors. More videos are added regularly as they are created by the instructors.
With a paid subscription to the Woodcarving Academy you can view any videos you like for as many times as you like.
Subscription rates: Monthly = $19.95 Quarterly = $49.95 Annual = $139.95
There is even a Free level which allows you to tour the website and watch the sample videos and content, and receive email updates as new content becomes available.
Check out the Woodcarving Academy and learn with the masters right in the comfort of your own home! Go to: www.woodcarvingacademy.com or Email: support@woodcarvingacademy.com
News & Announcements


The International Association of Woodcarvers has upcoming Zoom meetings on the following Saturdays at 3PM EST with special guest presenters. Check them out…
Zoom: 310-460-3575
Presentation Schedule:
1/6 – Maria Patterson (Dr. Dowhittle)
1/13 – Lagan Lippard (Halfling Carvings)
1/20 – Joshua Waters (Windy Cape Studios)
2/3 – Josh Arroyo
2/10 – Issac Middlemiss (Woodcarving Man)
INTERNATIONAL ASSOCIATION OF WOODCARVERS
COME JOIN US!!!


The Jersey Hills Wood Carvers (JHWC) club is a small but growing group of wood carvers sharing their time, knowledge and joy of woodcarving. The JHWC generally meets from 7:00 PM EST to 9:00 PM EST on the 1st, 3rd and 5th Thursday of each month (when school is in session) at the Jefferson Township High School wood shop classroom.
Membership is “FREE” and open to anyone interested in woodcarving regardless of their ability.
JHWC’s Upcoming Meetings and Events
2024
January 18th
February 1st, 15th and 29th
March 7th and 21st
April 4th and 18th
May 2nd, 16th and 30th
June 6th and 20th
For more information contact:
Al Santucci alsantucci4@gmail.com President
Bill Brunner billbrunnerdesign@gmail.com newsletter/website editor
Or visit:
Website: https://www.jerseyhillswoodcarver.com/
Facebook: https://www.facebook.com/groups/736479646821641/
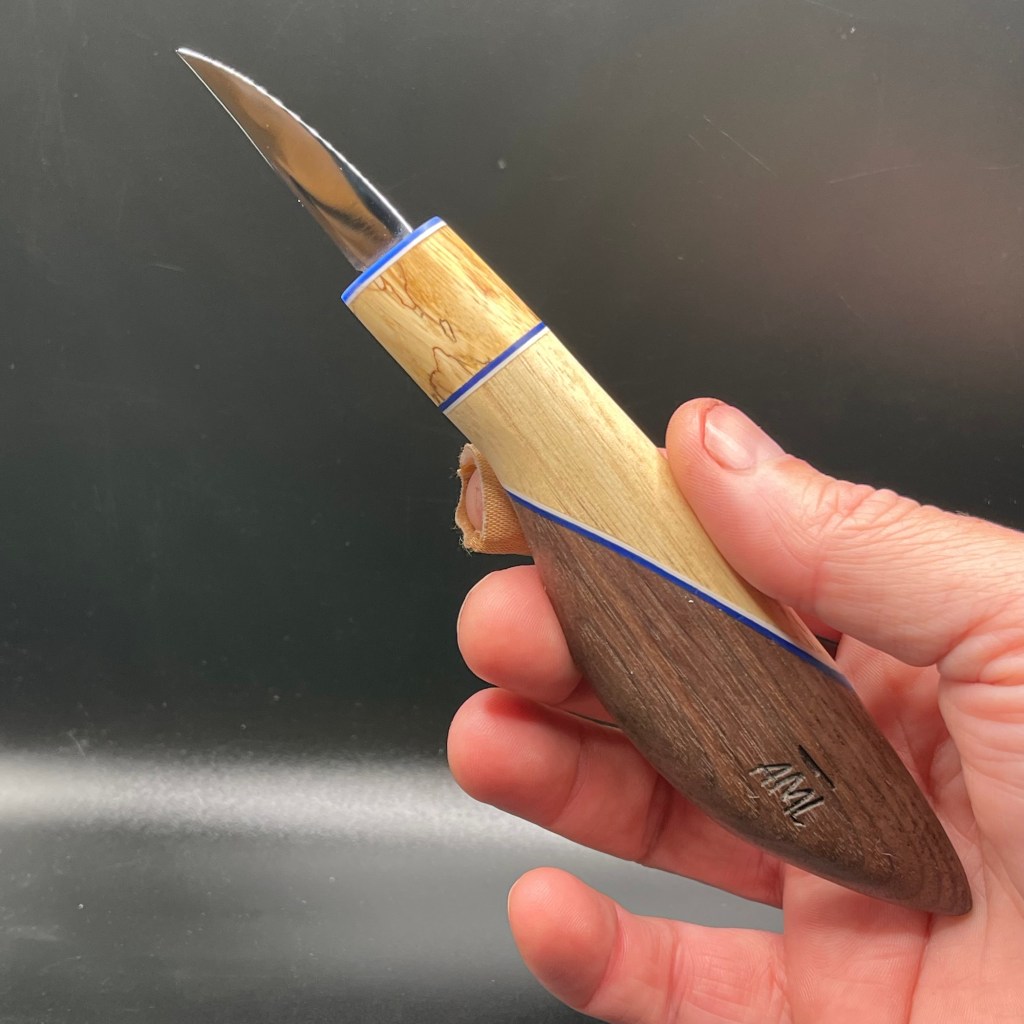
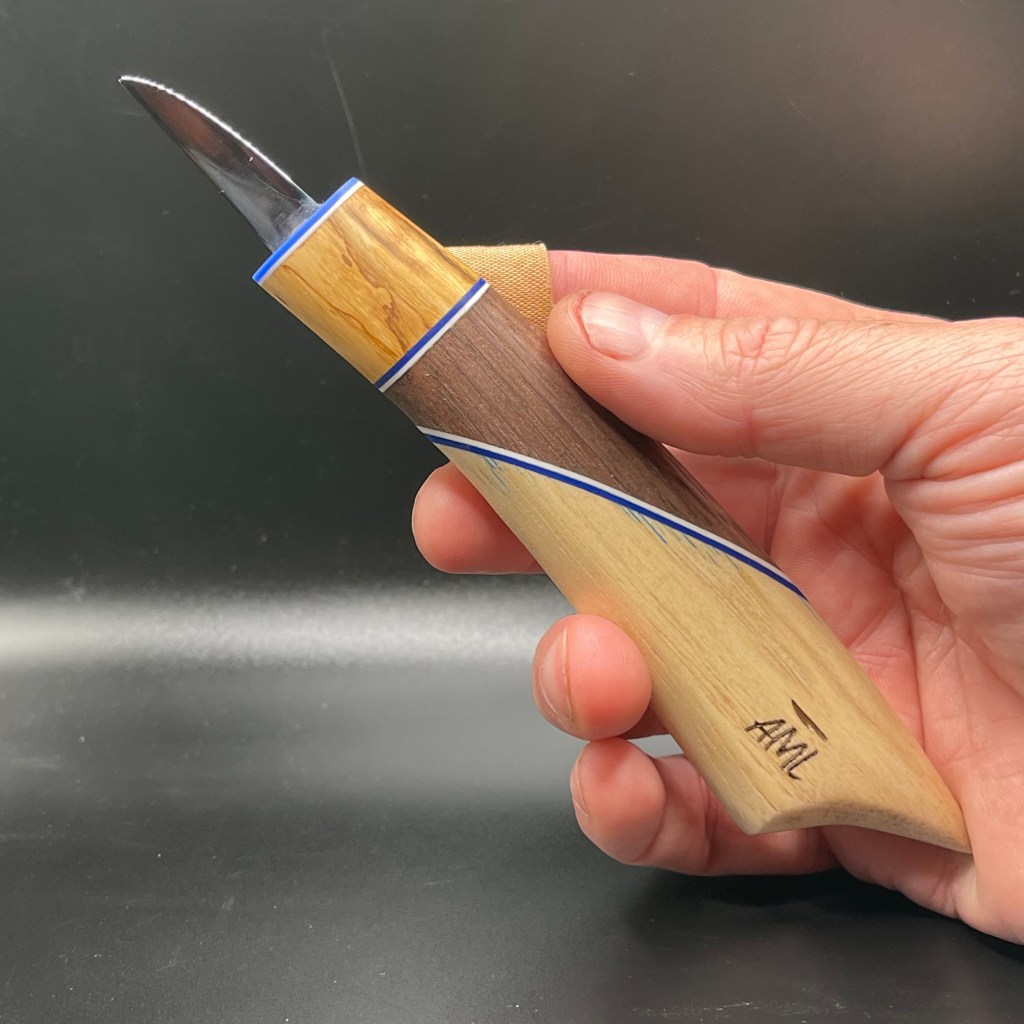
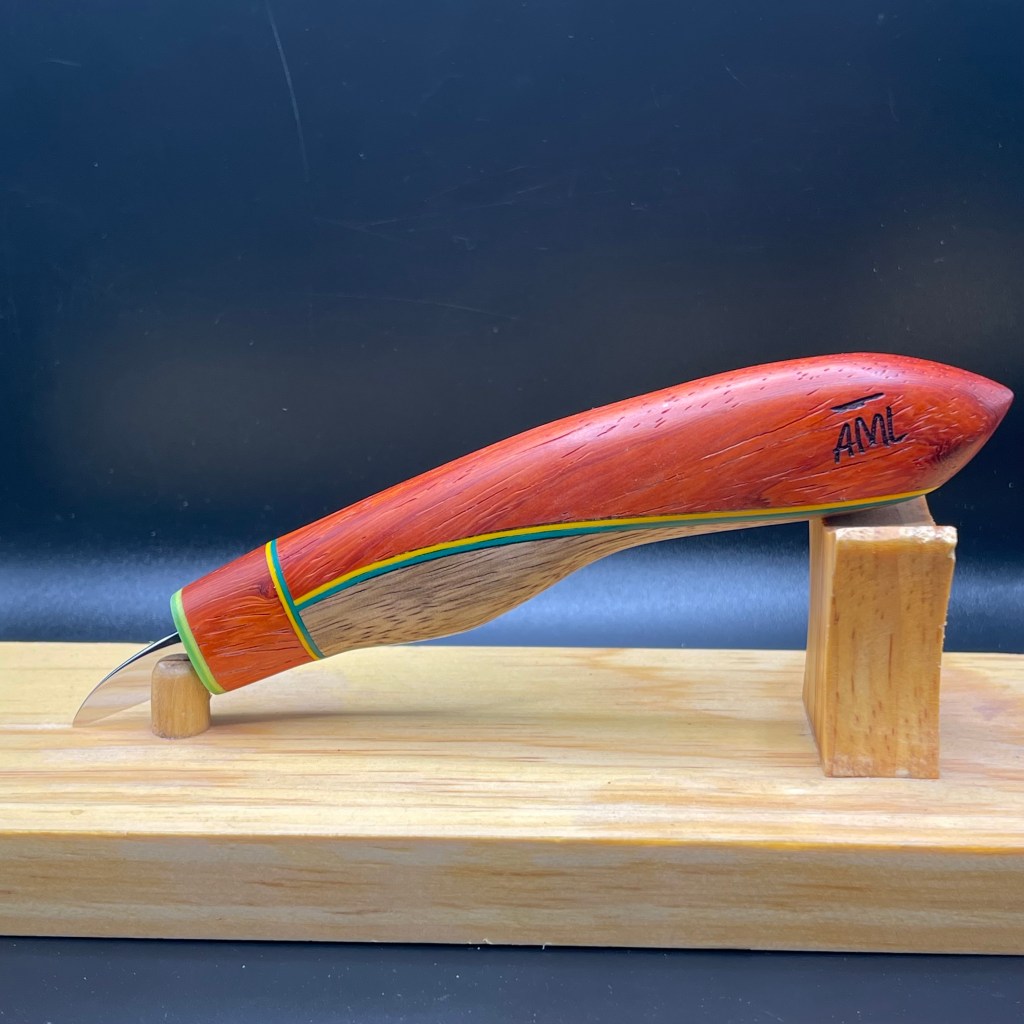
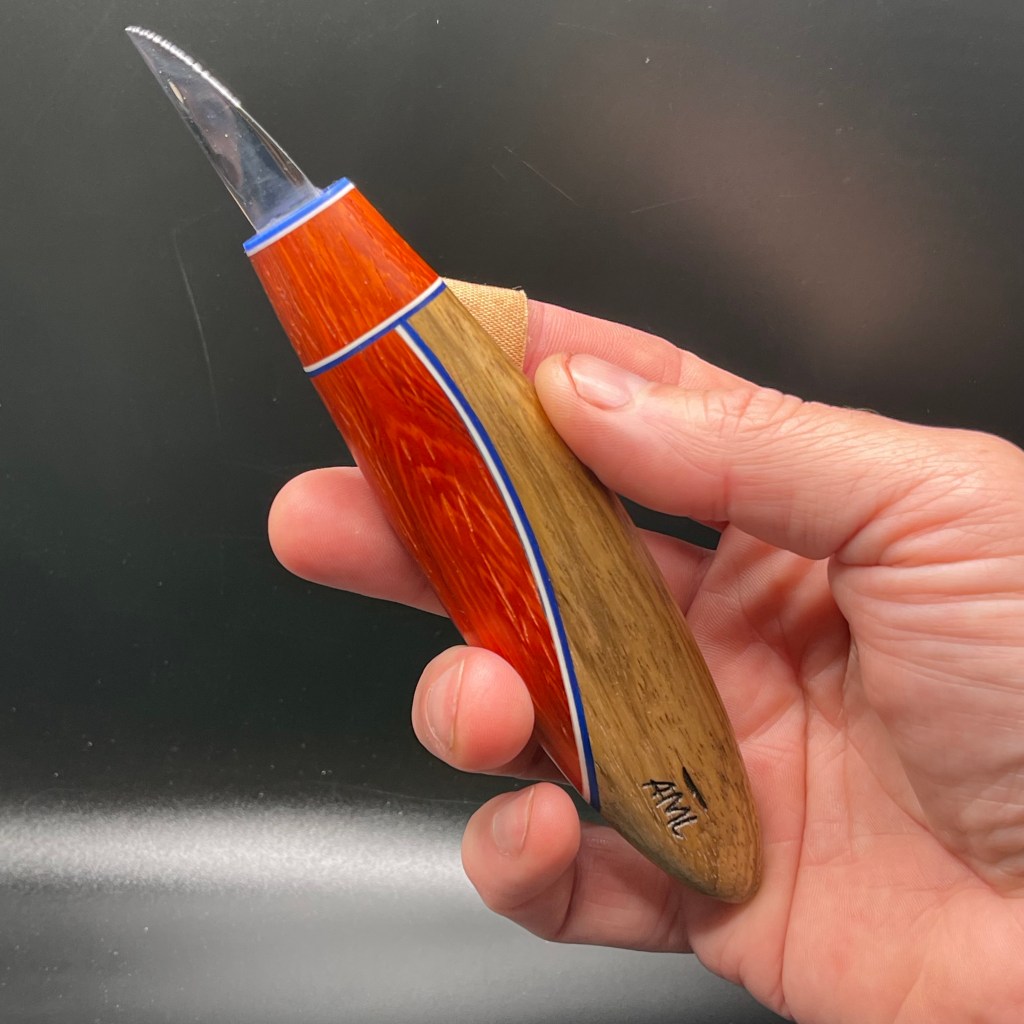
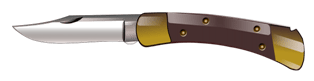
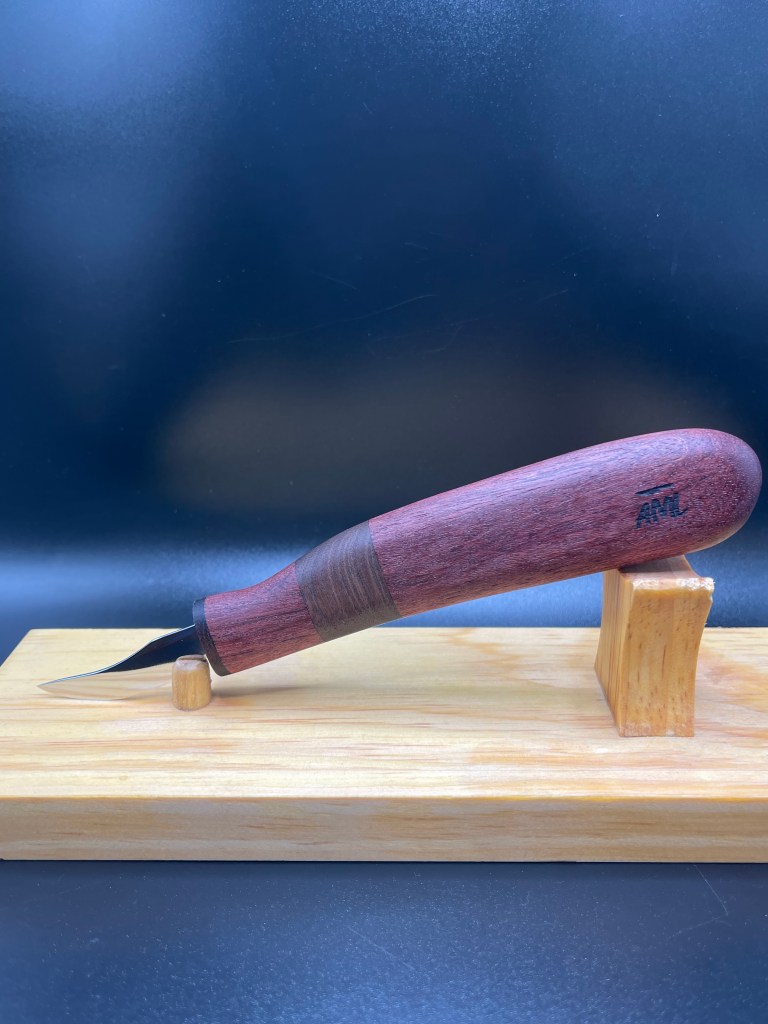
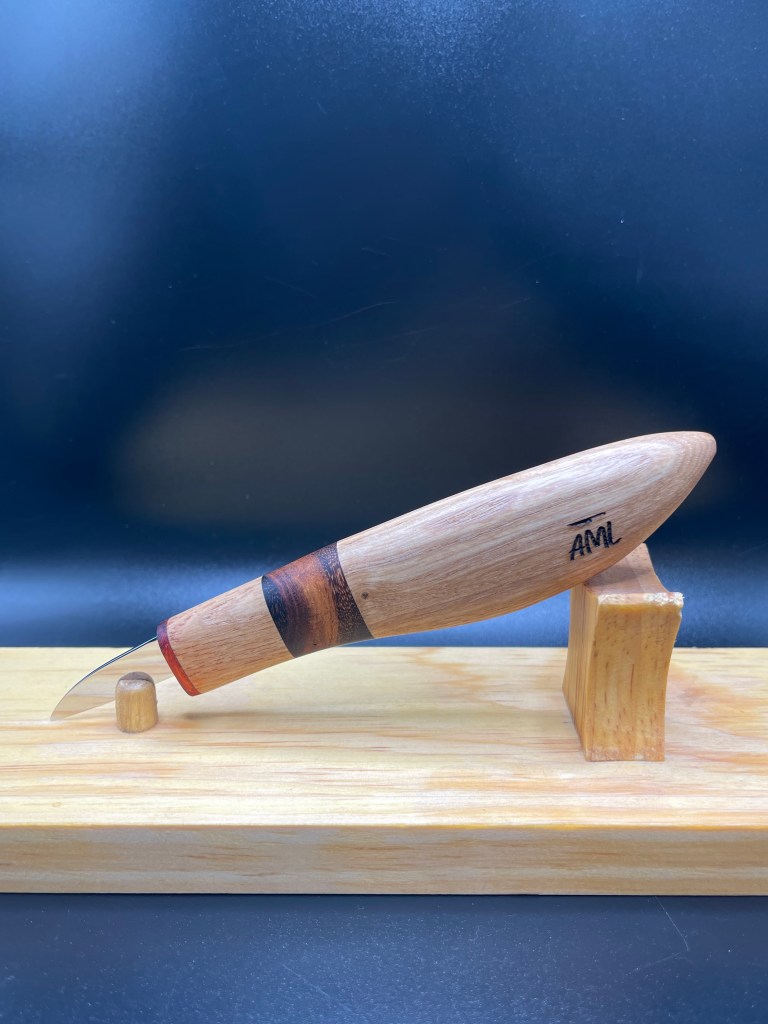
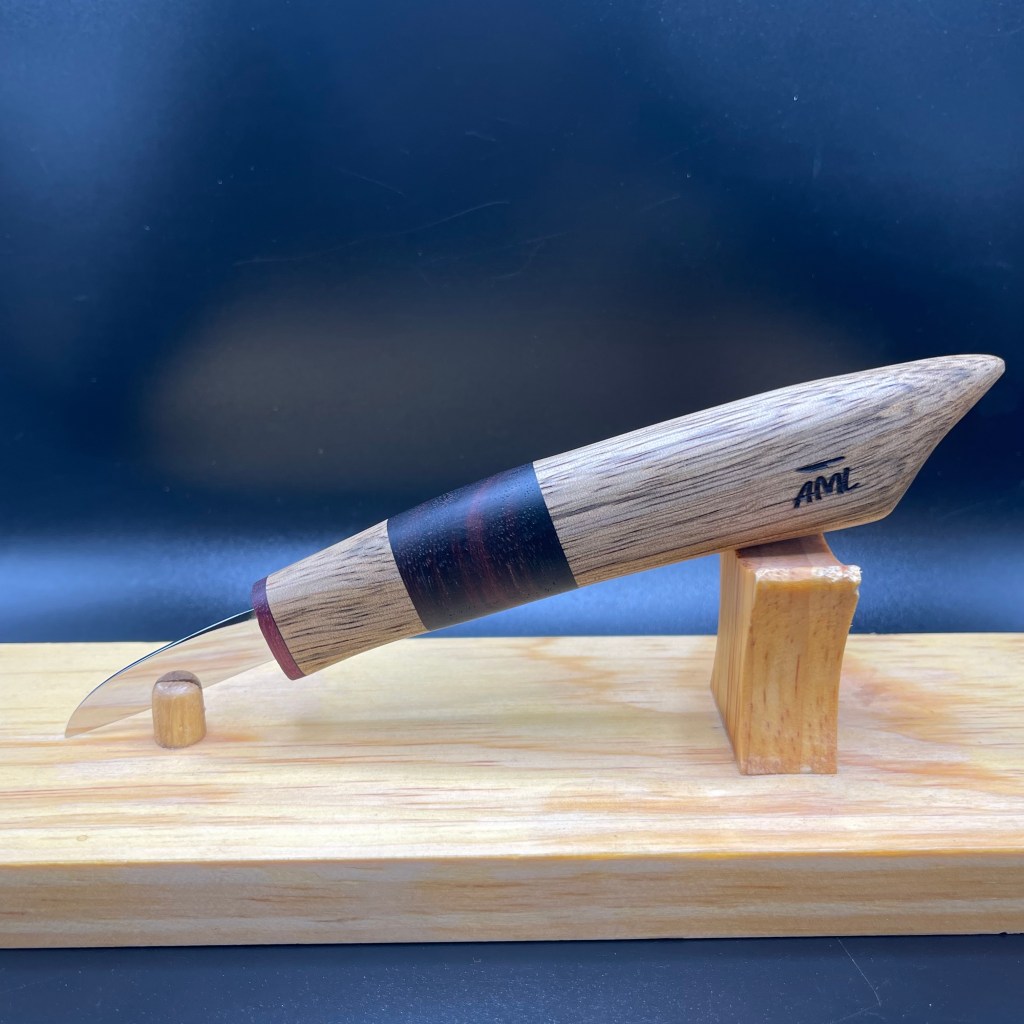
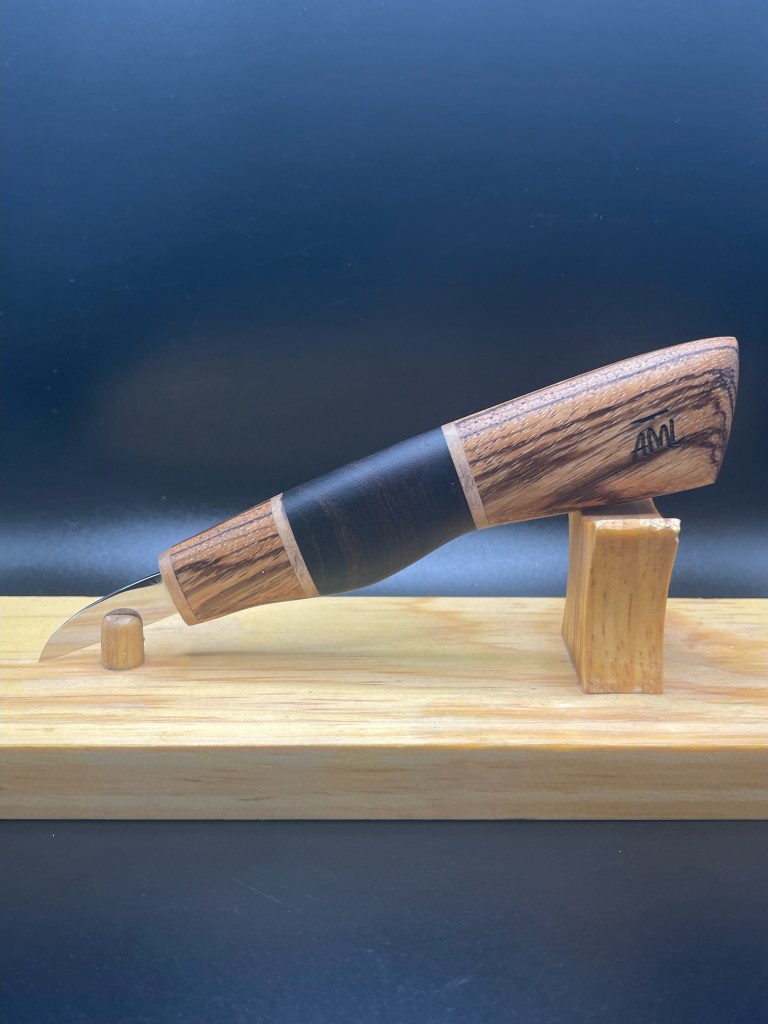
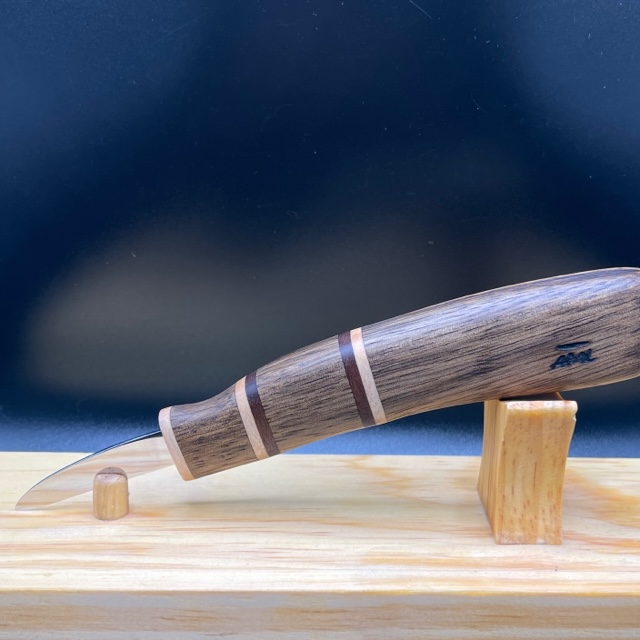
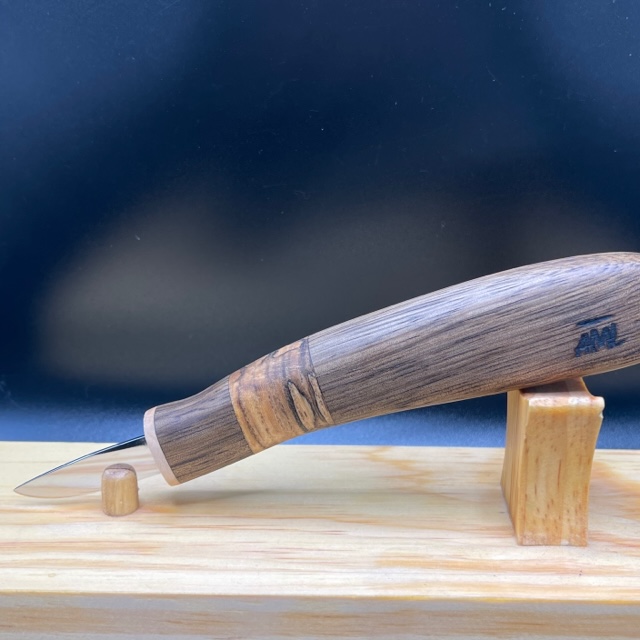
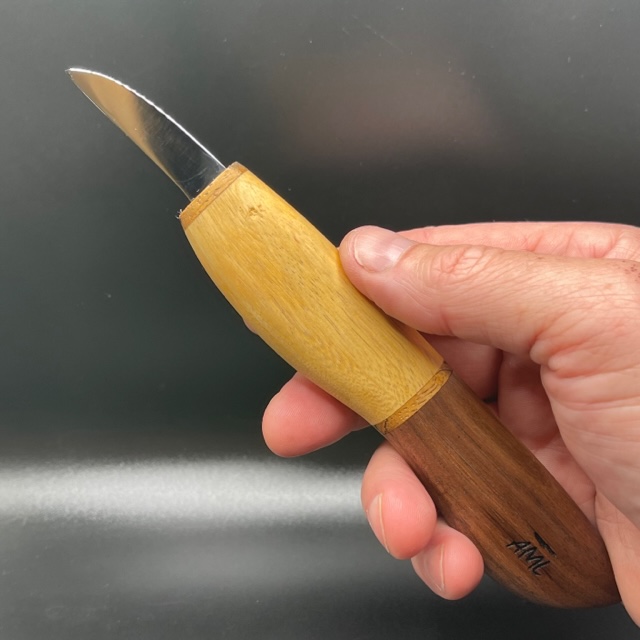
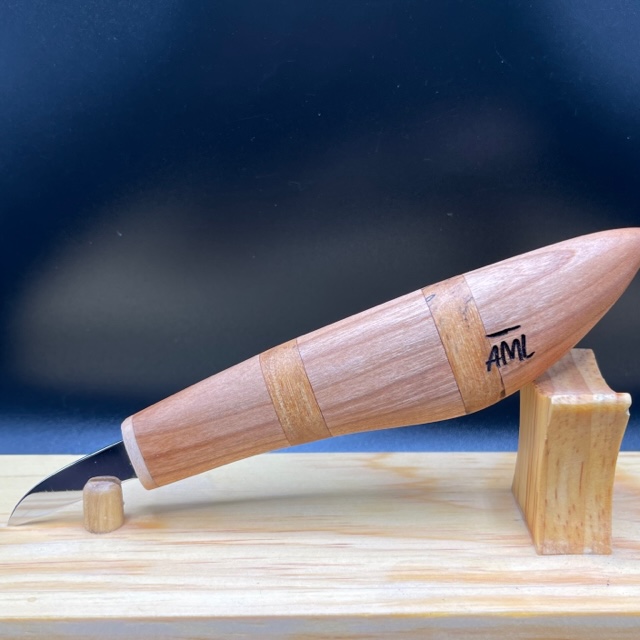
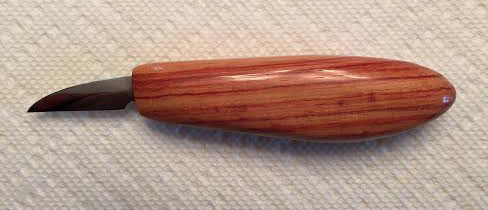
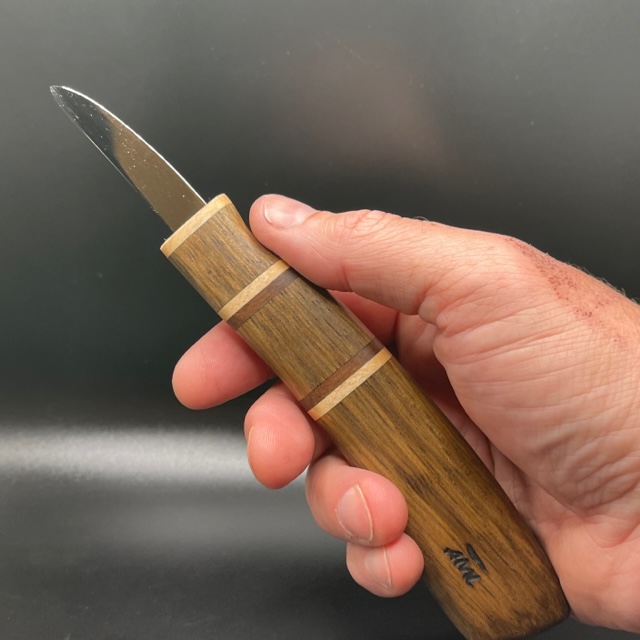
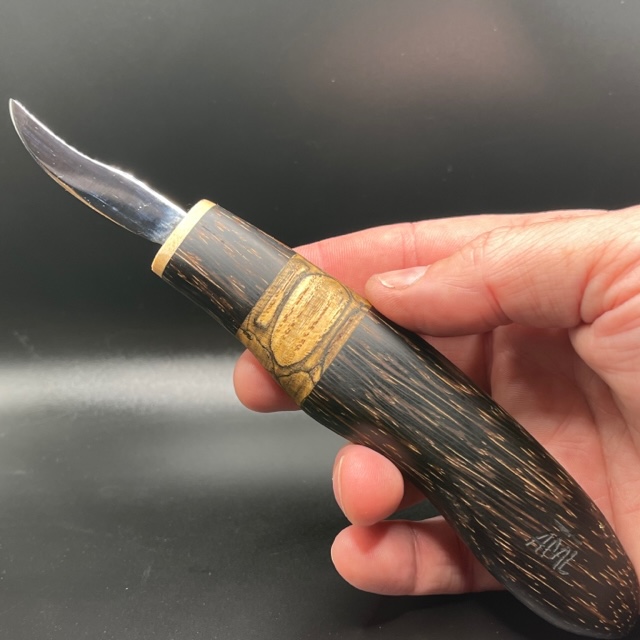
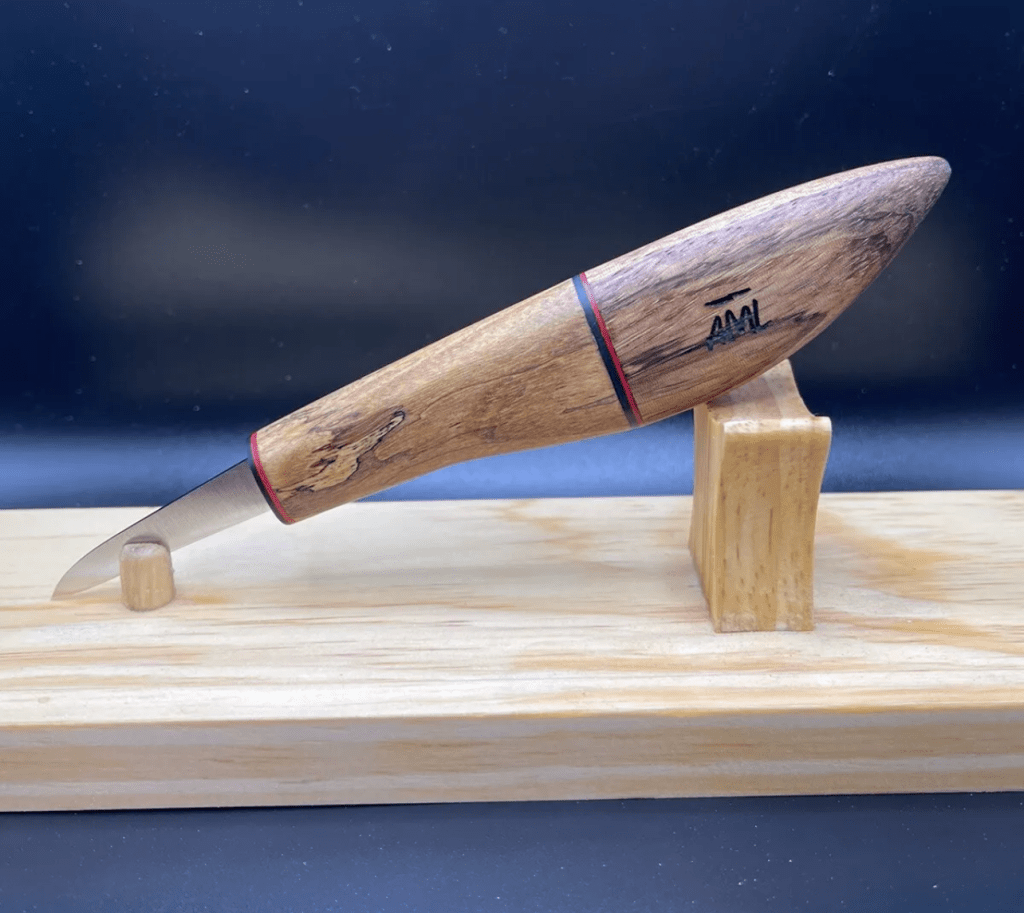
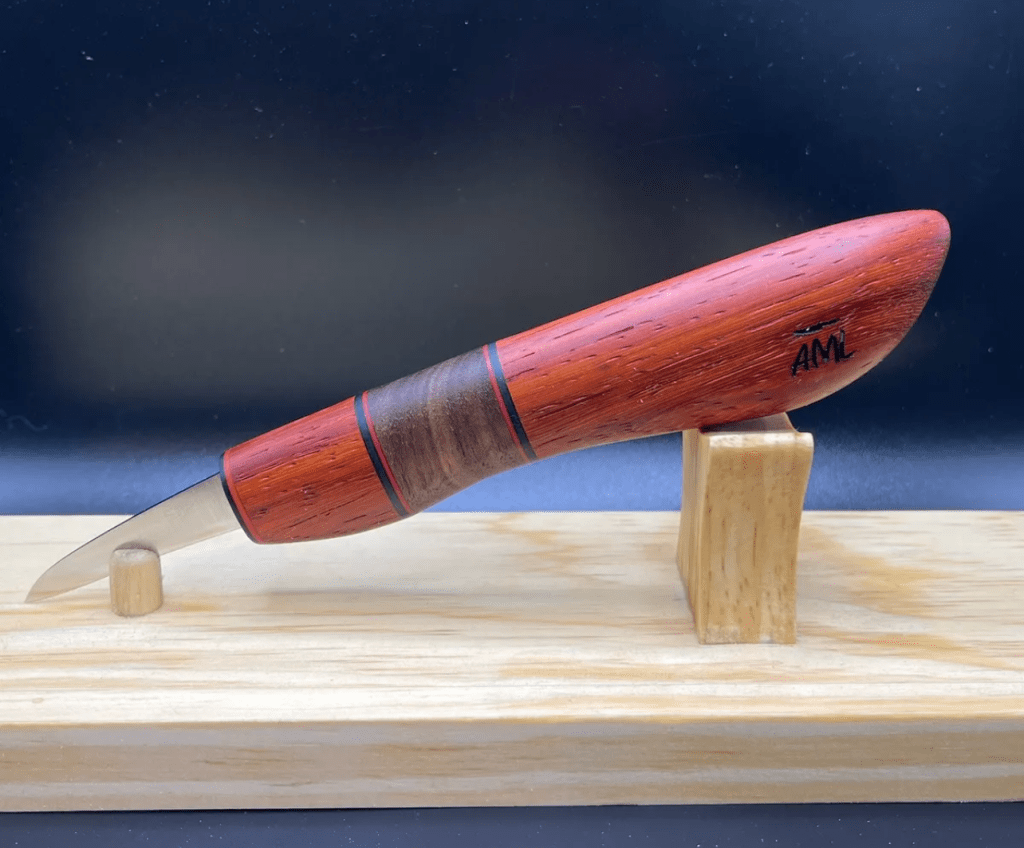
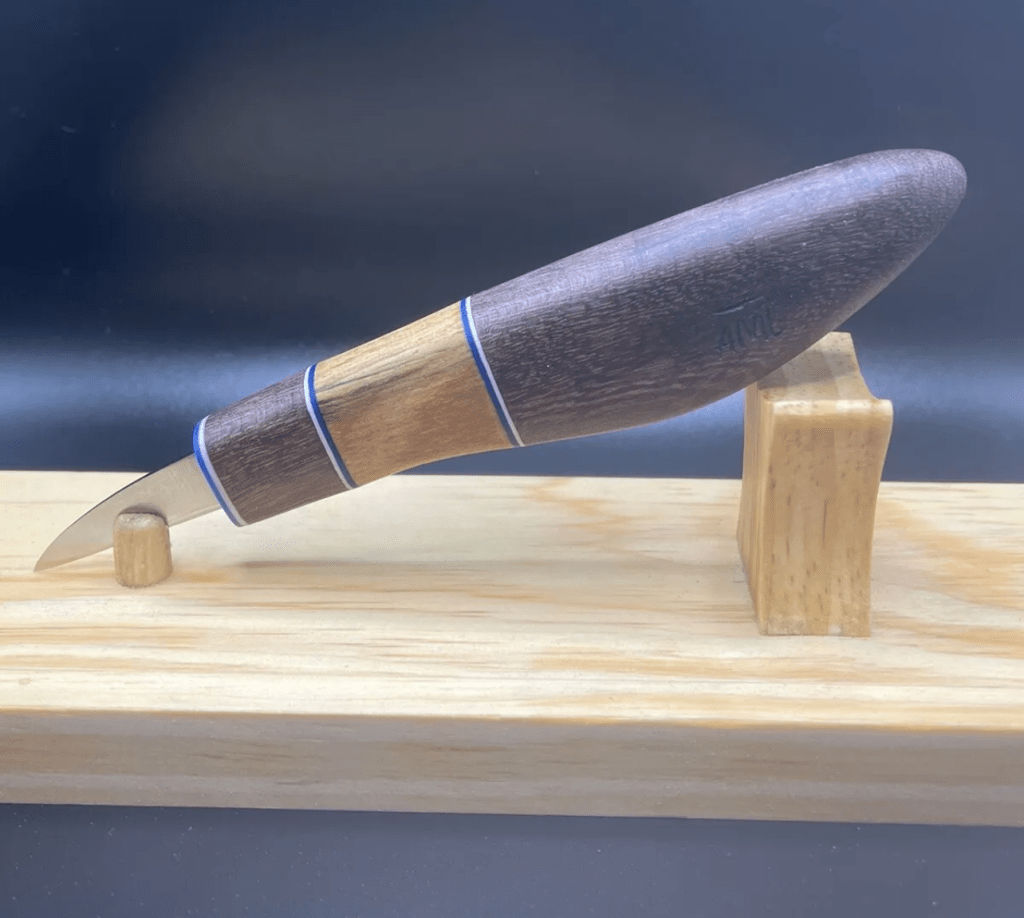
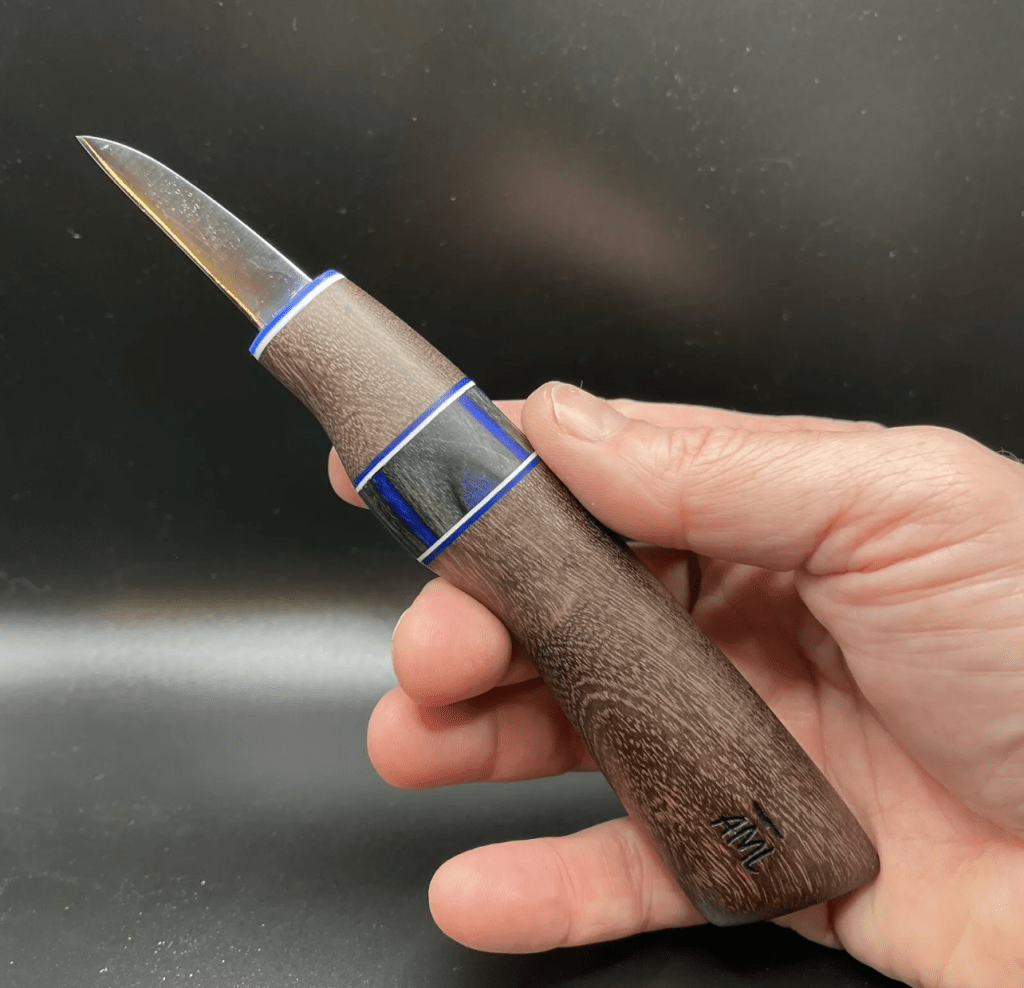
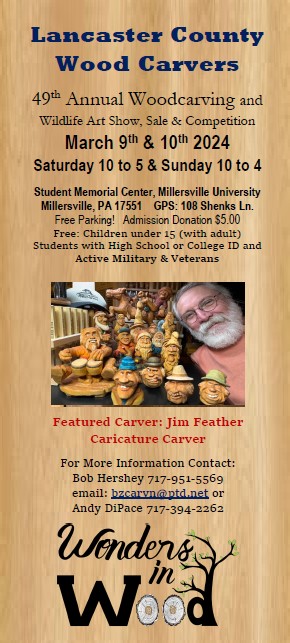
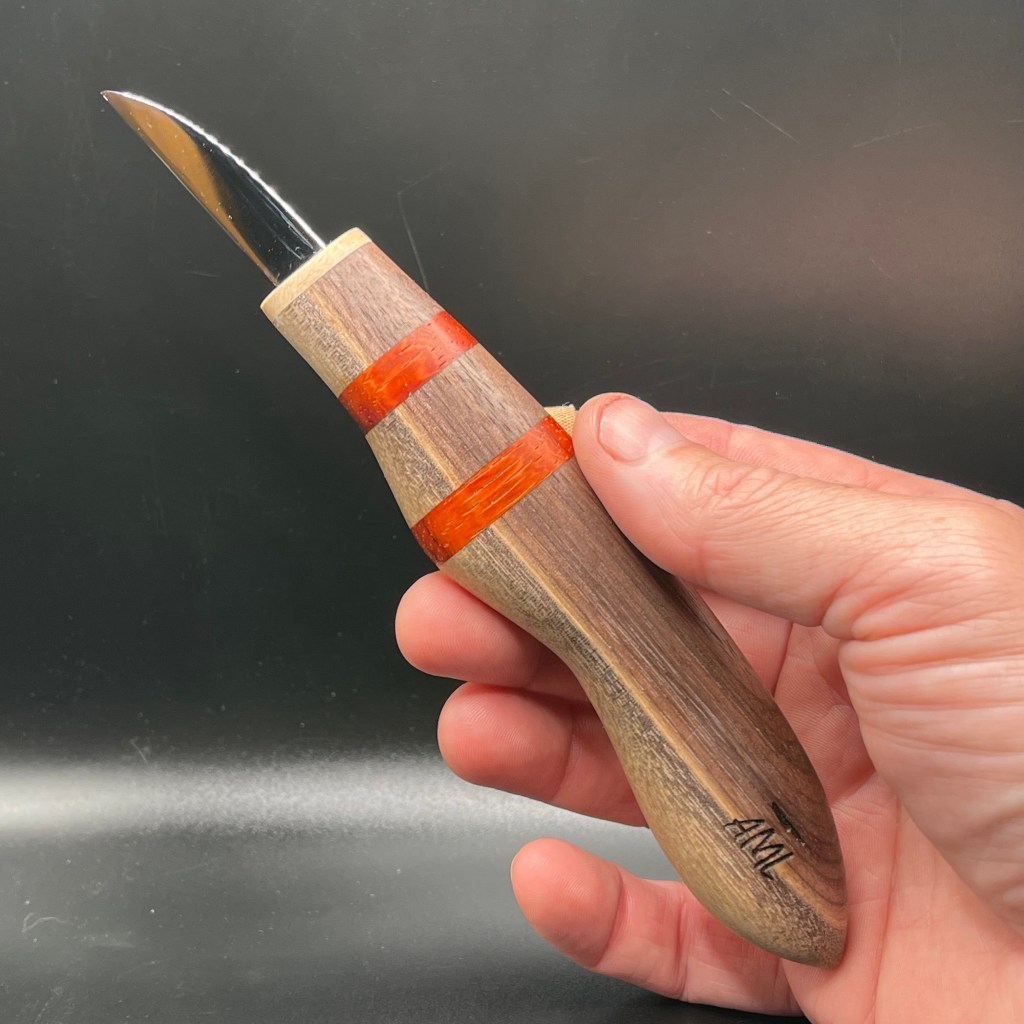
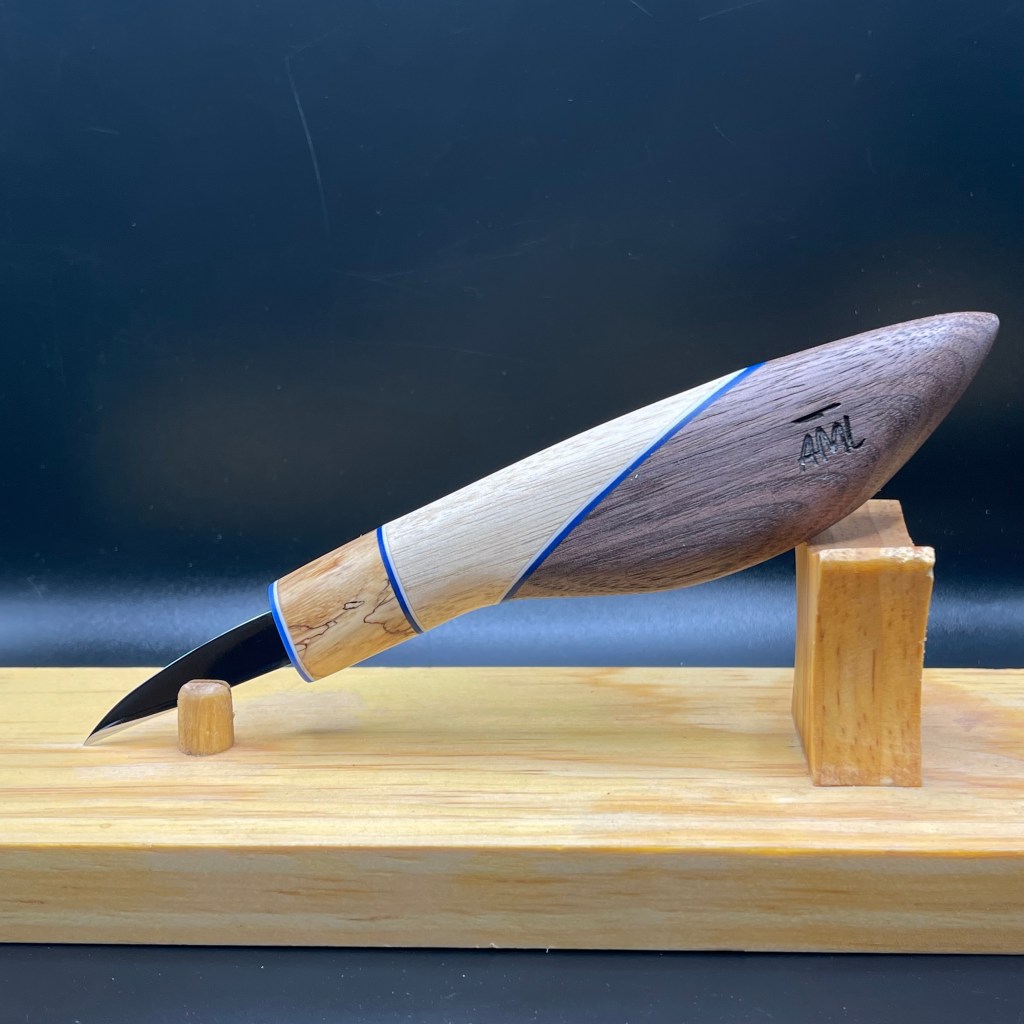
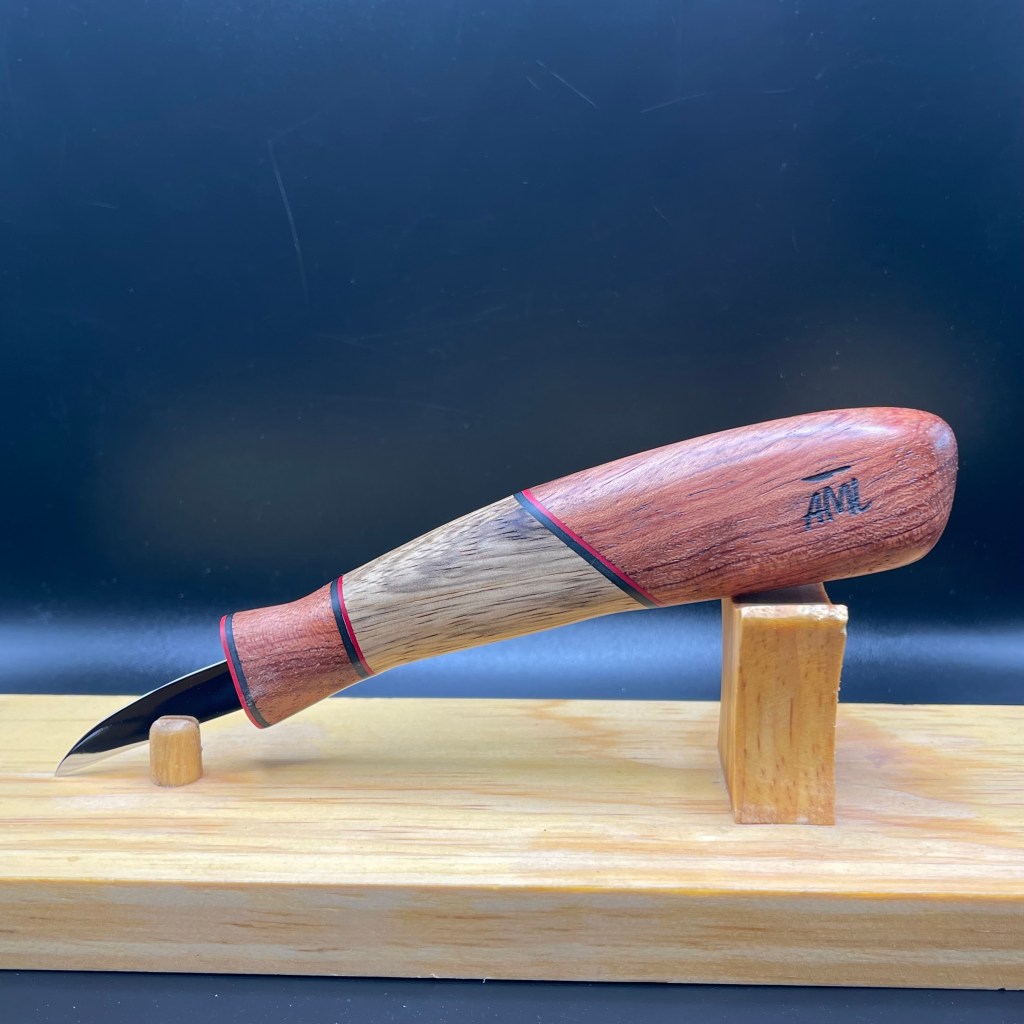
AML Wood Carving Knives

AML Wood Carving Knives are handmade by Andy Loughlin in Monroe, New York.
The blades are made from 1095 high carbon steel sharpen easily and hold an edge well. The variety of handle styles are all made from diverse exotic woods from all around the world. The knives are all available for auction on EBay under “AML Knives.” Bidding usually starts at $22 and most knives sell for between $40 and $100.
Every knife comes carving sharp right out of the package and each one comes with a custom made magnetic wooden sheath (see below) at no extra cost.
I now own two AML Knives and can speak personally about their quality. These are not production knives. Each knife is handmade by Andy, himself. The knives are very sturdy, well made, and will stack up well to the big boys. These knives have quickly become quite popular and sell out fast so check the site (“AML Carving Knives” on EBAY) often for availability. Below are examples of some knives currently available or which have recently sold:


Let’s make Wood Chip Chatter better than ever in 2024!
I’m sure you all have some terrific carvings to share in my Photo Shop section. Photos of your carvings liven up the blog’s appearance and make it more interesting. Also, my Carver’s Corner is a great way to get constructive critiques on your carvings so you can learn where to improve on your next ones. When sending in photos please specify whether you want them for display in Photo Shop or if you want me to critique them in the Carver’s Corner. Send your photos in to: carverbobk@woodchipchatter.com
Also, please submit any questions and comments you may have so we can keep Wood Chip Chatter active and keep the conversations going! Effective discussions are one of the best ways to learn about the topics that interest you. Remember, there’s no such thing as a dumb question! Plus we would all love to learn about the unique tips, techniques and products YOU use in your woodcarving process. Send your questions and comments to: carverbobk@woodchipchatter.com Thanks!
The next issue of Wood Chip Chatter will be posted on February 2, 2024.
Keep a sharp eye out for it.

Keep a sharp edge, and keep on carvin’!


Funny Bone

Being cremated is my last hope for a smoking hot body.