
The patriotic holidays will soon be upon us so I thought this is a good time to present a carving project to help celebrate the occasions.
I designed my Americana Goose Egg to be a simple project that can be completed in a short time with very few tools. A carving knife and V-tool are about all you need. So get cracking with a basswood goose egg and carve your own folk art symbol of America.
To get started on this project you will need a basswood goose egg, a carving knife and a 5/32″ (4mm) 45o V-tool.
Materials: Basswood goose egg, wood burner (optional), horsehair shoe brush, PLAID acrylic antiquing medium #819, Krylon clear matte acrylic spray, Howard FEED N WAX
Tools: Carving knife, 3/8″ (9.5mm) #3 gouge (optional), 5/32″ (4mm) 45o V-tool, pencil,
Paint Colors: Craftsmart, vanilla; Americana, Santa red; Apple Barrel, pinwheel blue
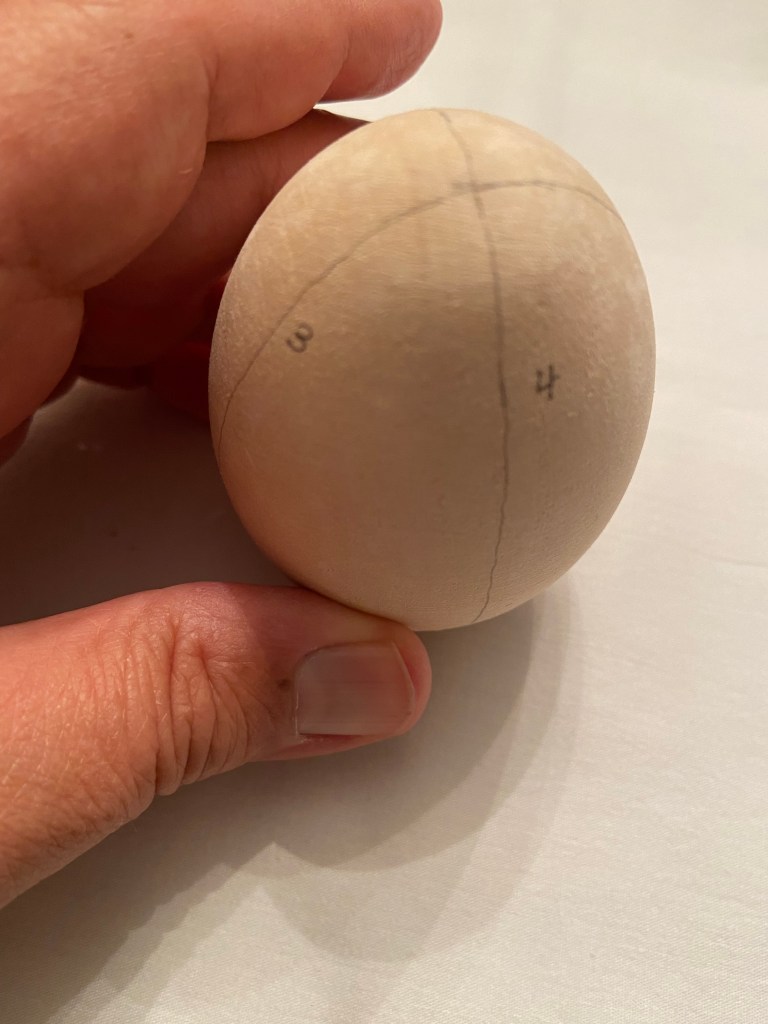
Step 1. Divide a basswood goose egg into quarters by drawing four light lines down the sides. Mark the lines 1 through 4.
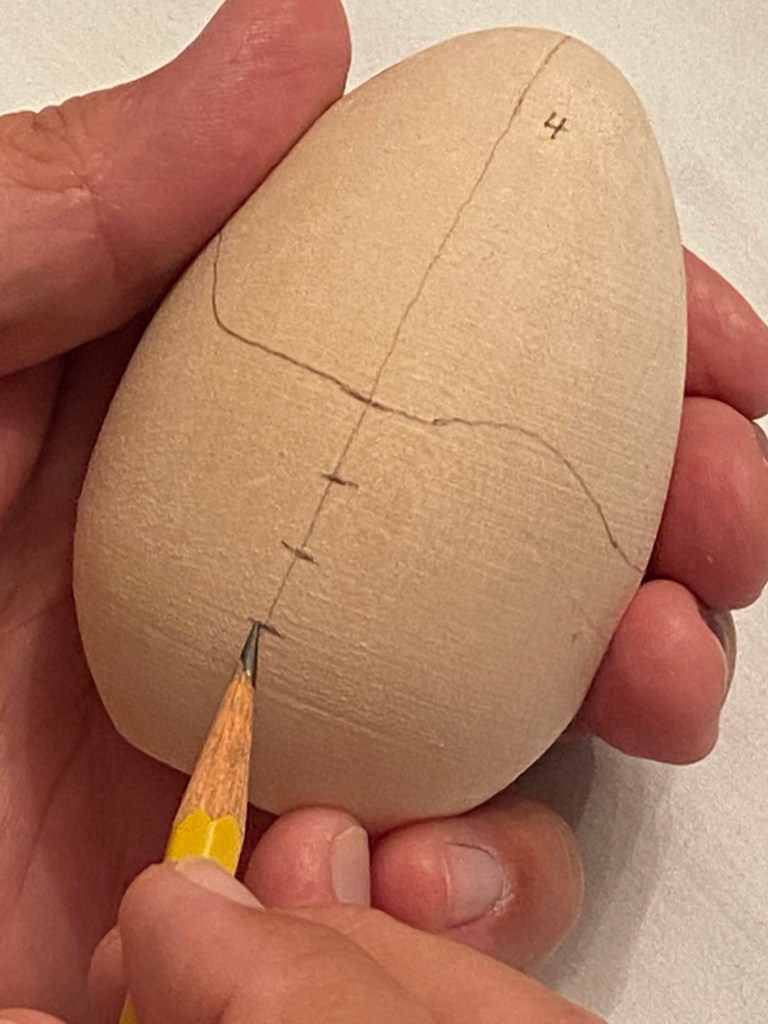
Step 2. Make a mark on line #1, 1-1/2″ (3.8cm) up from the bottom. Make a mark on line #2, 2″ (5cm) up from the bottom. Make a mark on line #3, 2″ (5cm) up from the bottom and a mark on line #4, 1-5/8″ (4.1cm) up from the bottom.

Step 3. Connect the four marks with long, lazy, curved lines.

Step 4. Mark below each top mark going downward at 3/8″ (9,5mm) intervals.
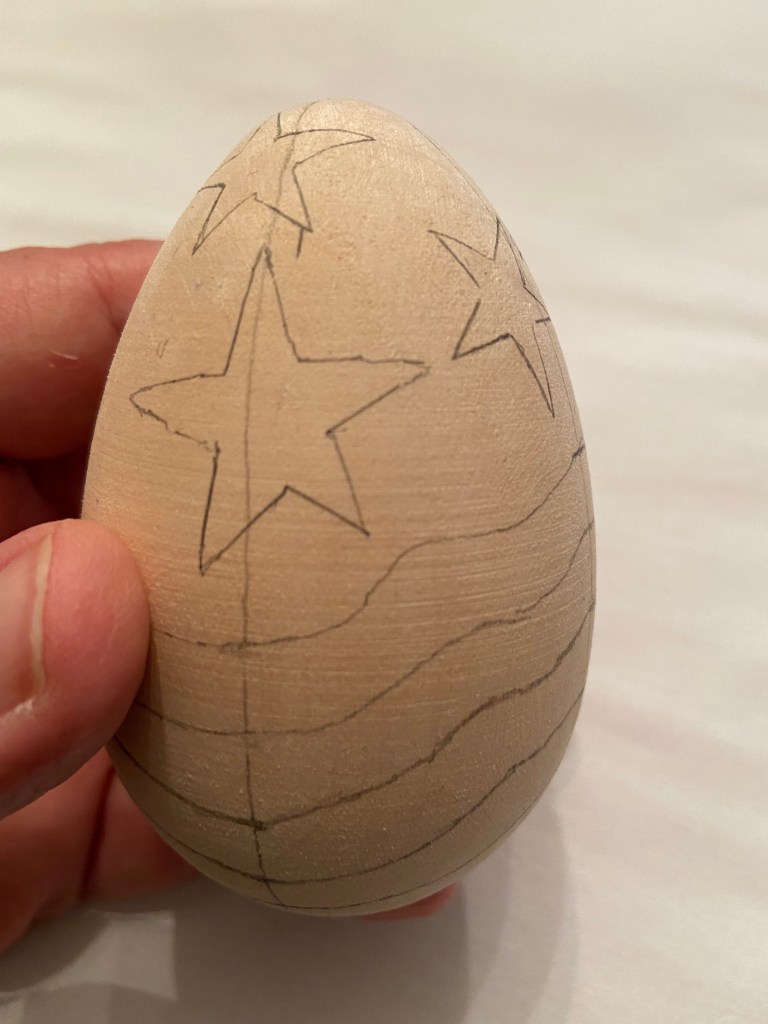
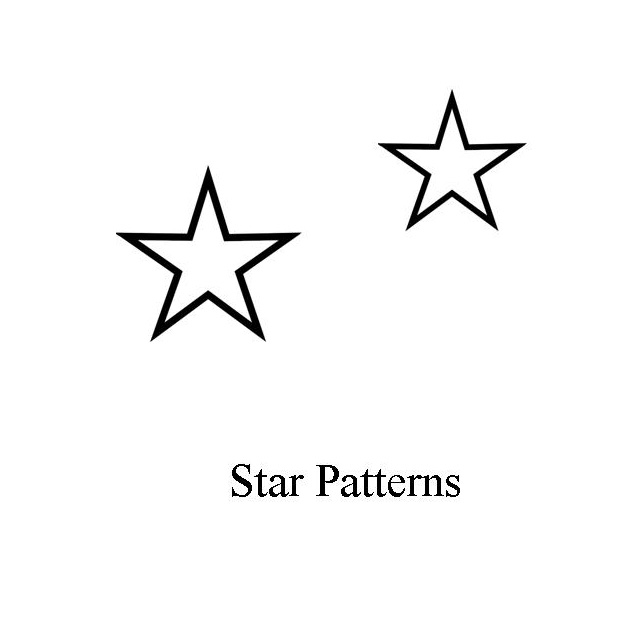
Step 5. As you did in Step 3, connect the rest of the marks following the curved line above it keeping at a distance of approximately 3/8″ (9.5mm). This distance is not critical and can vary slightly. Cut out the star patterns and randomly trace 6 stars [3 large (1″, 25mm) stars & 3 small (3/4″, 19mm) stars] in the area above the stripes.
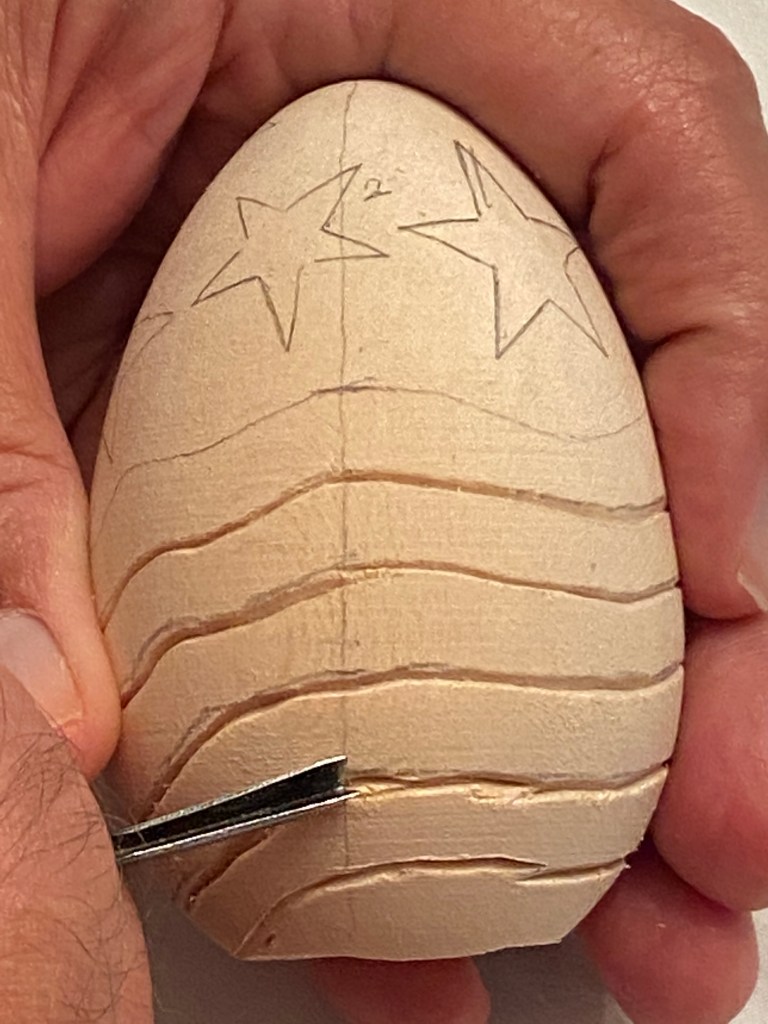
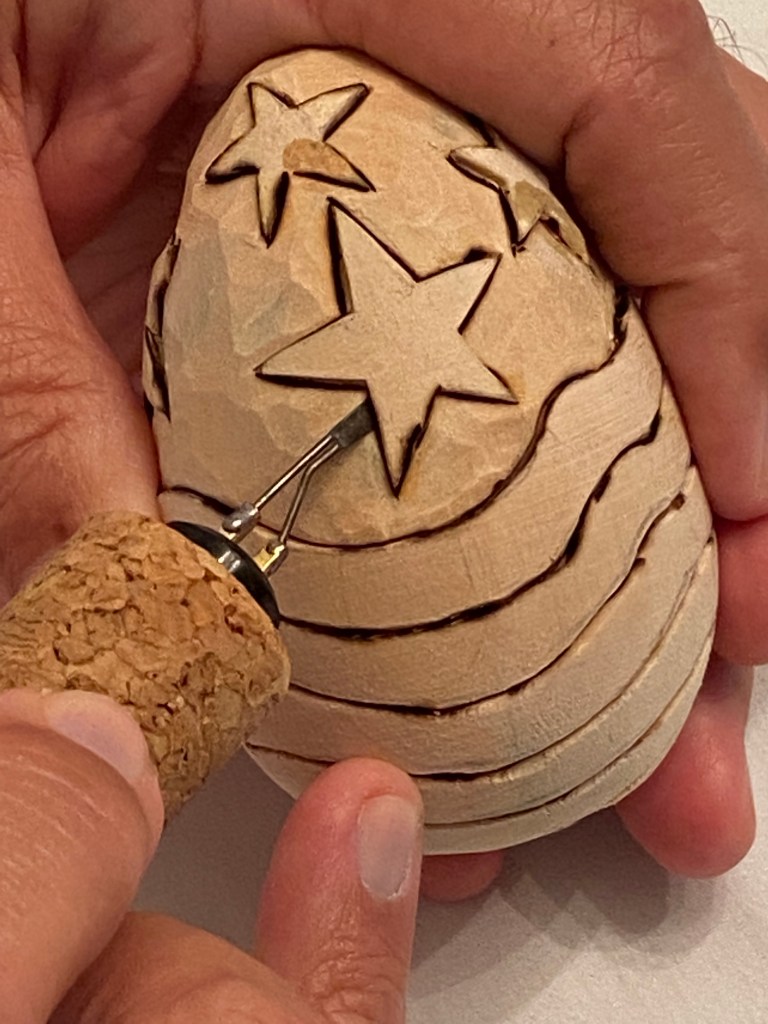
Step 6. Use a 5/32″ (4mm) 45o V-tool to carve the separations between the stripes. Begin at the top line and work downward holding the V-tool straight.
Step 7. Use a carving knife and a 3/8″ (9.5mm) #3 gouge to carve the stars and background around them. Make stop cuts around each star and cut back to them. You want to make the background approximately 1/16″ (1.5mm) lower than the stars. Use a wood burner with a skew tip to burn between the stripes and around the edges of the stars. The wood burning helps to prevent the paint colors from bleeding into each other.
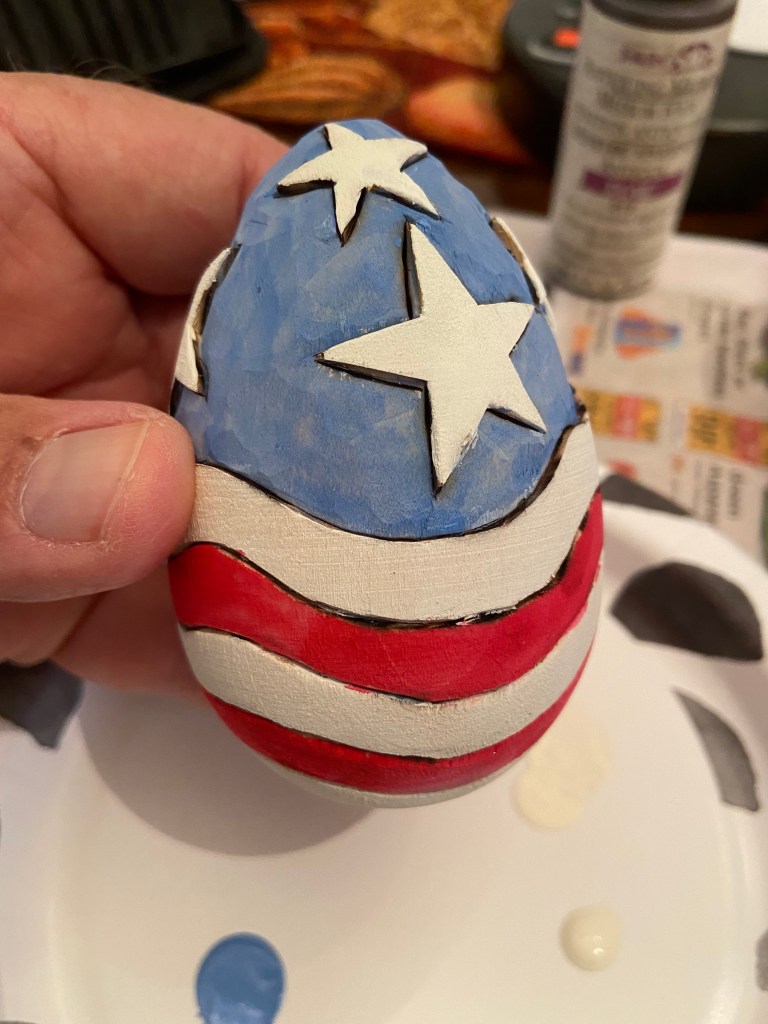
Step 8. First, paint the top stripe white. Then paint the remaining stripes alternating red and white.

Step 9. Paint the white stars first. Then paint the background blue. Allow the paint to dry completely before applying the antique.
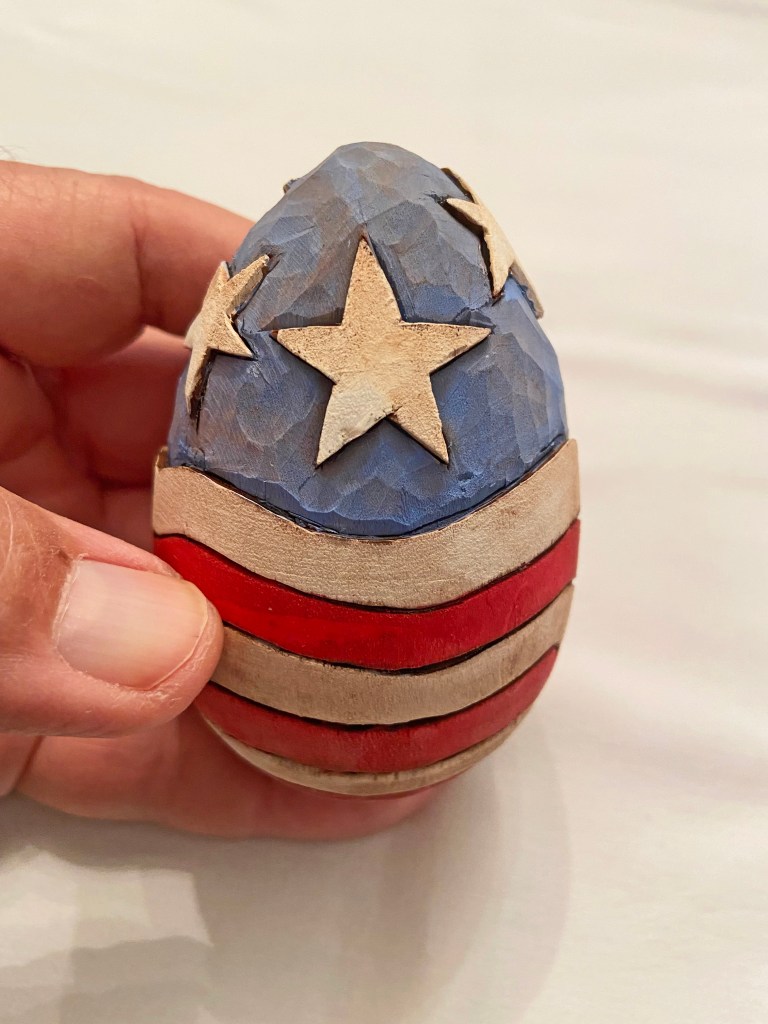
Step 10. To antique your egg make a thin slurry using 1 part of antiquing medium mixed with 5 parts of water. Mix thoroughly. Brush the mixture over the entire egg then immediately wipe off with a soft cloth. Use a damp cloth to aid in controlling the antique distribution.
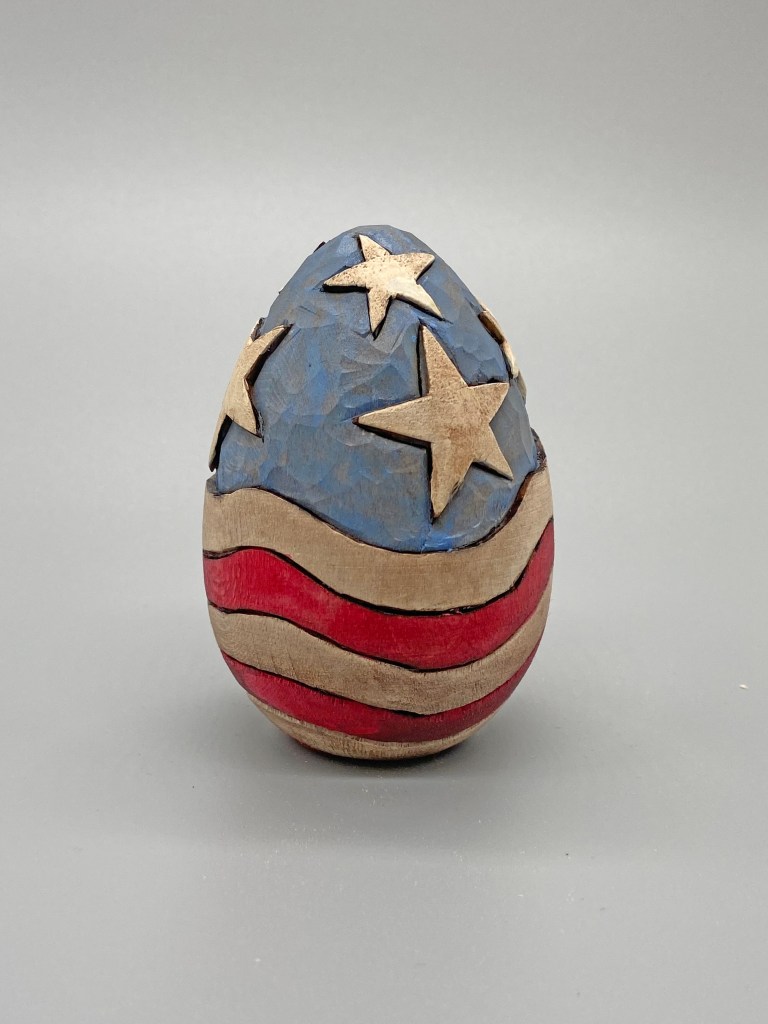
Step 11. Apply a coat of
Howard FEED N WAX and allow to sit for 10 minutes. Then rub down with a soft cloth and buff with
a horsehair shoe brush. The finished
Americana Goose Egg.
Reader’s Comments

I received a very nice comment on my walnut oil article from my very good friend, Dick Bonewitz of Carmel, Indiana. Dick said:
Great article on walnut oil. Very informative. Thanks so much. Keep up the good work
Dick Bonewitz
Carmel In
Thank you for your kind words, Dick. Much appreciated.
My good friend, Jon Gledhill wrote in with a follow up on his stain research post from last month. Jon writes:
Bob, Thanks for another great letter. I’d be happy to share what I’ve been doing and learning with stains. I’ll get working on it. I appreciate the invitation and opportunity to “give back” after having received so much help, input, and ideas from others. Jon Gledhill
Thanks for the comment, Jon! I’m sure many of us are anxious to learn more about your work.
My good friend, Tim Lassen sent in two photos of a trout he carved in response to the question raised by Dean Stewart last month about how to add scales to a fish carving. Tim writes:
Hi Bob..Attached are photos of a trout with scales. I found using wood burning hatched lines works well. i used a wood burner based on a recommendation from someone. Sorry I do not remember who, tho but they get the credit. I have attached two photos. One is with primer right after burning and the second is a completed project. Hope this helps your reader….Tim
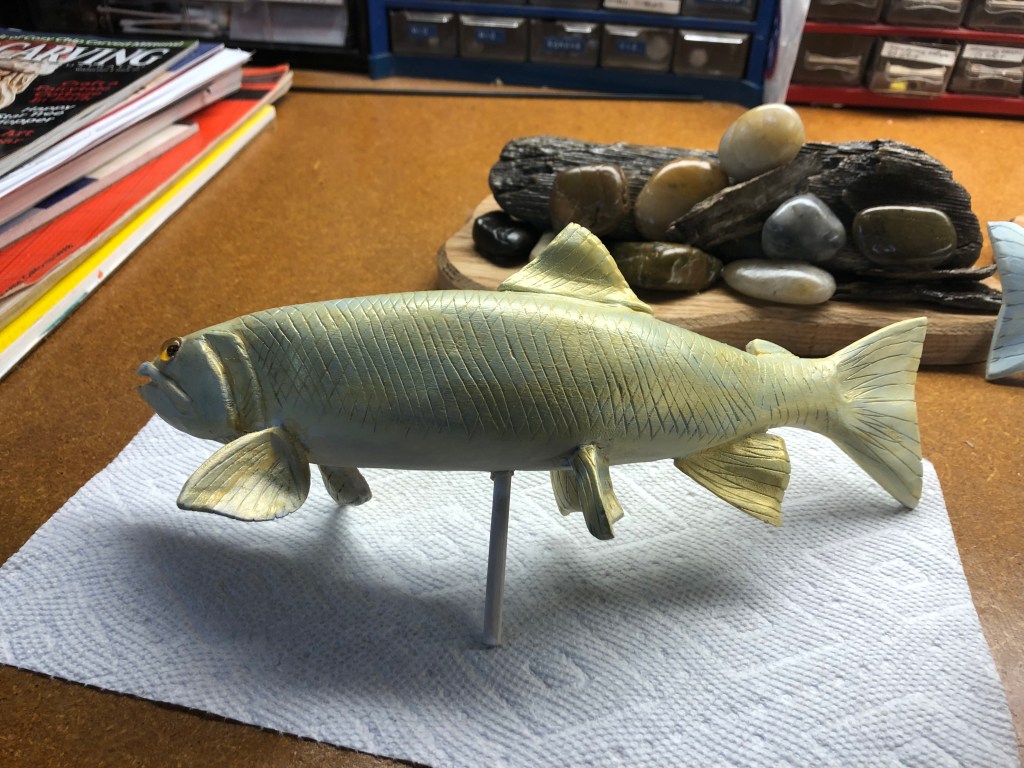
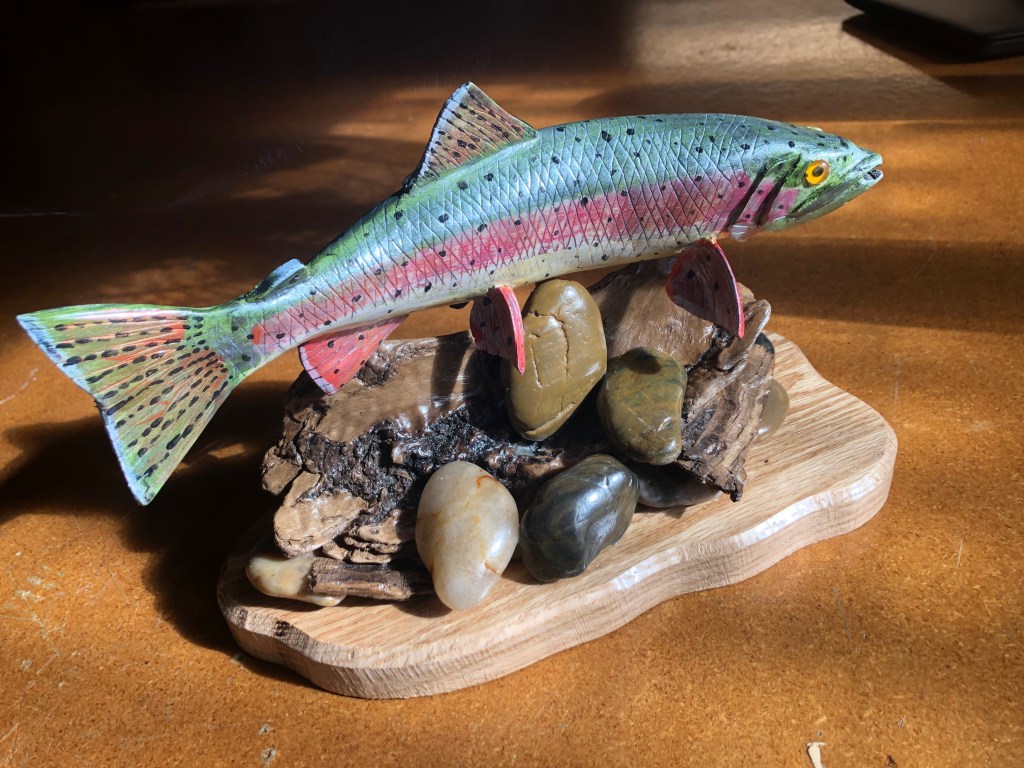
Thanks for the photos and tip about wood burning scales on a fish carving, Tim! Your rainbow trout looks excellent and I’m sure your suggestion will be helpful.
Photo Shop

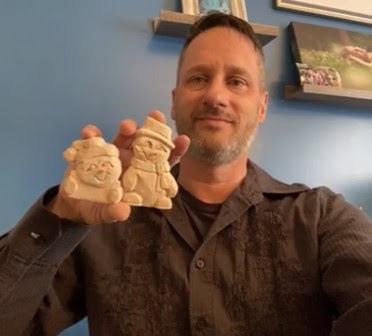
“Photo Shop” is the section of Wood Chip Chatter where carvers can send in photos of their wood carvings for display. It’s your chance to show off your work…sort of a show and tell. The photos will only be displayed and no comments or critiques will be made. For critiques on your carvings send them in to the “Carver’s Corner.” Send your photos to: carverbobk@woodchipchatter.comMy first entries to the Photo Shop this month are more photos of the various carvings my good friend, Andy Tarap has been doing:
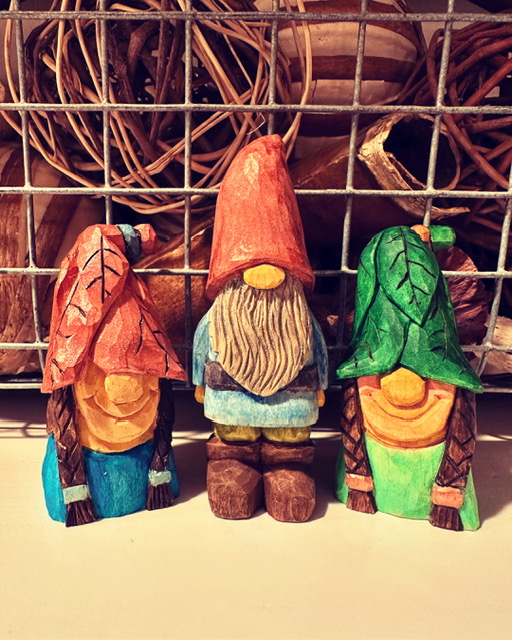
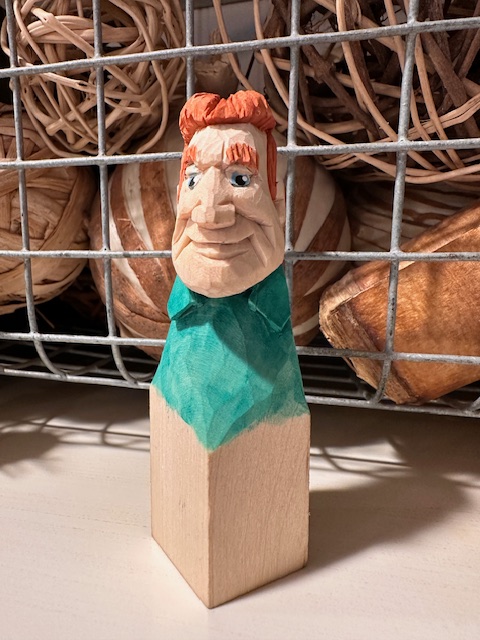

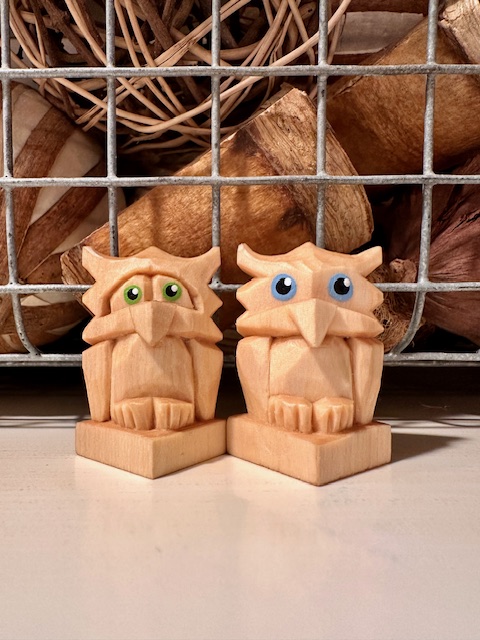
Very nice work, Andy! I like the variety of your carvings.
My next entry is a photo of a Killdeer carved by my very good friend, Dick Bonewitz from Carmel, Indiana. Dick writes:
Bob, here is picture of the Killdeer I carved and painted in a class with Josh Guge at the Ozarks Woodcarving seminar in Springfield Mo last month. It was power carved from Tupelo wood and painted with Liquitex heavy body acrylic paints. I will do a different base and create some habitat for it with sand and pea gravel as this bird nests on the ground roof tops. I highly recommend this seminar which will be held again next March
Dick Bonewitz
Carmel In

Your Killdeer came out great, Dick! It looks quite realistic. I use a lot of Liquitex paints on my carvings. They are very high quality paints which are made with premium quality pigments. Although they are much more expensive that the popular craft bottle paints you can notice the difference in the results.
Carver’s Corner

“Carver’s Corner” is the section where you can send in photos of your carvings to have me critique them and offer you my truthful opinions on what you did right and what you might improve on next time. It’s an excellent opportunity to improve your carving skills! Send your photos to: carverbobk@woodchipchatter.com
My good friend, Doug Cooper sent in a photo of the excellent mouse he carved and would like me to say a few words about it. Doug writes:
Hi Bob
Just discovered your blog.
I like it!
Here’s a picture for your carver’s corner.
Keep up the good work.
Thank you
Doug

Thank you so much for your photo contribution, Doug but I honestly don’t know what to say about it. It’s extremely well carved and painted and the accessories are perfect. I especially like how you painted the rusty jail cell bars. Even the bricks and plants are spot on. There’s really nothing to not like about the whole piece. Keep up the great work and I hope to see more of your terrific carvings in the future.
My good friend, Dean Stewart also submitted a photo of a terrific sea captain bust he recently carved following an Alex Lacasse tutorial. Dean writes:
Bob,
Here is a recent carve of mine. I’d appreciate some professional feedback on it. It is based on a tutorial by Alec Lacasse but the eyes are all mine. Carved in 2x2 basswood, sealed either mineral oil, painted with acrylics. Finally antiqued with burnt umber oil paint and sealed with Howard’s feed and wax.
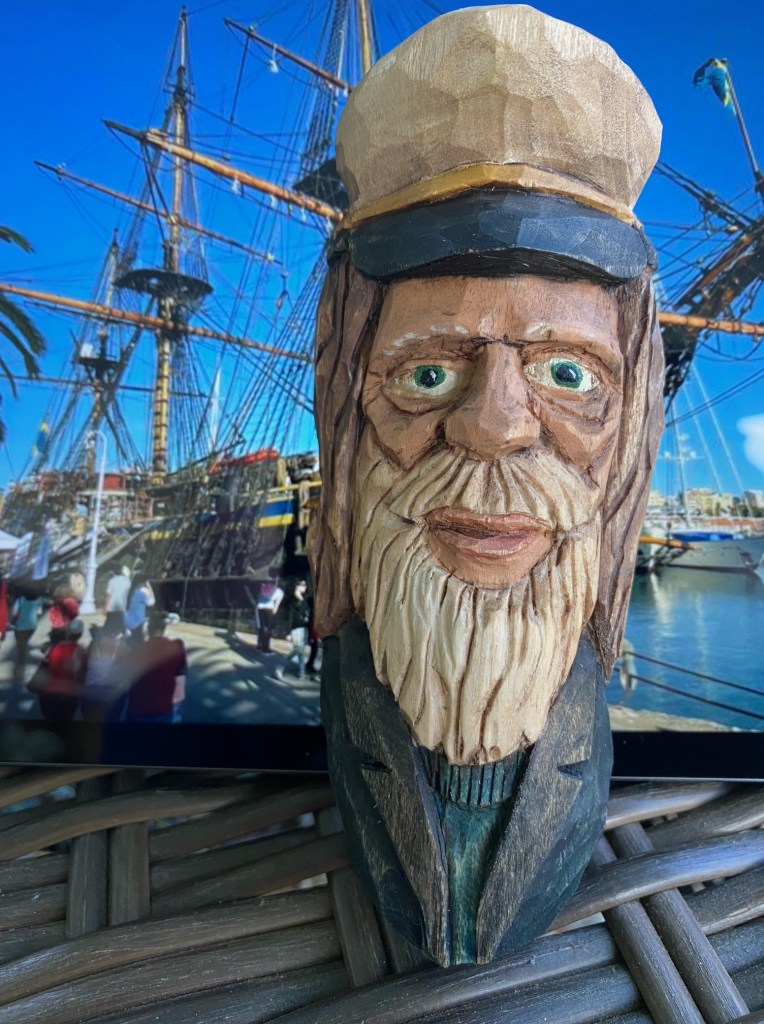
Thanks for the photo, Dean! Always appreciated. I’m not familiar with Alex’s sea captain tutorial so I don’t know what it’s supposed to look like and I’m not sure what you mean when you say “the eyes are all mine.” How are they different from the original?
The carving is done well overall but as it so happens it’s the eyes I’m concerned with. If you look carefully at the eyes they appear to be staring into space, a common problem when many carvers do eyes. The reason for this, in your case is that the eyes are too wide open. On your next one try closing the eyes a bit by carving the upper and lower eyelids closer together, showing less eyeball.
Other than that, you’ve done a good job. Keep up the good work.
Woodcarving Tip
Draw Your Hair First
Whenever I’m doing a carving that involves hair or fur I always draw it on with a pencil first. This way I get the flow of the hair going in the direction I want it. This is particularly important when carving animals where the fur flow changes quickly and goes in many different directions. By using a pencil you can always erase marks you are not satisfied with which may be going in the wrong direction.
Question & Answers

Russ sent in an interesting question about determining the radius of a gouge. Russ writes:
I have dabbling in carving for just less than a year. Lots of good stuff on line to help guide my journey. I am comfortable stropping my knives (only have Flexcut now, with Helvie & Drake on order). Stropping gouges, not so much.
Sadly our local Woodcraft store is closing.. but that is providing me with nice discount opportunities on Pfeil gouges.
I have made a couple flat strops (easy peasy). I am thinking of making an external gouge slip (gouges in the block, lined with leather, matching the radius of the gouges I most commonly use). However, I cannot find the radius of the various gouges. Perhaps you could aim me in the right direction for that information?
Thank you for your question, Russ, but I don’t really have a good answer for you since I’m not terribly familiar with gouges and how they are made. That said, I personally would not waste time (which would be better spent on carving) trying to make a slip strop for my gouges when for about 20 bucks Flexcut already offers their Flexcut SlipStrop which is specially designed for that purpose. I own one and it works just fine on my gouges and V-tools. The way I look at it, why reinvent the wheel?
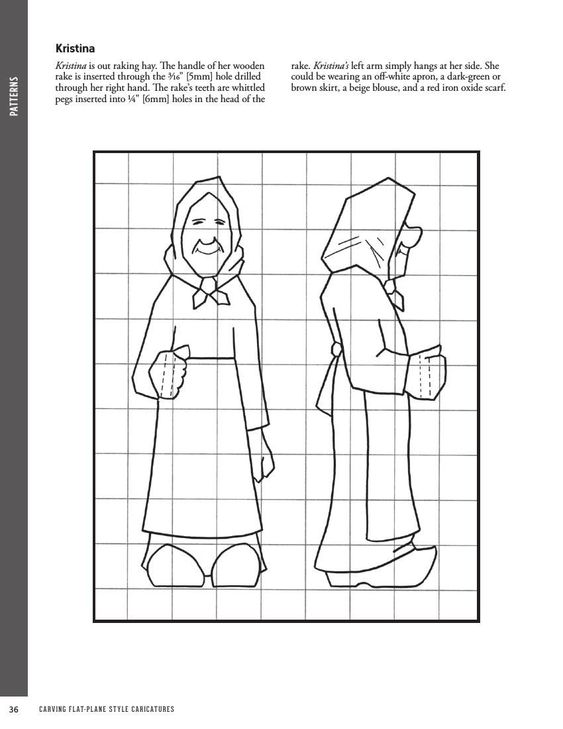
Pattern of the Month
“Kristina” by Harley Refsal
Upcoming Workshops & Seminars


Woodcarving 5 Piece Cowboy (& Friends)
Teacher: Dave Stetson
Dates: June 1,2,8,9
Times: Sat, Sun – 9:30am-11:30 Pacific /11:30am-01:30pm Central / 12:30pm – 2:30pm Eastern
8 hours (4 sessions – 2 hours each day)
Location: Online (Via Zoom)
For details and to sign up email Dave Stetson

Online Classes With Chris Hammack
Teacher: Chris Hammack
Chris Hammack is offering a new series of online classes to help students learn and sharpen their woodcarving skills. Individual and Group Classes are available through his web site chrishammackart.com/groupclass
TWhittle Tuesdays
Teacher: Dwayne Gosnell
Dates: Two – 2 hour classes each month on Tuesdays
Location: Online (Via Zoom)
To sign up contact Dwayne Gosnell via email dagwood_76@gmail.com

Woodcarving Academy
Established in 2020, the Woodcarving Academy offers dozens of videos and seminars created by some of the country’s top level instructors. More videos are added regularly as they are created by the instructors.
With a paid subscription to the Woodcarving Academy you can view any videos you like for as many times as you like.
Subscription rates: Monthly = $19.95 Quarterly = $49.95 Annual = $139.95
There is even a Free level which allows you to tour the website and watch the sample videos and content, and receive email updates as new content becomes available.
Check out the Woodcarving Academy and learn with the masters right in the comfort of your own home! Go to: www.woodcarvingacademy.com or Email: support@woodcarvingacademy.com
News & Announcements


The International Association of Woodcarvers has upcoming Zoom meetings on the following Saturdays at 3PM EST with special guest presenters. Check them out…
Zoom: 310-460-3575
Presentation Schedule:
5/4 – Christine Hill
5/11 – Kyle York (Kjaycarvings)
5/18 – Cody Bonham
5/25 – Rhys of Woody Woodcarvers
We will be starting out Summer Series beginning in June. There will be only one meeting per month during June, July and August.
INTERNATIONAL ASSOCIATION OF WOODCARVERS
COME JOIN US!!!
The Jersey Hills Wood Carvers (JHWC) club is a small but growing group of wood carvers sharing their time, knowledge and joy of woodcarving. The JHWC generally meets from 7:00 PM EST to 9:00 PM EST on the 1st, 3rd and 5th Thursday of each month (when school is in session) at the Jefferson Township High School wood shop classroom.
Membership is “FREE” and open to anyone interested in woodcarving regardless of their ability.
JHWC’s Upcoming Meetings and Events
2024
May 16th and 30th
June 6th and 20th
For more information contact:
Al Santucci alsantucci4@gmail.com President
Bill Brunner billbrunnerdesign@gmail.com newsletter/website editor
Or visit:
Website: https://www.jerseyhillswoodcarver.com/
Facebook: https://www.facebook.com/groups/736479646821641/
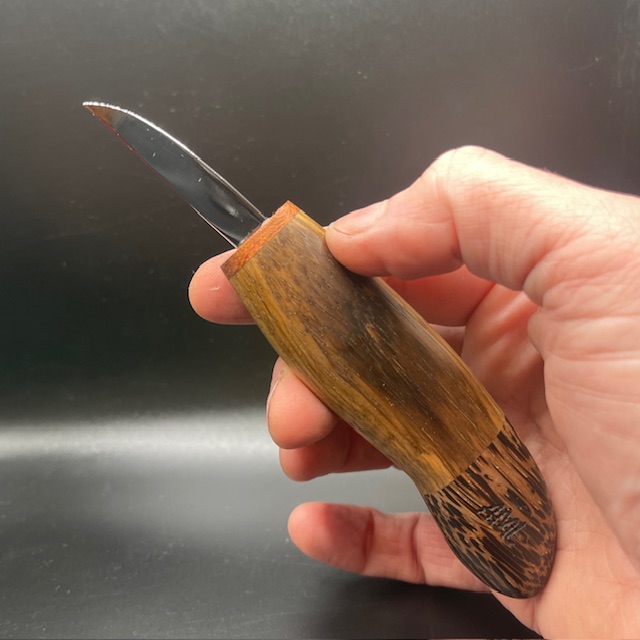
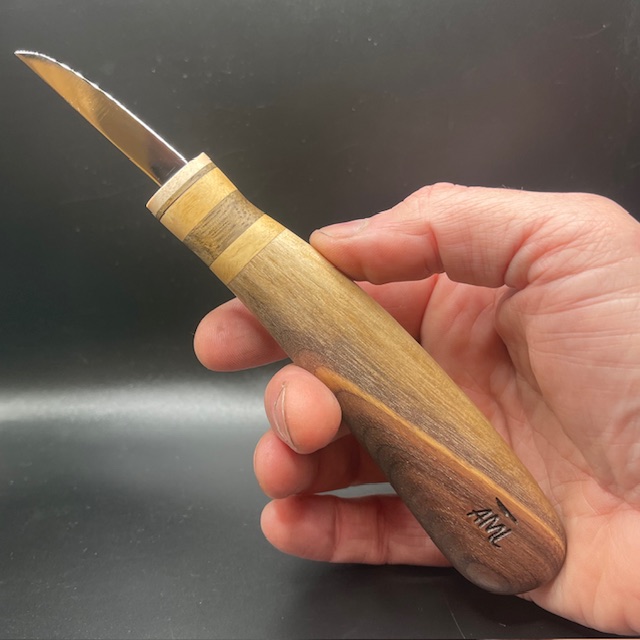
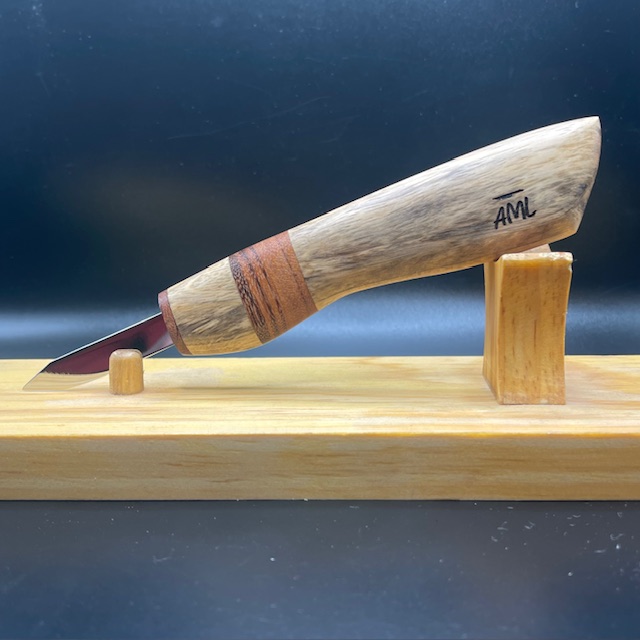
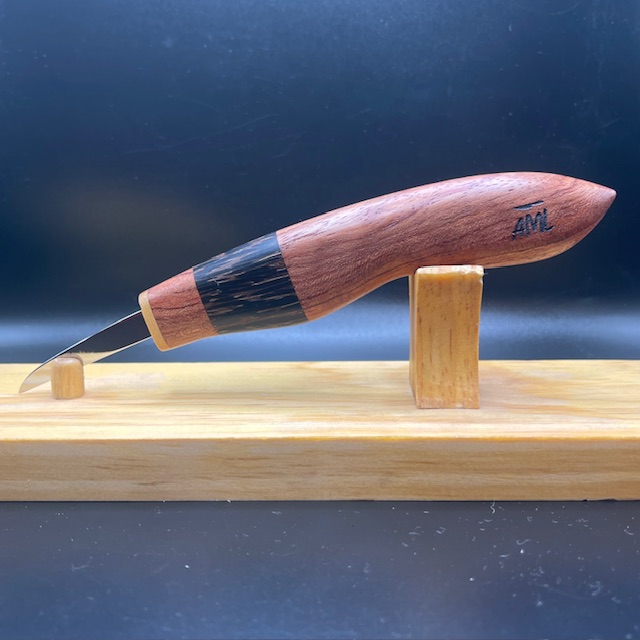
AML Wood Carving Knives

AML Wood Carving Knives are handmade by Andy Loughlin in Monroe, New York.
The blades are made from 1095 high carbon steel sharpen easily and hold an edge well. The variety of handle styles are all made from diverse exotic woods from all around the world. The knives are all available for auction on EBay under “AML Knives.” Bidding usually starts at $22 and most knives sell for between $40 and $100.
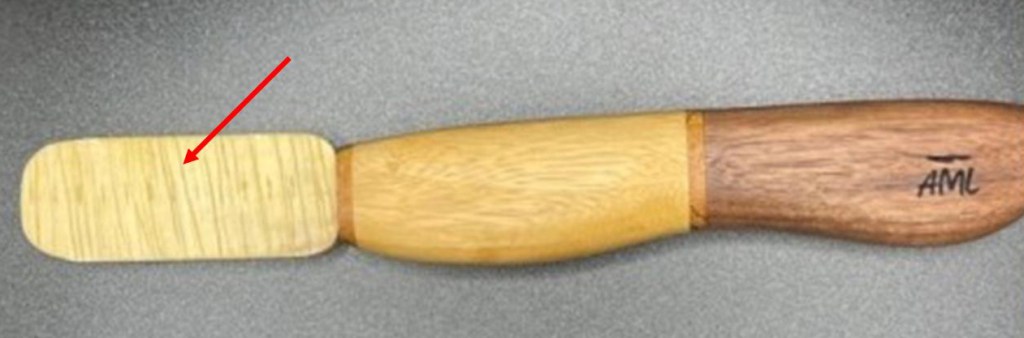
Every knife comes carving sharp right out of the package and each one comes with a custom made magnetic wooden sheath (see below) at no extra cost.
I now own two AML Knives and can speak personally about their quality. These are not production knives. Each knife is handmade by Andy, himself. The knives are very sturdy, well made, and will stack up well to the big boys. These knives have quickly become quite popular and sell out fast so check the site (“AML Carving Knives” on EBAY) often for availability. Below are examples of some knives currently available or which have recently sold:


Sad News…
Sadly I was just informed late last week that my much anticipated book will not, in fact be published. In a nutshell this is what I was told:
“Hi, Bob,
I hope you’re having a great week so far. I wanted to update you on the status of your carving booklet; unfortunately, we are pausing our booklet program for the present and will not be proceeding with publication as scheduled.
I realize that this is disappointing news. Rest assured that the decision is not reflective of the projects’ quality; you have real talent, and we’d like to repurpose the step-by-steps in future issues of the magazine instead, as we believe they hold value for readers.
Please let me know if you have any questions. Have a good afternoon.”

It appears that my book project fell victim to a cost-cutting measure at Fox Chapel Publishing. I never saw this coming and needless to say I am deeply saddened.
The next issue of Wood Chip Chatter will be posted on June 7, 2024.

Keep a sharp eye out for it.
Keep a sharp edge, and keep on carvin’!


Funny Bone


Bob, Great blog! I really enjoy reading it and getting all your tips. Sorry to hear about your book. Doug Gabel
LikeLike
love this keep them coming Gus Cooper Australian wood carver?? I wood carve as a hobby at 87 years of age. my email is patngus1@gmail.com Thank You
LikeLike