Five Best Oil Finishes
Oil finishes are commonly used on wood furniture and kitchen utensils. Generally speaking, oil finishes are eco-friendly, food-safe, and non-toxic. They’re also easy to repair and produce a more textured grain pattern than many alternatives. They tend to be considered a more traditional finish, as oils have been used as wood finishes for thousands of years.
However, oil finishes generally don’t offer the same level of protection and durability that you’d find with a lacquer or varnish.
Here are five of the most commonly used oil finishes:
1. Linseed Oil
Linseed oil, also known as flaxseed oil, is one of the most popular wood finishes in the world. Like other hand-rubbed oil finishes, linseed oil saturates deep into the wood grain to protect against scratches and changes in humidity. It is easy to care for, eco-friendly, and produces a satin finish that really brings out the color and grain of the wood underneath.
Raw, polymerized, and boiled linseed oil are all derived from the flaxseed plant, but have been processed differently and to varying degrees. Raw linseed oil is the purest form, but is sometimes impractical as a furniture finish due to the extended drying times- it can take several weeks for each coat of raw linseed oil to cure. Boiled linseed oil is common as a wood finish, but contains some potentially hazardous drying compounds. Polymerized linseed oil is the best of both worlds: pure and non-toxic with quick drying times.
2. Tung Oil
Tung oil is a plant-based oil used as a wood finish. It is clear, quick-drying, and penetrates the grain to enhance and protect the wood. It’s one of the oldest and most popular wood finishes in the world and is derived from the seeds of the tung tree in Eastern Asia. Tung oil has become a staple among fine furniture craftsmen in the United States and beyond. It is eco-friendly, non-toxic, and food-safe.
Tung oil is derived from pressing the seeds of the tung tree, which is native to Eastern Asia. The oil has been cultivated and used in China as a wood finish for at least 2,500 years.
Similarly to linseed oil, it is difficult to find furniture that is made with raw or 100% pure tung oil. Many craftsmen will use boiled or polymerized tung oil, and it’s also common for manufacturers to mislabel products as tung oil when they’re not. If you’re interested in a tung oil finish, it’s worth doing a bit of digging to understand exactly what finish is being used and what it’s comprised of. You can find pure tung oil from Real Milk Paint.
There are many reasons a craftsman might consider using tung oil to finish wood furniture. It’s all natural, non-toxic, and eco-friendly, and it doesn’t yellow as much over time as common finishes like linseed oil, nitrocellulose lacquer, or varnishes like polyurethane.
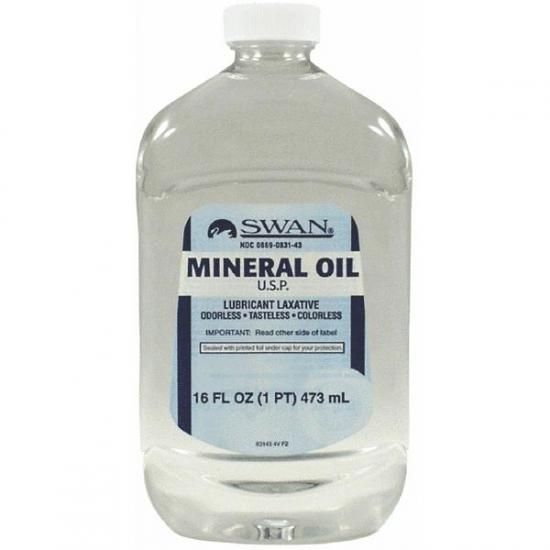
3. Mineral Oil
Mineral oil is a broadly used term to describe a clear, odorless oil. Most often, mineral oil refers to a derivative of petroleum. Despite this, mineral oil is generally seen as non-toxic and food safe. In fact, it’s especially common on cutting boards, wood kitchen utensils, wood bowls, and any other wood products that frequently come into contact with food. It’s also a common ingredient in baby oil, as it’s been tested and approved for dermatological use.
Although mineral oil is non-toxic and food safe, it is not used often as a finish for wood furniture, as other oils on this list offer more desirable traits.
4. Walnut Oil
Walnut oil is derived from the nuts of the juglans regia tree, a relative of juglans nigra (which produces the black walnut wood used in our furniture). Walnut oil, like mineral oil, is often used on cutting boards and kitchen utensils due to it’s food-safe properties. Raw walnut oil, like linseed oil and tung oil, possesses a fairly long drying time, so it’s not uncommon for walnut oil to be cut with mineral spirits (boiling) or heated (polymerized) to speed up the time it takes for the oil to cure.
5. Danish Oil
Danish oil is a super common finish among woodworkers, although it isn’t clearly defined. Similarly to mineral oil, the term Danish oil can apply to many different substances. In fact, the ambiguity with danish oil is even more severe. The term “Danish Oil” is basically a catch all term for any oil-based wood finish.
Danish oil often contains tung oil or linseed oil along with several other ingredients– thickeners, thinners, drying agents, binding compounds, and more. Usually, dDanish oil is a super common finish among woodworkers, although it isn’t clearly defined. Similarly to mineral oil, the term Danish oil can apply to many different substances. In fact, the ambiguity with Danish oil is even more severe. The term “Danish Oil” is basically a catch all term for any oil-based wood finish.
Danish oil often contains tung oil or linseed oil along with several other ingredients– thickeners, thinners, drying agents, binding compounds, and more. Usually, Danish oil finishes are a mixture of some type of varnish with either tung oil or linseed oil, but not always.
For example, Tried & True sells a polymerized linseed oil under the trade name of “Danish Oil.”
Source: Vermont Woods Studios
Reader’s Comments

My first comment comes from my very good friend, Jim Babcock from Columbus, Indiana. Jim is trying to find information on a carving he has had for many years. Jim writes:
“Bob:
Just looked at your latest blog and as always, both interesting and helpful. Also enjoy
seeing what some of the other carvers are doing.
I am attaching an image of a carving that I did not carve or paint, but wish i could say I did.
Have had it for 20 – 25 years . It’s about 3 1/2 inches long and has no markings or date on it.
From what I have been able to research, It seemed to be done in the Zapotec tradition style.
The paint detail, especially on a carving this small, continues to amaze me.
Any thoughts or information you or other bloggers can shed on this would be much appreciated.
Jim Babcock
Columbus, Indiana”
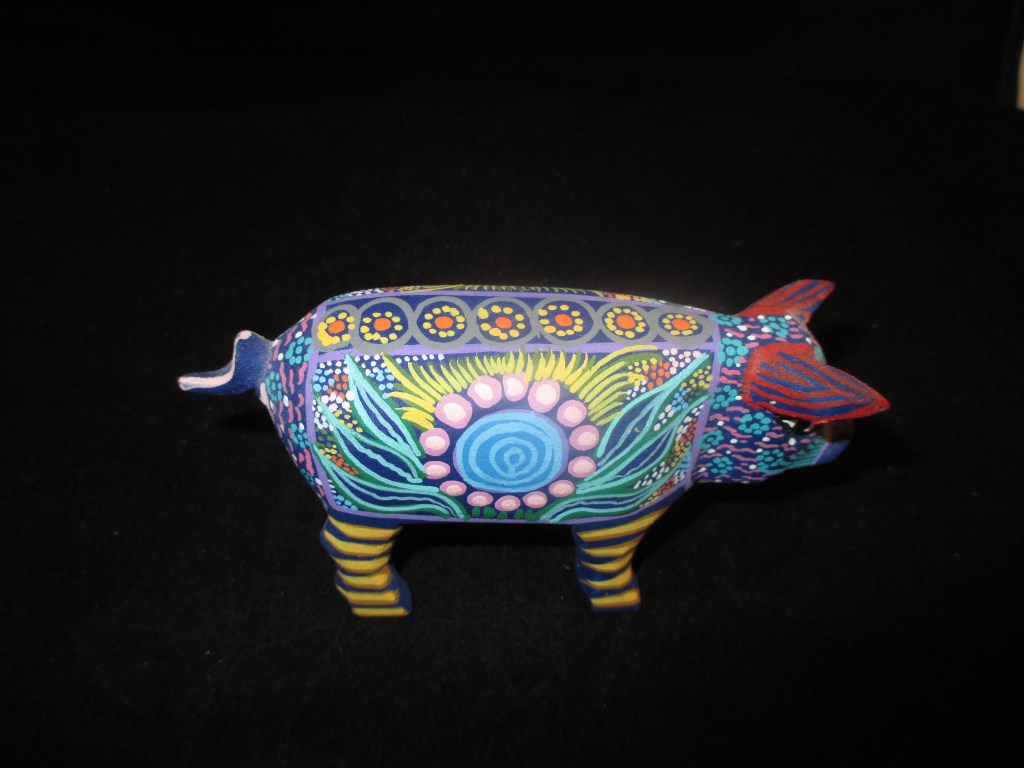
That’s a very interesting carving, Jim, and the painting is what makes it special. At first glance it reminds me of a Scandinavian style carving, but that’s about all I can say. Perhaps some of our readers can tell us more about it. Can anyone help?
Next is a comment from my very good friend, Jon Gledhill who enjoyed my latest book review. Jon writes:
“Thank you for the book review!
I’m excited to order my copy after reading your comments.
These compilations of projects of various carving levels and different projects (e.i., not just all Santas) is the type of books I enjoy collecting.
Happy Holidays! Jon Gledhill”
I‘m glad you liked my book review, Jon. The How-To Book of Christmas Carving is an excellent book with loads of fun Christmas carving projects. You will be glad you ordered it.
My very good friend, who prefers to remain nameless sent in an excellent suggestion this month. It’s in regards to something I have often wondered about. He writes:
“Bob,
As always, I can tell you I enjoyed reading through the current Wood Chip Chatter. In the past you have asked me if I had any suggestions, and I think I now have two.
First, after seeing the Santa’s carved by Todd Martin, I am left wondering how big they are. My instinct tells me they might be carved from one inch stock. Awesome. As you and many others know, I am very much at home with one inch stock. My point here is, perhaps you could add a dimension or two so readers can equate the size of the carvings. Just how large is that nicely carved Dogwood flower?
I love what you are doing, Bob. Keep up the great work promoting carving.
P.S. I’m thinking about putting together a basic primer on getting started carving figures. Kind of how I started myself. Maybe it will help some get started doing what I love with those huge one inch blocks. I’ll keep you updated on how it goes.”
Thanks for the suggestion, my friend! I agree, it’s very difficult to tell the size of a carving just from the photo. In the future, it will be helpful if we all add the size and/or dimension of the carving in our photos.
The primer you mentioned sounds like it will be quite helpful. I’m anxious to see what you come up with and certainly welcome any contribution(s) you may have.
Cathy, a new subscriber who is also new to wood carving wrote in asking for some recommendations on tools for beginners. Here is what she had to say:
“Hello, I just joined. I have two knives that I bought at a gun/knife shop in TN. Two basic wood carving tools. One cuts at a V and the other, I suppose, is a gouge. Both are fairly large being as they are for beginners. Do you have a suggestion on what tools I could buy as a beginner?
Thank you!
Cathy”
Hi Cathy, Thank you for writing and welcome to the world of woodcarving. There’s a lot to learn and I want you to get off on the right foot. If you would send me an email at rwkoz51@gmail.com I can send you a list of essential items you should get first, and I can also answer any other questions you might have.
My good friend, Jon Gledhill was kind enough to assemble a series of photos illustrating the various staining methods he uses on his chip carving projects. Here is his explanation:
“Hello Bob!
Back in April, you shared the photo of a stain sample board I had sent, and you invited me to share some additional information about finishing projects with stain. Sorry it’s taken so long, but I’ve never forgotten the invitation.
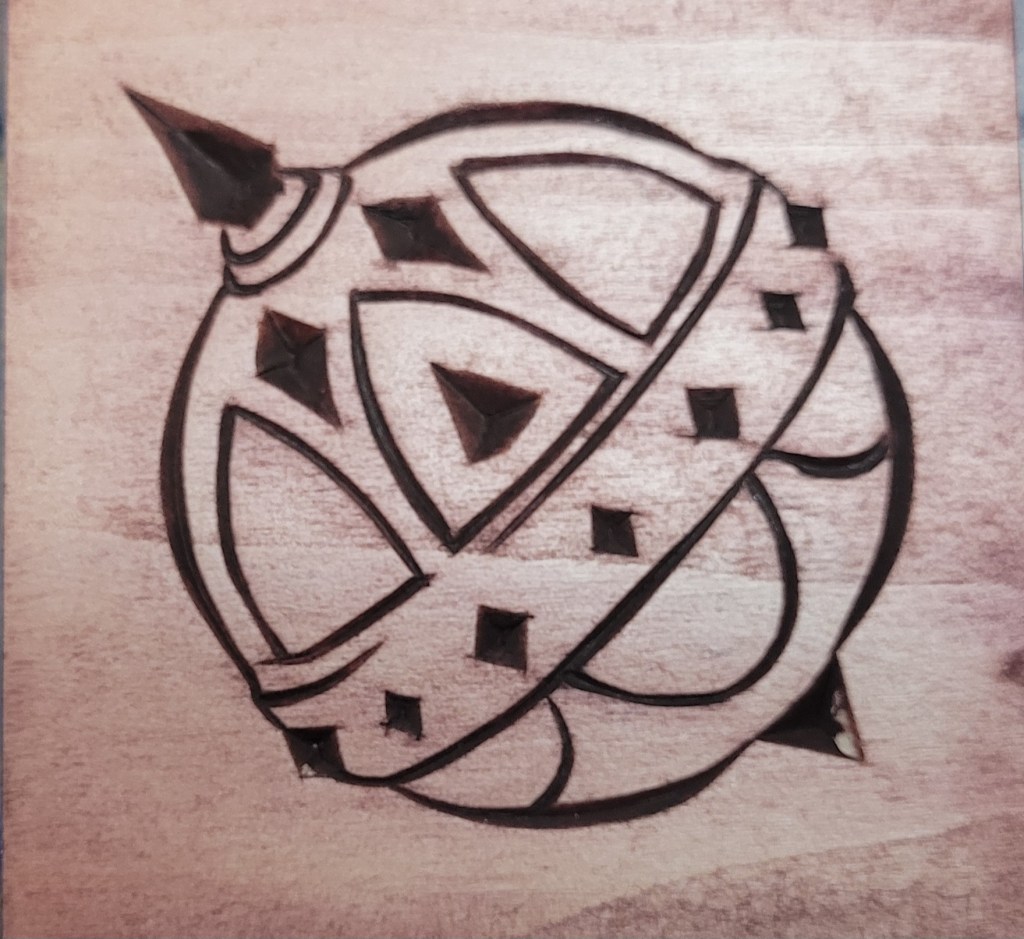
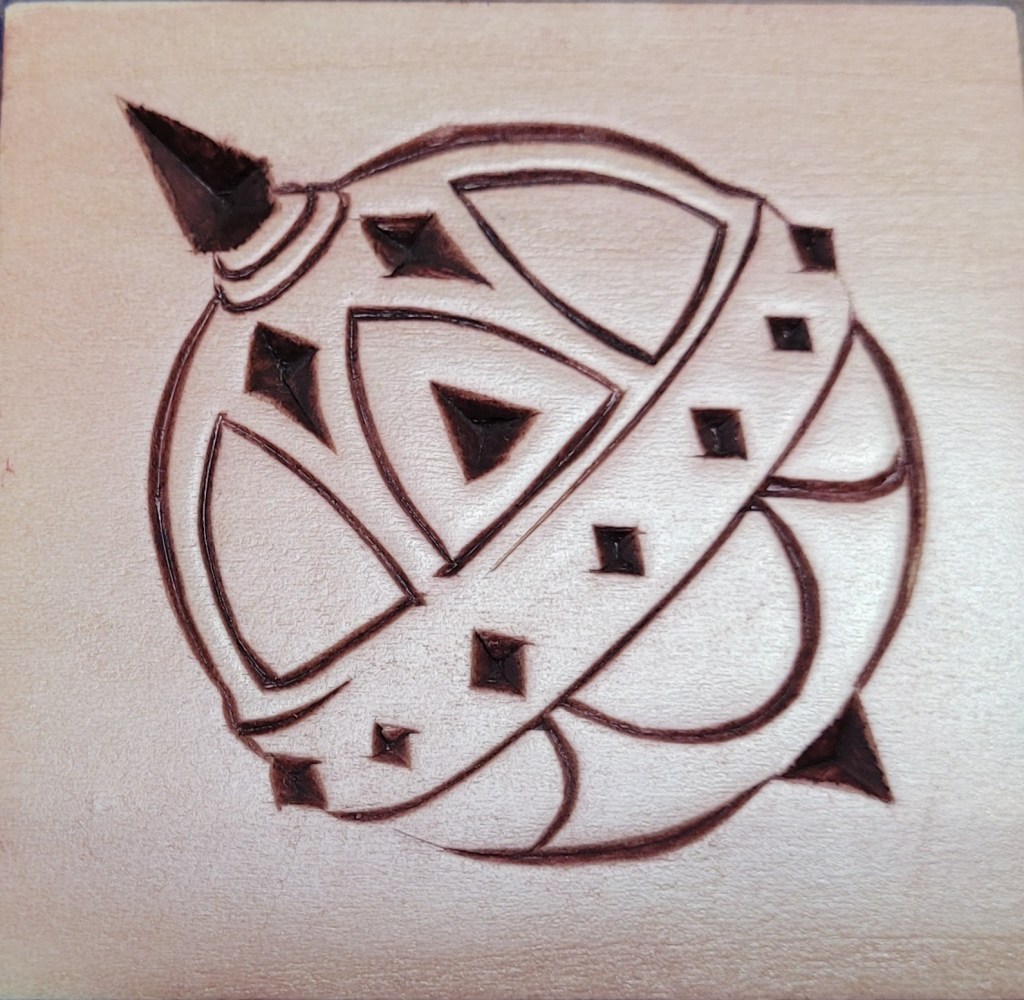
Here are photos of a commissioned project I just completed, making (10) 3″x3″ fridge magnets for a customer. It was a perfect time to try various finishes on the extra pieces I’d carved. If additional information would be helpful, please let me know.
Each of these pieces was sprayed once with a lacquer sealer to prep them for finishing.
The three that have a lighter surface and darker pattern show the difference between one, two, and three coats of Lacquer Matte spray finish, applied before adding stain to them. I brushed Mahogany Gel Stain onto each one, then quickly wiped off the surface, leaving the stain in the carved pattern. You can see a significant difference between the one that only has one coat of finish and the others, but have to look a bit closer to see the difference between the other two.
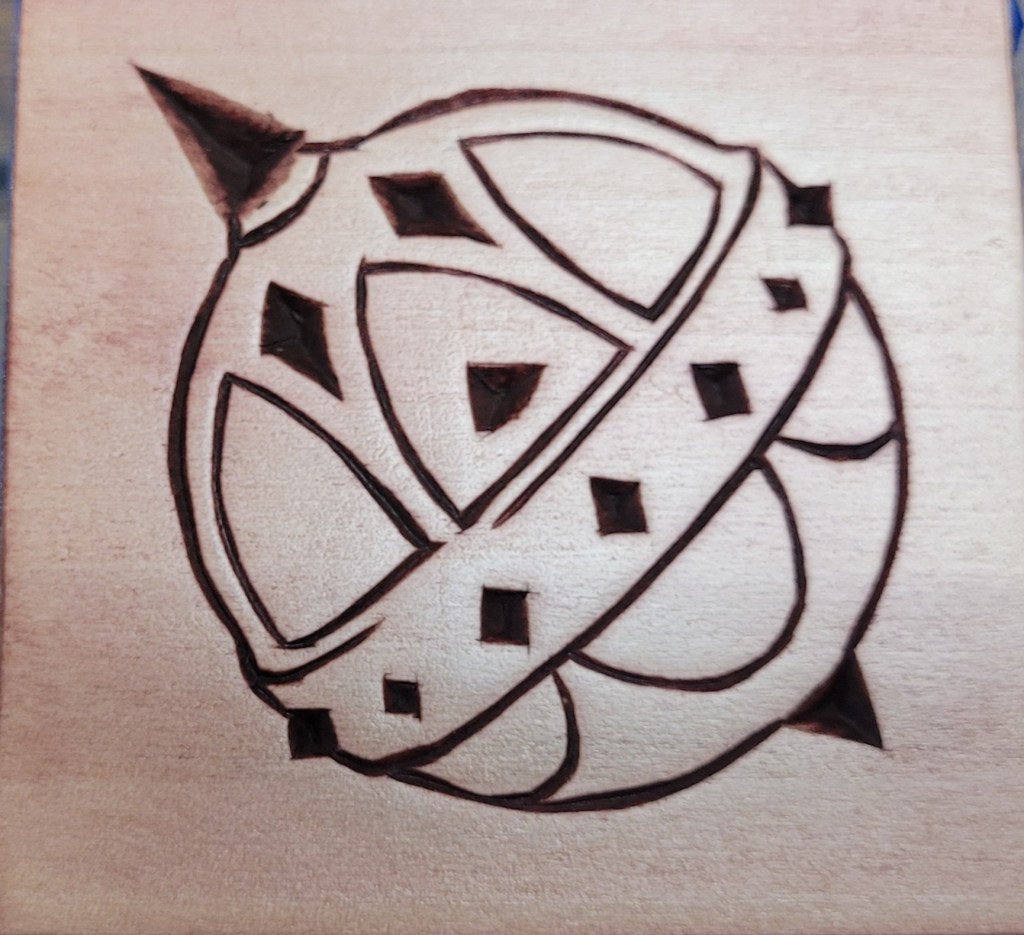
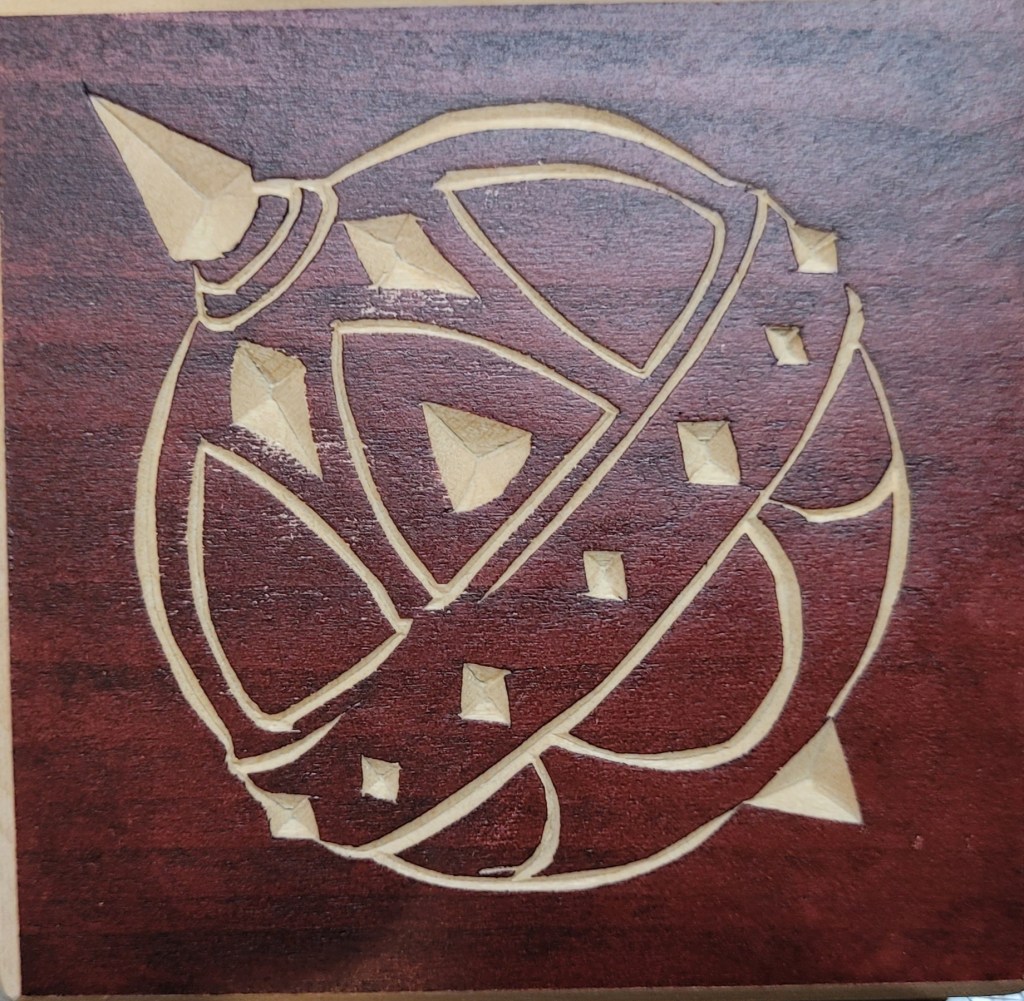
The fourth piece was finished a different way, but used the same Mahogany Gel Stain. After spraying it with sealer, I use a brayer (rubber roller used in printmaking) to apply a thin coat of stain to the piece, which still allows the grain to show through, but adds a dark finish to the surface, allowing the carving to stand out a different way. This was the finish used on the 10 fridge magnets.
Thanks for the opportunity to share some of my carving journey!
Best wishes,
Jon Gledhill”
Thanks for the photos and excellent explanation of your staining methods, Jon. Contributions as such are very educational, and I’m certain the majority of my readers greatly appreciate your efforts. I welcome everyone to ask Jon any questions you may have. I’m sure he is more than happy to discuss his methods further.
Photo Shop

“Photo Shop” is the section of Wood Chip Chatter where carvers can send photos of their wood carvings for display. It’s your chance to show off your work…sort of a show and tell. The photos will only be displayed, and no comments or critiques will be made. For critiques on your carvings, send them to the “Carver’s Corner.” Send your photos to carverbobk@woodchipchatter.com
My very good friend, Dean Stewart came up with a clever way to display his ornaments and wanted to share it with everyone:
“Bob,
I wanted to share my Santa ornament tree with your readers. This simple structure gave me a way to display my favorite Santa carvings. It doesn’t take up a lot of space either. It’s made of a 24” 1×2, with slates made from an old crate. I’ve also used yardsticks for these. (You can find them at Home Depot). They range in size from 18” to 12”. The base is a piece of pine 8×8 routed for a nice edge. I wanted to paint it, but my wife thought it looked good natural.
Dean”

Thanks, Dean! It looks terrific, and so do your ornaments! Thanks for sharing!
Woodcarving Tip
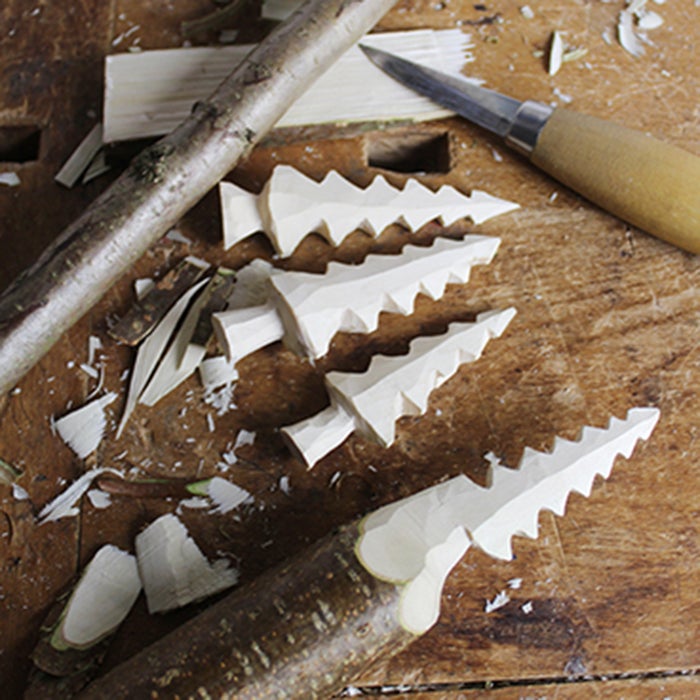
Carving Wrinkles
It’s easy to forget to add small details that can enhance the finished look of your caricature carvings—such as wrinkles and folds in clothing.
Use small gouges and V-tools along with your knife to create different kinds of wrinkles.
When carving wrinkles into clothing, focus on areas where fabric naturally bunches or folds. Some great places to add wrinkles are around joints—such as the elbows, knees, and armpits—where normal fabric tends to compress during movement.
You can also carve slight folds at the waistline, especially if your caricature carving is bending or twisting. Adding a few wrinkles around the neck and shoulders can give the appearance of loose or layered clothing.
Shoes or boots can also “pop” with small creases near the ankles.
Google stock photo images of people in various clothes for more inspiration!
Source: carvingjunkies.com
Pattern of the Month

Upcoming Workshops & Seminars
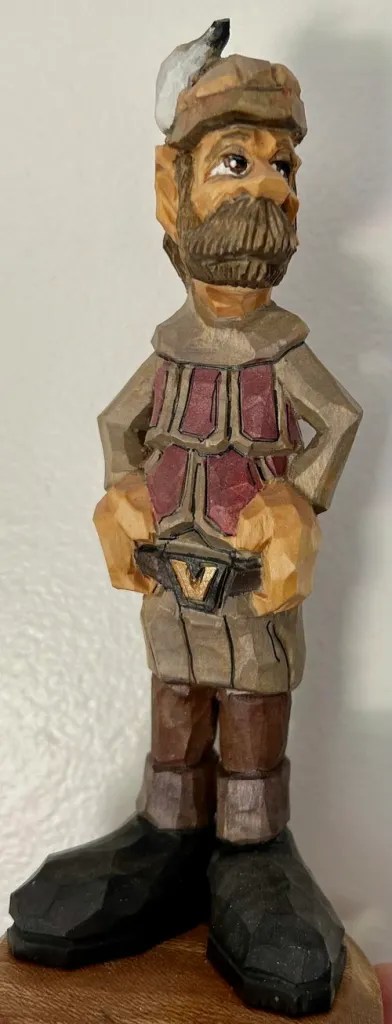
VIK the handsome Viking
Teacher: Dwayne Gosnell
Dates: December 10 (Tues),23(Mon) – 6PM Eastern
Twiitling Tuesday – 4 hours ( 2 sessions – 2 hours each day)
Location: Online (Via Zoom)
For details and to sign up click on Dwayn’s website https://www.dgosnellwoodcarving.com/

Raccoon With Leaf
Teacher: Janet Cordell
Dates: January 6,10,13,17,20,24 2025
Times: 2-4 p.m. Pacific Time // 3-5 p.m. Mountain Time // 4-6 p.m. Central Time // 5-7 p.m. Eastern Time
12 hours ( 6 sessions – 2 hours each day)
Location: Online (Via Zoom)
to sign up contact Janet Cordell janet_cordell@yahoo.com

Woodcarve Handsome Hunks and Hotties
Teacher: Ryan Olsen
Dates: January 11,12,18,19 (PM Sessions) 2025
Time: Sat, Sun – 1:30pm-3:30 Pacific /3:30pm-05:30pm Central / 4:30pm – 6:30pm Eastern
8 hours ( 4 sessions – 2 hours each day)
To sign up Contact Ryan Olsen ryanscaricatures@gmail.com

Shorties
Teacher: Dale Green
Dates: February 1,2,8,9 2025
Saturday & Sunday both weekends 9:30 am-11:30 Pacific / 10:30 am – 12:30 pm Mountain /
11:30 am- 1:30 pm Central / 12:30 pm – 2:30 pm Eastern
8 hours ( 4 sessions – 2 hours each day)
Location: Online (Via Zoom)
Contact Dale: dalecarves@gmail.com

Cowboy with Bottle
Teacher: Dave Stetson
Dates: March 1,2,8,9,15,16 2025
Times: Sat, Sun – 9:30am-11:30 Pacific /11:30am-01:30pm Central / 12:30pm – 2:30pm Eastern
12 hours (6 sessions – 2 hours each day)
Location: Online (Via Zoom)
For details and to sign up email Dave lcnmichele@aol.com

Online Classes With Chris Hammack
Teacher: Chris Hammack
Chris Hammack is offering a new series of online classes to help students learn and sharpen their woodcarving skills. Individual and Group Classes are available through his web site chrishammackart.com/groupclass

Twhitling Tuesdays
Teacher: Dwayne Gosnell
Dates: Two – 2 hour classes each month on Tuesdays
Location: Online (Via Zoom)
To sign up contact Dwayne Gosnell via email dagwood_76@gmail.com

Woodcarving Academy
Established in 2020, the Woodcarving Academy offers dozens of videos and seminars created by some of the country’s top level instructors. More videos are added regularly as they are created by the instructors.
With a paid subscription to the Woodcarving Academy you can view any videos you like for as many times as you like.
Subscription rates: Monthly = $19.95 Quarterly = $49.95 Annual = $139.95
There is even a Free level which allows you to tour the website and watch the sample videos and content, and receive email updates as new content becomes available.
Check out the Woodcarving Academy and learn with the masters right in the comfort of your own home! Go to: www.woodcarvingacademy.com or Email: support@woodcarvingacademy.com

News & Announcements


The International Association of Woodcarvers has upcoming Zoom meetings on the following Saturdays at 3PM EST with special guest presenters. Check them out…
Zoom: 310-460-3575
Presentation Schedule:
12/7 – No meeting
12/14 – No meeting
12/21 – Jim Hiser
12/28 – Ryan Olsen
INTERNATIONAL ASSOCIATION OF WOODCARVERS
COME JOIN US!!!
The Jersey Hills Wood Carvers (JHWC) club is a small but growing group of wood carvers sharing their time, knowledge and joy of woodcarving. The JHWC generally meets from 7:00 PM EST to 9:00 PM EST on the 1st, 3rd and 5th Thursday of each month (when school is in session) at the Jefferson Township High School wood shop classroom.
Membership is “FREE” and open to anyone interested in woodcarving regardless of their ability.
JHWC’s Upcoming Meetings and Events
2024
December – 19th
2025
January – 2nd, 16th, 30th
February – 6th, 20th
March – 6th, 20th
April – 3rd, 24th
May – 1st, 15th, 29th
June – 5th
For more information contact:
Al Santucci alsantucci4@gmail.com President
Bill Brunner billbrunnerdesign@gmail.com newsletter/website editor
Or visit:
Website: https://www.jerseyhillswoodcarver.com/
Facebook: https://www.facebook.com/groups/736479646821641/
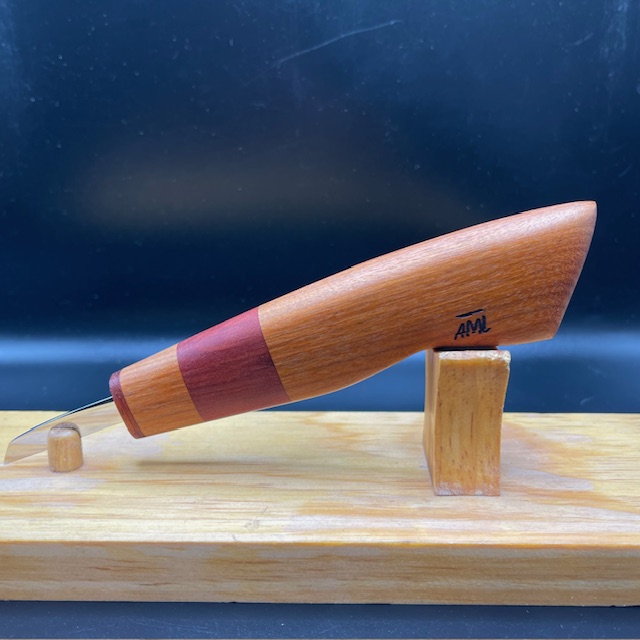
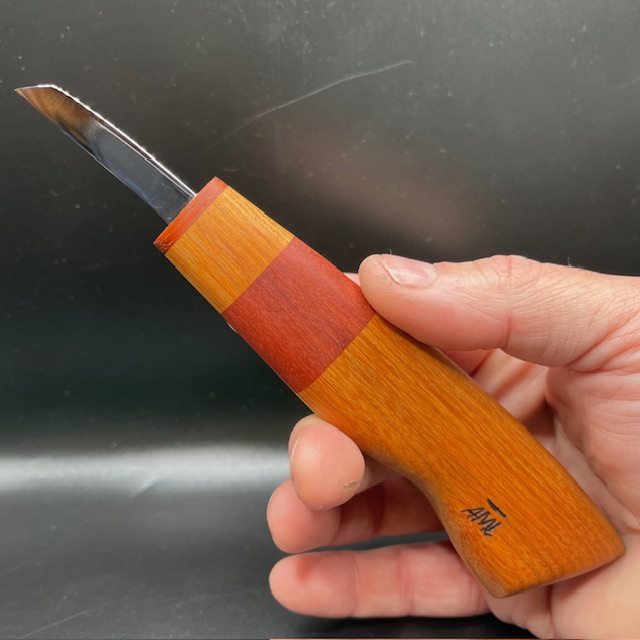
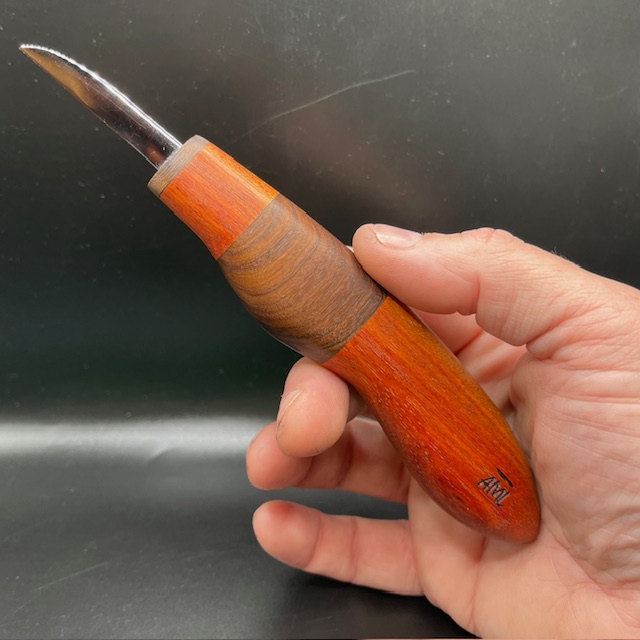
AML Wood Carving Knives
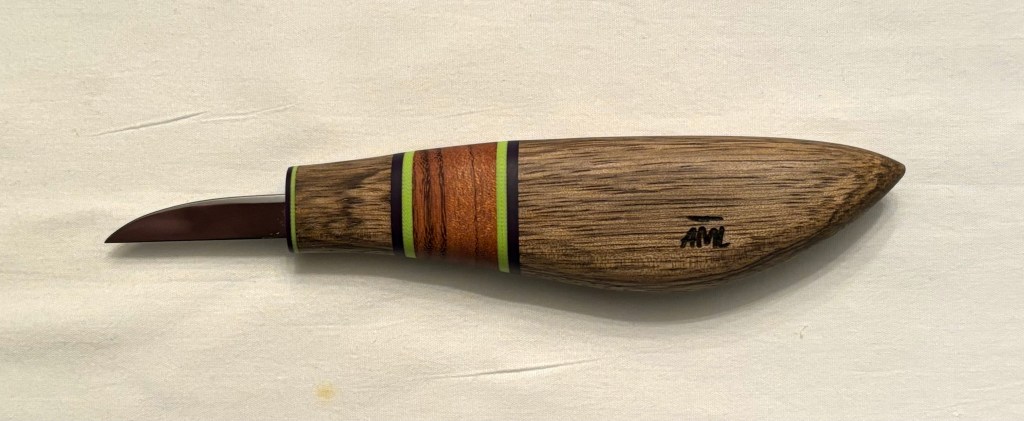
AML Wood Carving Knives are handmade by Andy Loughlin in Monroe, New York.
Each blade is meticulously crafted from 1095 high-carbon steel, ensuring easy sharpening and long-lasting edge retention. The diverse exotic woods used for the handle styles are sourced from around the world, adding a touch of elegance to these knives. You can find these exceptional knives for auction on eBay under ‘AML Knives,’ with bidding usually starting at $22 and most knives selling for between $40 and $100.
Unpack your AML Wood Carving Knife and experience its razor-sharpness right out of the package. Each knife comes with a custom-made magnetic wooden sheath, a thoughtful addition at no extra cost.
I now own three AML Knives and can speak personally about their quality. These are not production knives. Each knife is handmade by Andy himself. The knives are sturdy, well made, and will stack up to any other knife on the market. These knives have quickly become quite popular and sell out fast, so check the site (“AML Carving Knives” on EBAY) often for availability.
Andy has recently begun making knives with handles made from exotic woods and colored epoxy, creating some stunning and unique handle designs. Below are examples of some knives currently available or which have recently sold:


Happy Holidays!!!

The next issue of Wood Chip Chatter will be posted on January 3, 2025.
Keep a sharp eye out for it.

Keep a sharp edge, and keep on carvin’!

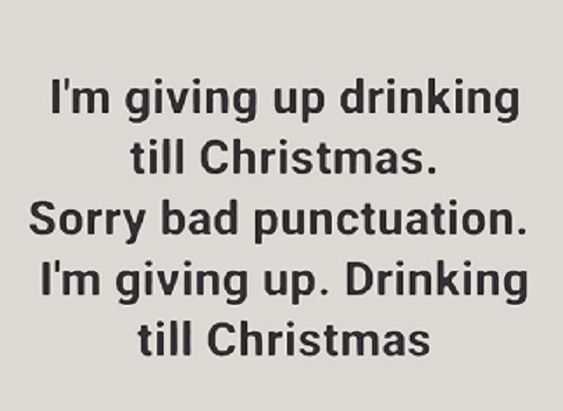
Funny Bone


I do love wood chip chatter. Would like to let you all know that Friends Carving Club in Port Orange Florida is having a show on January the 12th. 2025. Come and join us.
Connie Teeters
LikeLike